Growing up, rainy afternoons meant one thing in our house—gathering around the dining table for paper craft ideas for kids. My mom would bring out old magazines, colorful origami sheets, glue sticks, and scissors, and we’d spend hours creating everything from folded animals to festive greeting cards.
Table of Contents
Now that I’m a parent myself, I’ve rediscovered the magic of paper craft ideas for kids, and it’s become our go-to activity during weekends and holidays. These paper craft ideas for kids not only keep little hands busy, but they also spark creativity in a way that screens never will.
Whether you’re planning a school project or simply looking for ways to bond with your child, these paper craft ideas for kids bring joy, learning, and hands-on fun. From cutting out paper animals to building 3D shapes or making handmade puppets, paper craft ideas for kids are fun, simple, and easy to follow.
You don’t need fancy tools—just paper, imagination, and a willingness to have a little messy fun. These paper craft ideas for kids are perfect for home, classrooms, or daycare environments.
Paper Bead Jewelry Making

Making paper bead jewelry is a fun and creative project for kids. In the image, you can see children happily working on their colorful creations. They are surrounded by a variety of beads, strings, and tools, showcasing the joy of crafting.
To start making paper beads, gather some materials. You will need colorful paper (like magazines or wrapping paper), scissors, a ruler, a pencil, and glue. You can also use a toothpick or a skewer for rolling the beads.
First, cut the paper into long triangles. The wider the base, the larger the bead will be. Next, take a triangle and start rolling it tightly around the toothpick, beginning from the wide end. Apply a little glue at the end to secure it. Repeat this process to create as many beads as you like!
Once the beads are dry, you can string them together to make necklaces, bracelets, or even keychains. Kids can mix and match colors for a unique look. This activity not only sparks creativity but also helps improve fine motor skills.
Fun Paper Plate Masks

Creating fun paper plate masks is a fantastic way for kids to express their creativity. These colorful masks can be made to resemble animals, characters, or even silly faces. The image shows a variety of masks, each with its own unique design and vibrant colors. Kids can easily get involved in making these masks, which can be used for playtime or dress-up.
To make your own paper plate masks, start by gathering some supplies. You’ll need paper plates, scissors, paint or markers, glue, and any additional decorations like feathers or glitter. First, cut out eye holes in the paper plate. Then, let the kids paint or color the plate to create their mask’s base. Once the paint dries, they can add features like ears, noses, or whiskers using extra materials.
Next, attach a string or stick to hold the mask up. You can punch holes on the sides of the plate and tie string through them, or glue a stick to the bottom. This makes it easy for kids to wear their creations. Encourage them to come up with stories or characters for their masks, making playtime even more fun!
Creative Paper Collage Art

Paper collage art is a fun and imaginative way for kids to express themselves. The image shows a colorful arrangement of various paper shapes and textures. Bright flowers, leaves, and playful shapes come together to create a lively scene. This type of art encourages creativity and allows children to explore their artistic side.
To start a paper collage project, gather materials like colored paper, scissors, glue, and any other decorative items you want to include. Kids can cut out shapes from the paper, such as flowers, suns, and leaves, just like in the image. Encourage them to mix colors and textures for a vibrant look.
Next, choose a base for the collage. This could be a piece of cardboard or a thick sheet of paper. Kids can arrange their cutouts on the base before gluing them down. This step allows them to play with composition and design. Once they are happy with the layout, it’s time to glue everything in place.
Finally, let the collage dry completely. Once done, kids can display their artwork proudly. This activity not only enhances fine motor skills but also boosts confidence as they create something unique. Paper collage art is a great way to spend time together and spark creativity!
3D Paper Structures and Models
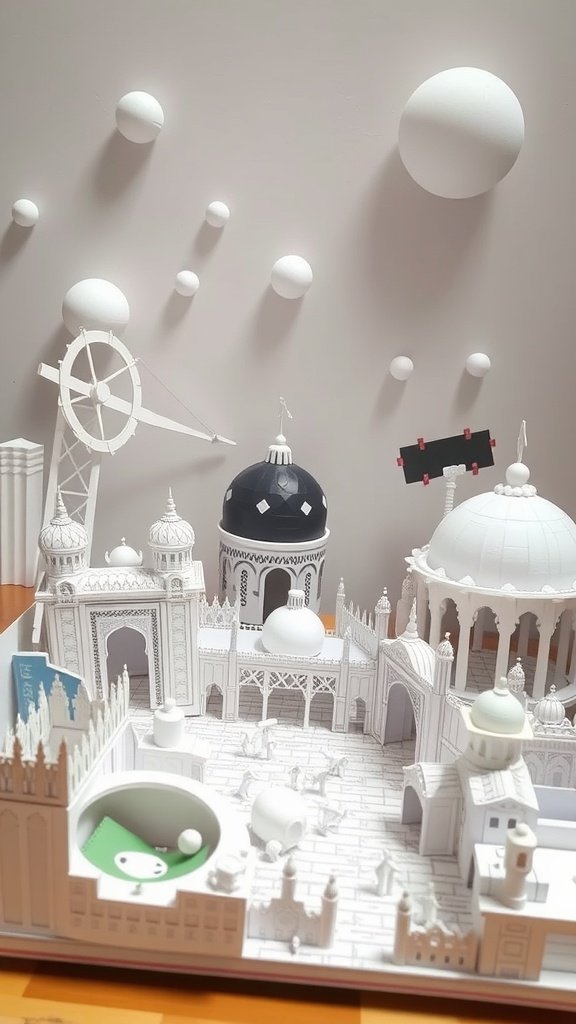
Creating 3D paper structures is a fantastic way for kids to express their creativity. The image shows a detailed paper model featuring various architectural elements, like domes, towers, and a whimsical ferris wheel. This kind of project can spark imagination and encourage kids to think about design and structure.
To make your own 3D paper model, start by gathering materials. You’ll need sturdy paper or cardstock, scissors, glue, and markers for decoration. Begin by sketching out your design on paper. It can be anything from a castle to a futuristic city. Once you have your design, cut out the pieces carefully.
Next, fold the paper where needed to create the 3D effect. Use glue to attach the pieces together, ensuring they are secure. Kids can personalize their models by painting or coloring them. Adding small details like windows or doors can make the model even more interesting.
Finally, display your creation proudly! This project not only enhances fine motor skills but also teaches kids about spatial awareness and planning. Encourage them to share their models with friends and family, fostering a sense of accomplishment.
Colorful Paper Mache Animals

Creating colorful paper mache animals is a fun and engaging project for kids. This activity not only sparks creativity but also helps develop fine motor skills. The image shows a variety of vibrant animal figures made from paper mache, including a giraffe, a lion, and a playful dragon. Each piece is unique and showcases bright colors and playful designs, making them perfect for decoration or play.
To start making your own paper mache animals, gather materials like newspaper, flour, water, and balloons. You can also use paint and brushes for decorating once the animals are dry.
Here’s a simple step-by-step guide:
Step 1:Inflate a balloon to the desired size of your animal. This will serve as the base.
Step 2:Tear newspaper into strips. Mix flour and water to create a paste. Dip the strips into the paste and remove excess paste.
Step 3:Layer the strips over the balloon, covering it completely. Let it dry for 24 hours.
Step 4:Once dry, pop the balloon and remove it. You now have a hollow paper mache shape!
Step 5:Paint your animal with bright colors. You can add details like eyes and patterns to make it more lively.
Step 6:Let the paint dry completely before displaying your colorful creations.
This project is not only enjoyable but also a great way for kids to express their artistic side. Plus, they get to play with their handmade animals afterward!
Interactive Paper Board Games
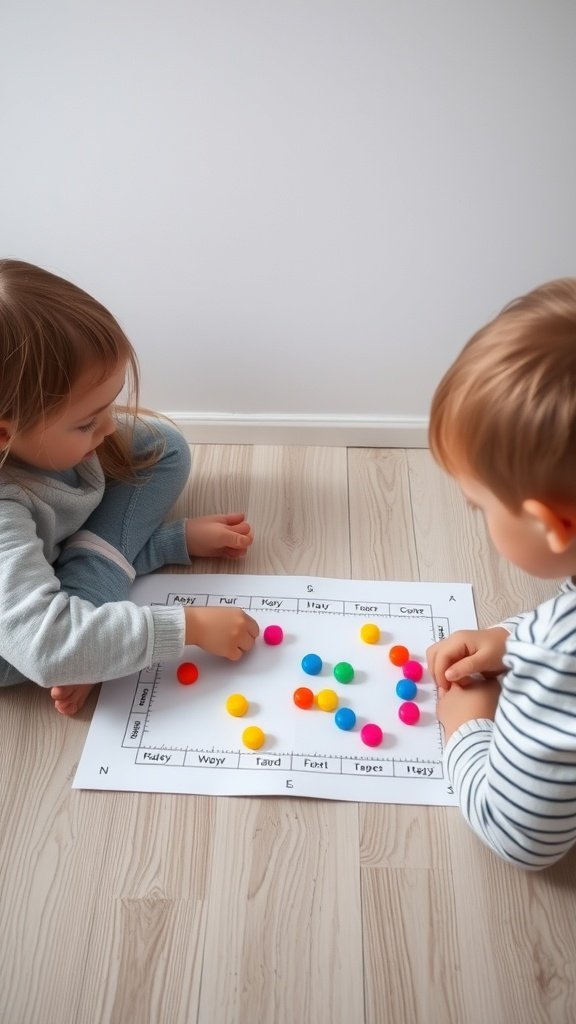
Creating interactive paper board games is a fun way to engage kids while sparking their creativity. In the image, two children are playing a colorful board game made from paper and small, vibrant tokens. This setup not only promotes play but also encourages learning through strategy and teamwork.
To make your own paper board game, start by gathering materials like a large sheet of paper, markers, and some small objects to use as game pieces. You can use buttons, coins, or even homemade tokens from clay or paper.
Next, design your game board. Draw a path with spaces for players to move along. You can create different themes, like a treasure hunt or a race to the finish line. Use bright colors and fun illustrations to make it visually appealing.
Now, think of the rules. Decide how players will move their pieces and what actions they can take. For example, you might include special spaces that allow players to skip ahead or send them back. Write these rules clearly on the board.
Once everything is ready, gather friends or family to play. This interactive activity not only provides entertainment but also helps kids develop critical thinking and social skills. Plus, they’ll love showing off their unique creations!
DIY Paper Puppets with Movable Parts

Creating paper puppets is a fun and engaging activity for kids. In the image, two children are happily holding their handmade puppets, which feature cute cat designs. These puppets not only spark creativity but also encourage imaginative play.
To make your own paper puppets, gather some basic supplies like colored paper, scissors, markers, and glue. Start by drawing your puppet design on a piece of paper. You can create animals, people, or even fantasy creatures!
Once you have your design, cut it out carefully. For movable parts, like arms or legs, cut out separate pieces and attach them with brads or paper fasteners. This allows the parts to move freely. Kids can color and decorate their puppets to add personality.
After assembling the puppets, it’s time for a puppet show! Encourage kids to come up with stories and dialogues for their characters. This activity not only boosts creativity but also helps develop storytelling skills.
Origami Flowers for Every Occasion

Origami flowers are a fun and creative way for kids to express themselves. The image showcases a vibrant collection of paper flowers in various colors and shapes. Each flower has its unique design, making them perfect for any occasion, from birthdays to holidays.
Making these flowers is simple and can be a great bonding activity. Start with square pieces of colored paper. You can use origami paper or any colorful paper you have at home. The first step is to fold the paper diagonally to form a triangle. Unfold it and then fold the other two corners to the center. This creates a smaller triangle.
Next, fold the top point of the triangle down to create a petal shape. Repeat this step for each side, and soon you will have a beautiful flower. You can add leaves by cutting green paper into leaf shapes and attaching them to the base of the flower with glue.
For a more advanced project, try creating layered flowers. Use different sizes of squares for each layer to give depth. You can also experiment with different colors to make a stunning bouquet. These flowers can be used as decorations, gifts, or even as part of a school project.
Encourage kids to personalize their flowers. They can add glitter, stickers, or even write messages on the petals. This adds a special touch and makes each flower unique. Origami flowers are not just fun to make; they also help develop fine motor skills and creativity.
Paper Chain Decorations
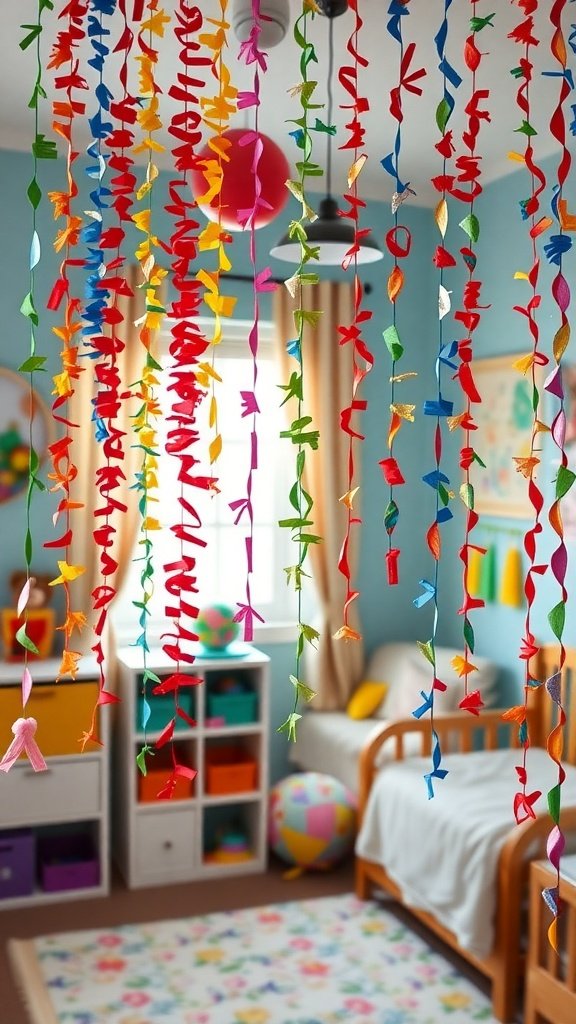
Paper chain decorations are a fun and colorful way to brighten up any space. The image shows a room filled with vibrant paper chains hanging from the ceiling, creating a cheerful atmosphere. These decorations are perfect for parties, celebrations, or just to add a splash of color to a child’s room.
Making paper chains is simple and requires just a few materials. You can use colored paper, scissors, and glue or tape. Start by cutting the paper into strips. Each strip should be about 1 inch wide and 6 inches long. You can mix and match colors to create a lively design.
To assemble the chains, take one strip and form it into a loop, securing the ends with glue or tape. Then, take another strip, thread it through the first loop, and form it into a loop as well. Continue this process, adding more loops until you reach your desired length. Hang your paper chains in doorways, around windows, or from the ceiling for a festive look!
Handmade Greeting Cards for Friends
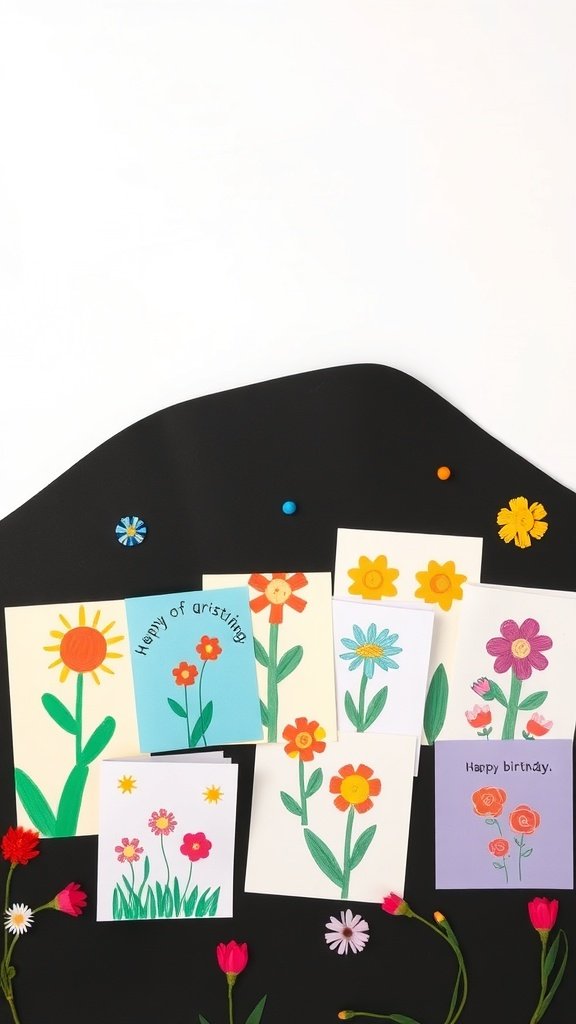
Creating handmade greeting cards is a fun way to express your feelings. The image shows colorful cards decorated with flowers and cheerful messages. Each card is unique, showcasing creativity and personal touch.
To start making your own cards, gather some basic supplies. You’ll need blank cards or cardstock, markers, colored pencils, or paints. Stickers and decorative items like flowers can add extra flair.
Begin by folding your cardstock into the desired card size. Next, think about the message you want to convey. Write it on the front of the card using markers or pens. You can choose simple greetings like ‘Happy Birthday’ or ‘Thinking of You.’
Now, it’s time to decorate! Draw or paint flowers, stars, or any design that fits the theme. Use stickers for an easy and fun touch. Let your imagination run wild!
Once you’re satisfied with your design, let everything dry if you used paint. Finally, write a personal note inside the card. This makes it extra special for your friend.
Handmade cards are not just gifts; they show that you care. Your friends will appreciate the time and effort you put into creating something just for them.
Origami Animals and Their Habitats
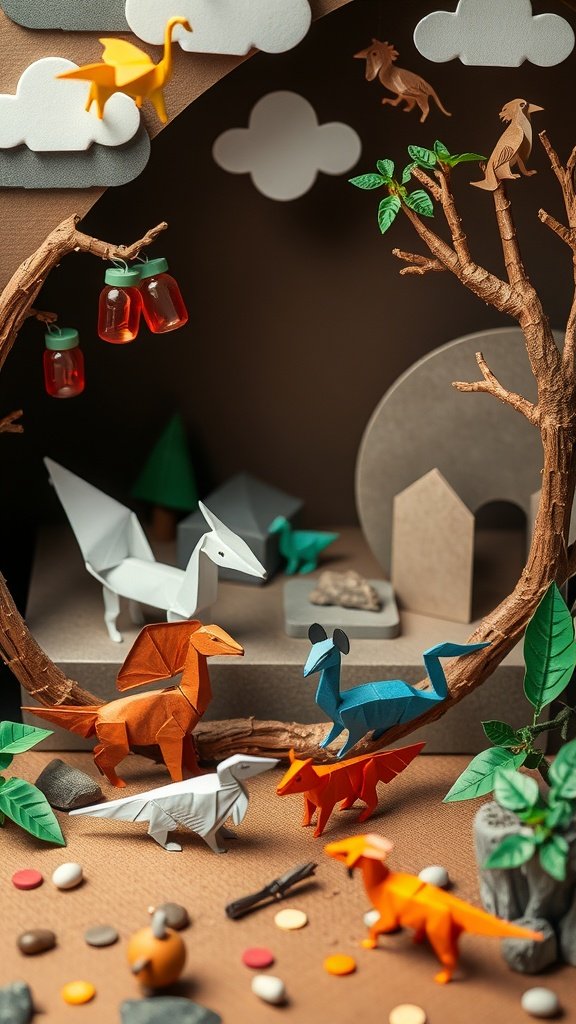
Origami is a fun way to create animals and their habitats using just paper. The image shows a delightful scene filled with colorful origami animals, each representing different species. There are dinosaurs, birds, and other creatures, all carefully folded and placed in a playful setting.
To start making your own origami animals, gather some colorful paper. You can use origami paper or any paper you have at home. Choose a simple design for your first animal, like a crane or a dinosaur. Follow step-by-step instructions from a book or online tutorial.
Once you have your animals ready, think about their habitats. You can create a forest scene with trees made from twigs and leaves cut from green paper. Use small stones or pebbles to represent the ground. This adds a fun touch to your origami creations and helps kids learn about where different animals live.
Encourage kids to use their imagination. They can create a jungle for colorful birds or a desert for dinosaurs. This activity not only develops their crafting skills but also sparks creativity and storytelling.
Paper Towel Roll Binoculars
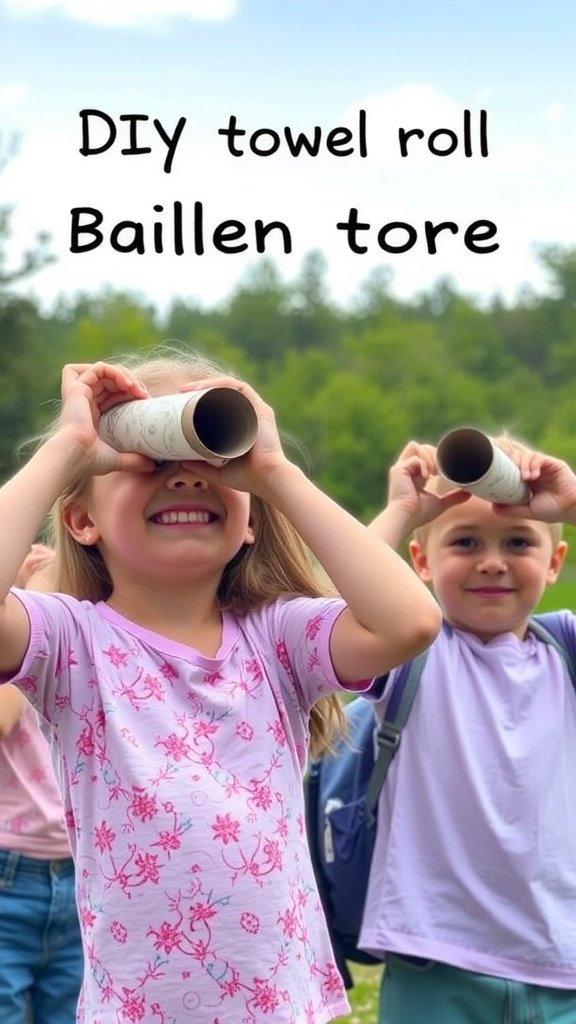
Making paper towel roll binoculars is a fun and easy project for kids. It encourages creativity and outdoor play. The image shows children happily using their homemade binoculars, ready to explore the world around them.
To create these binoculars, you will need two empty paper towel rolls, some string, and decorative materials like markers or stickers. Start by decorating the rolls to make them unique. Kids can use their favorite colors or designs.
Once the rolls are ready, tape them together side by side. This will form the binoculars. Next, cut a piece of string and attach it to each roll. This way, kids can hang the binoculars around their necks for easy carrying.
Now, it’s time to take them outside! Kids can use their new binoculars to look at birds, trees, or anything else that catches their eye. This simple project not only sparks imagination but also encourages kids to observe nature.
Seasonal Paper Crafts
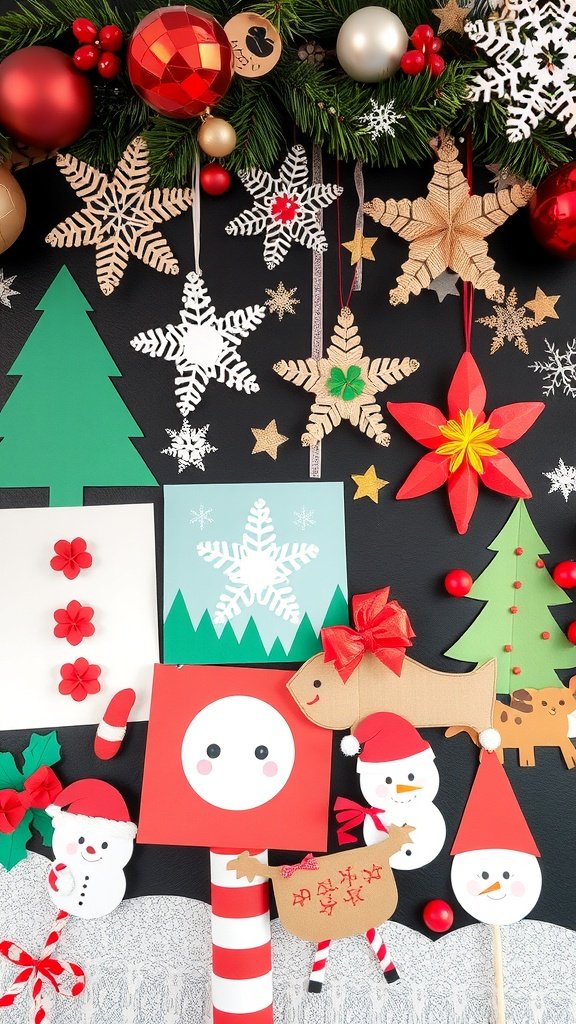
Seasonal paper crafts bring joy and creativity to kids during festive times. The image showcases a delightful array of holiday-themed paper creations. From snowflakes to Santa figures, these crafts are perfect for sparking imagination.
One fun idea is to make paper snowflakes. Start with a square piece of paper. Fold it diagonally to form a triangle, then fold it again. Use scissors to cut shapes along the edges. Unfold to reveal a beautiful snowflake!
Another project is creating festive ornaments. Use colored paper to cut out shapes like stars or trees. Decorate with glitter or stickers for a personal touch. Hang them on the tree or around the house to brighten up the space.
Kids can also make adorable snowman puppets. Cut out circles from white paper for the body and add a hat and scarf using colored paper. Glue on googly eyes and a button for a fun face. These puppets can be used for storytelling or playtime.
Lastly, don’t forget about making greeting cards! Fold a piece of cardstock in half and decorate the front with drawings or cutouts. Write a sweet message inside to share with friends and family. This adds a personal touch to holiday greetings.
Scrapbook Pages Full of Memories

Creating scrapbook pages is a fun way to capture special moments. This image shows a bright and colorful scrapbook page filled with photos and decorations. The layout features playful elements like hearts, flowers, and cheerful shapes that bring the memories to life.
The photos of smiling kids are surrounded by vibrant embellishments. These decorations add a personal touch and make the page visually appealing. Each element tells a story, reminding us of the joy and laughter shared during those moments.
To create your own scrapbook page, start by gathering your materials. You’ll need some photos, colored paper, scissors, glue, and decorations like stickers or cut-outs. Choose a theme that reflects the memories you want to highlight.
Next, arrange your photos on the page. Play around with the layout until you find a design you love. Once you’re happy, glue everything down. Finally, add your decorations to fill in the spaces and enhance the overall look. Don’t forget to write captions or notes to capture the essence of each memory!
Paper Airplane Competitions

Paper airplane competitions are a fun way for kids to engage in friendly rivalry while honing their folding skills. In the image, children are excitedly watching their paper airplanes soar through the air. This activity not only sparks creativity but also encourages teamwork and problem-solving.
To get started, gather some colorful paper. Each child can create their own design, experimenting with different folds to see which airplane flies the best. Here’s how to set up a competition:
1. **Gather Materials**: Collect various types of paper, such as printer paper, construction paper, or even recycled paper. Make sure everyone has enough to create multiple airplanes.
2. **Teach Folding Techniques**: Show kids a few basic airplane designs. Simple models like the classic dart or glider are great options. Let them practice folding and adjusting their planes.
3. **Set Rules**: Decide on the competition rules. Will it be distance, flight time, or accuracy? Make sure everyone understands the criteria before starting.
4. **Launch Time**: Find a spacious area for the competition. Kids can take turns launching their planes. Encourage them to cheer each other on!
5. **Keep Score**: Have a designated scorekeeper to track distances or times. This adds an element of excitement as kids eagerly await the results.
6. **Celebrate Creativity**: After the competition, celebrate all participants. Consider giving out fun awards for categories like “Most Creative Design” or “Longest Flight.”
Paper Mosaic Art Projects

Creating paper mosaic art is a fun and colorful way for kids to express their creativity. The image shows a vibrant display of various shapes and colors, forming a lively scene. Kids can use different colored paper to cut out shapes like triangles, circles, and stars, just like in the picture.
To start, gather materials such as colored paper, scissors, glue, and a sturdy base like cardboard. Kids can choose a theme, like nature or a favorite character, to inspire their design.
Next, cut the colored paper into various shapes. Encourage kids to mix and match colors and sizes. Once they have a good collection, they can begin arranging the pieces on the base. This step is all about creativity—there are no wrong choices!
After arranging, it’s time to glue the pieces down. Make sure to apply enough glue so that each piece sticks well. Once everything is glued, let the artwork dry completely. Finally, display the finished mosaic art in a special spot at home!
Creative Paper Storybooks
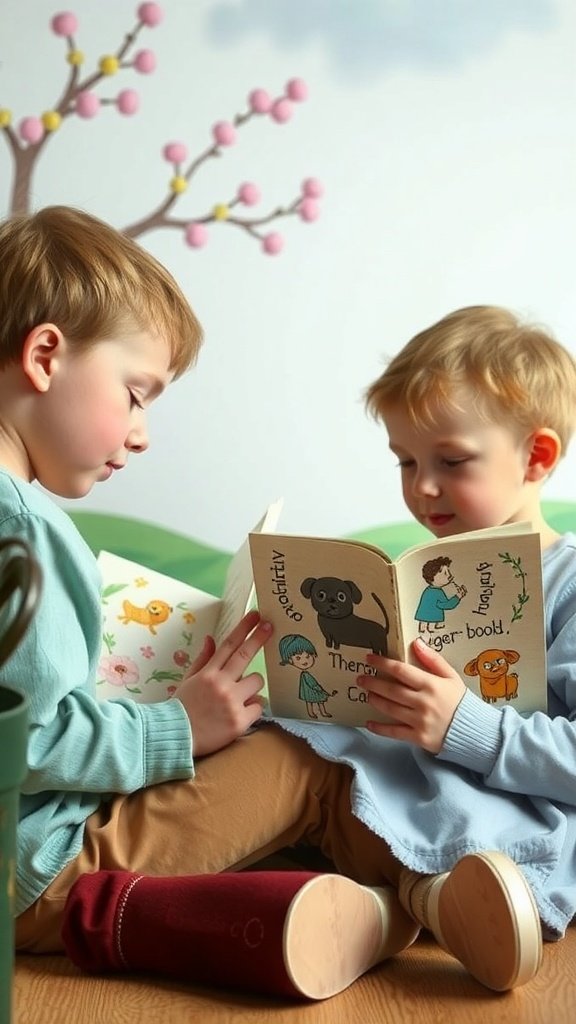
Creating paper storybooks is a fun and engaging way for kids to express their creativity. In the image, two children are sitting together, deeply focused on a colorful storybook. This scene captures the joy of storytelling and the magic of imagination.
Making your own storybook is simple and can be done with just a few materials. Start by gathering some sheets of paper, scissors, and markers or crayons. Kids can fold the sheets in half to create a booklet. Encourage them to draw pictures and write short stories on each page. This activity not only boosts their writing skills but also allows them to illustrate their ideas.
Once the pages are filled, staple or tie them together to keep the storybook intact. Kids can even decorate the cover with stickers or drawings. This personal touch makes each book unique and special. Sharing their creations with family and friends can be a delightful experience, fostering confidence and communication skills.
Paper Suncatchers for Window Displays
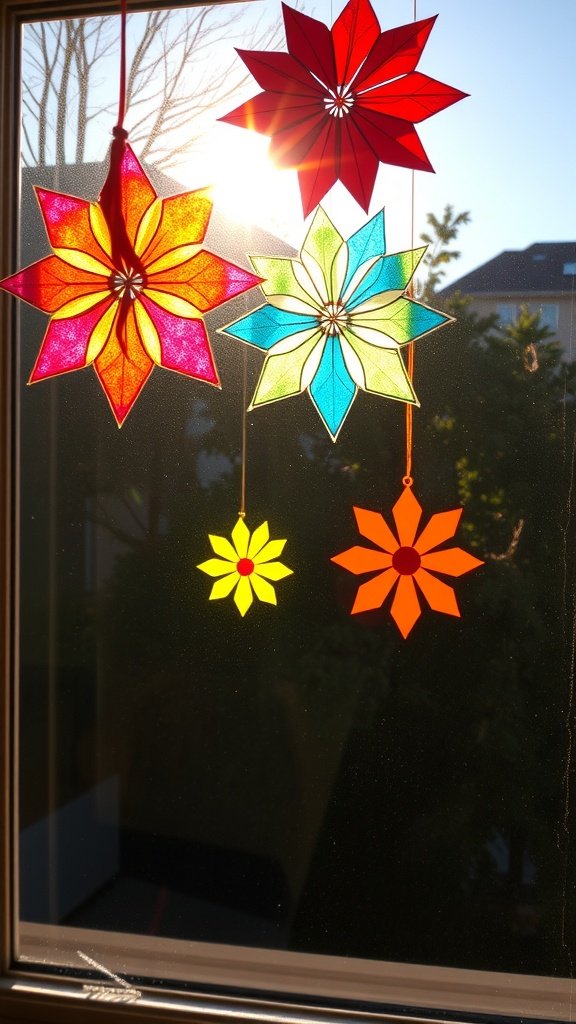
Brighten up your home with colorful paper suncatchers! These cheerful decorations are perfect for kids to make and hang in windows. The vibrant colors catch the sunlight, creating a beautiful display that can change with the seasons.
To create your own suncatchers, gather some colorful tissue paper, scissors, and clear contact paper. Start by cutting the tissue paper into fun shapes like flowers or stars. Next, cut two pieces of contact paper, making sure they are larger than your shapes.
Place one piece of contact paper sticky side up on a flat surface. Arrange the tissue paper shapes on top, leaving some space between them. Once you’re happy with the layout, carefully place the second piece of contact paper on top, sealing the shapes inside.
Now, cut around the edges to remove any excess contact paper. Finally, hang your suncatcher in a sunny window using string or tape. Watch as the sunlight brings your creation to life!
DIY Paper Flowers for Home Decor

Creating DIY paper flowers is a fun and simple way to brighten up your home. The image shows a beautiful arrangement of colorful paper flowers in a vase, showcasing pink, white, and yellow blooms. These flowers add a cheerful touch to any room.
To make your own paper flowers, gather some materials. You will need colored paper, scissors, a glue stick, and floral wire. You can also use green paper for leaves and a vase to display your finished creation.
Start by cutting out petal shapes from the colored paper. You can choose different sizes and shapes for variety. For example, make some petals rounded and others pointed. Once you have enough petals, take a piece of floral wire and attach the petals by gluing them around one end of the wire. This will form the flower.
Next, cut out leaves from the green paper. Glue these leaves onto the wire below the flower. You can bend the wire slightly to give the flower a natural look. Repeat this process for as many flowers as you want to create.
Finally, arrange your paper flowers in a vase. You can mix different colors and sizes to create a stunning display. These paper flowers are perfect for home decor and can last forever!
Paper Science Experiments
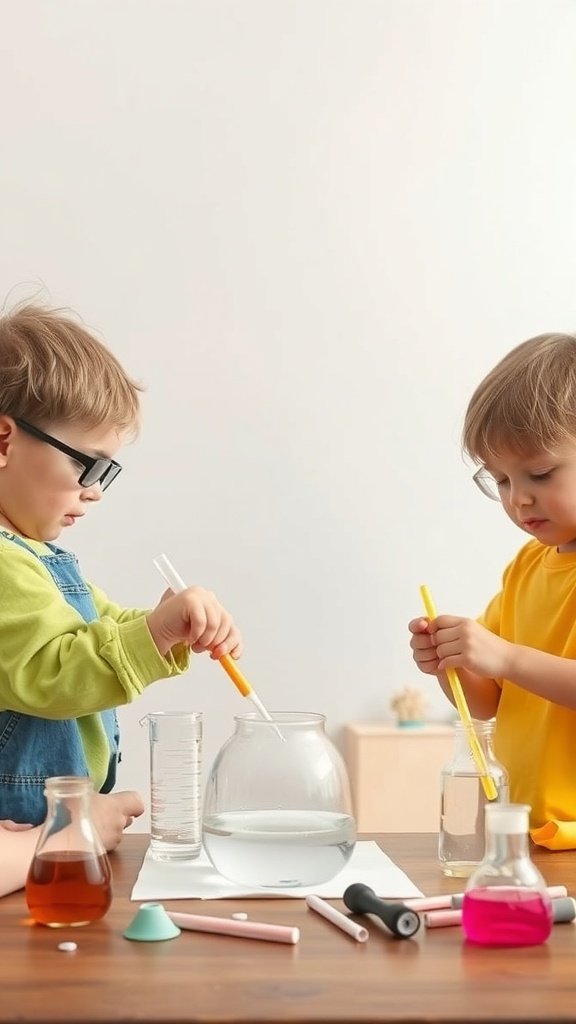
Paper science experiments are a fun way for kids to learn about science while being creative. In the image, two children are engaged in a hands-on activity, mixing colorful liquids and using tools to explore their surroundings. This playful approach makes science accessible and enjoyable.
One exciting experiment is the paper chromatography project. Start by cutting a strip of filter paper. Use markers to draw a line near the bottom. Next, dip the paper into a small amount of water without letting the ink touch the water. Watch as the colors spread and separate! This shows how different pigments can mix and separate.
Another idea is to create a paper boat and test its buoyancy. Cut a piece of paper into a boat shape and float it in a bowl of water. Add small weights, like coins, to see how many it can hold before sinking. This experiment teaches about density and buoyancy in a fun way!
For a colorful twist, try making homemade pH paper. Use strips of paper and soak them in different fruit juices, like beet juice or lemon juice. Once dried, dip them into various liquids to see how the colors change. This shows how certain substances can be acidic or basic.
Paper Quilled Art Designs

Paper quilling is a fun and creative way for kids to express themselves. The image shows a beautiful quilled art piece featuring a night sky with a crescent moon and delicate flowers. The black trees stand tall, and the colorful flowers add a cheerful touch to the scene.
To create your own paper quilled art, start by gathering some basic supplies. You will need quilling paper strips, a quilling tool, scissors, and glue. Choose colors that inspire you!
Begin by rolling the strips of paper into tight coils using the quilling tool. Once you have a few coils, pinch them into different shapes like teardrops or hearts. These shapes can be used to form flowers, leaves, or even the moon in your design.
Next, arrange your shapes on a piece of cardstock or a canvas. Play around with the layout until you’re happy with how it looks. Once you have your design, glue each piece down carefully.
For added texture, consider using different widths of paper strips. Thicker strips can create bold shapes, while thinner strips can add delicate details. Don’t forget to let your imagination run wild!
Finally, display your masterpiece proudly. Paper quilled art is not just a craft; it’s a way to create something beautiful that you can share with friends and family.