I still remember the first time I searched for DIY apron patterns—my kitchen was a flour-covered mess, and I had nothing to protect my clothes. That sparked a small obsession with collecting DIY apron patterns, from vintage-style full aprons to half aprons with cute ruffles.
Table of Contents
Over time, I found that sewing DIY apron patterns became more than a weekend project; it was a relaxing hobby with real results.
Whether you’re a beginner or a pro with your sewing machine, exploring DIY apron patterns opens up fun and practical ideas for your next project. I’ve stitched DIY apron patterns for holidays, gifts, and even matching ones for my kids.
This post rounds up the best DIY apron patterns, each with unique styles, simple instructions, and lots of charm to inspire your next handmade creation.
Apron with Adjustable Neck Strap
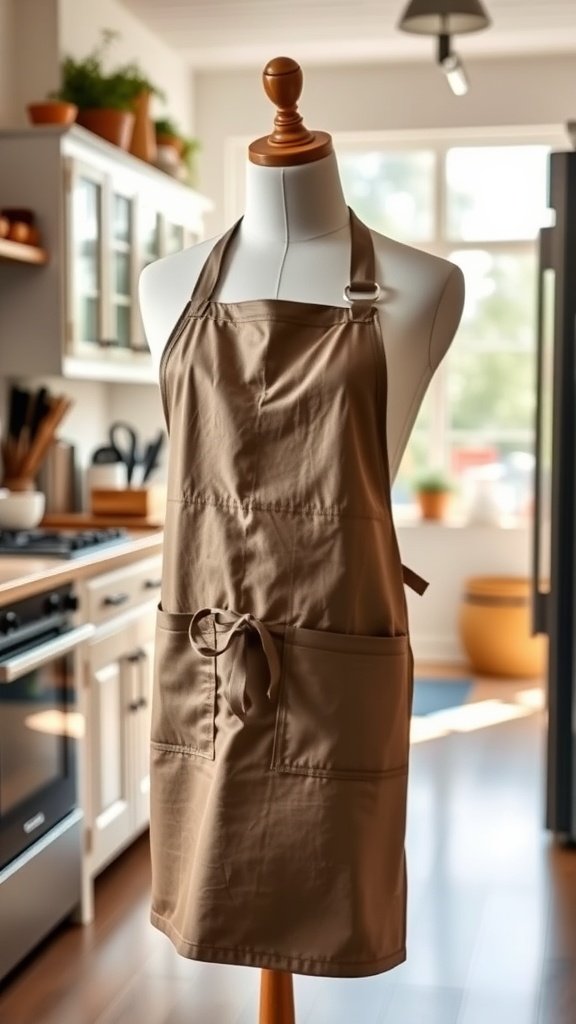
This apron features an adjustable neck strap, making it a practical choice for anyone who loves to cook or craft. The design allows for a comfortable fit, so you can focus on your tasks without any distractions.
The fabric is sturdy yet soft, ensuring it can withstand spills and splatters while keeping you comfortable. The neutral color adds a touch of style, making it suitable for any kitchen decor.
The apron also includes spacious pockets, perfect for holding utensils or recipe cards. This handy feature keeps everything you need within reach, so you can work efficiently.
To create your own adjustable neck strap apron, start by selecting a durable fabric. Cut the fabric to your desired size, making sure to include extra for the neck strap and pockets. Sew the edges to prevent fraying, and attach the adjustable strap using a buckle or slider. Finally, add pockets for convenience. This project is simple and rewarding, giving you a functional piece that reflects your personal style.
Half Apron with Pockets

This half apron is a practical choice for anyone who loves to cook or craft. Its simple design features two spacious pockets, perfect for holding utensils, recipes, or even your phone. The neutral color makes it easy to pair with any outfit, keeping you stylish while you work.
The apron hangs comfortably from the shoulders, allowing for easy movement in the kitchen. It’s made from durable fabric, ensuring it can withstand spills and stains. Plus, the half apron style keeps you cool while you’re busy preparing meals or tackling DIY projects.
To create your own half apron with pockets, start by choosing your fabric. Cotton or canvas works well. Cut a large rectangle for the body and two smaller rectangles for the pockets. Sew the pockets onto the body, making sure they are securely attached. Finally, add straps that fit comfortably around your neck and waist. This DIY project is not only fun but also functional!
Apron with a Unique Asymmetrical Cut
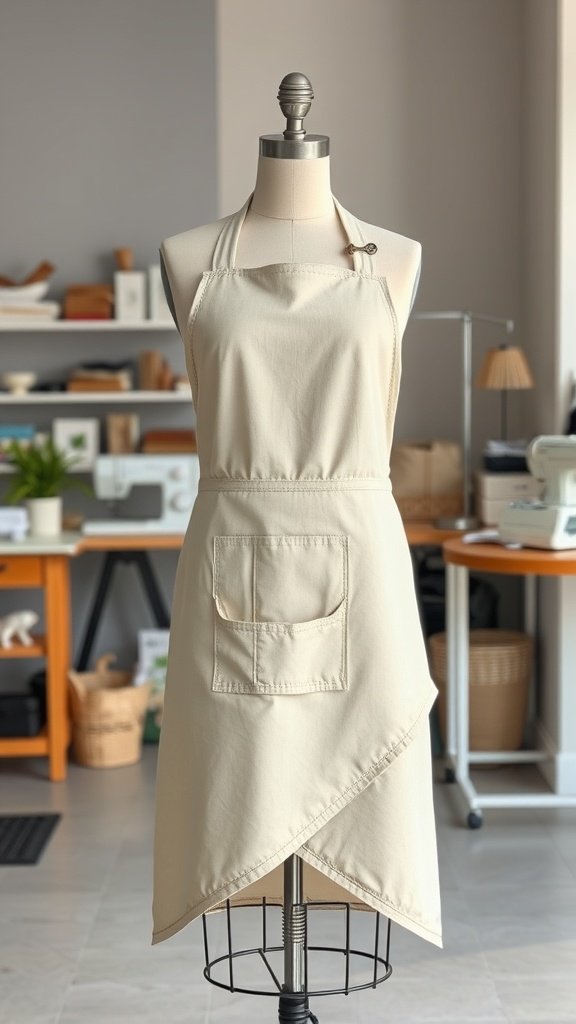
This apron showcases a stylish asymmetrical cut that adds a modern twist to a classic design. The fabric is a soft, neutral tone, making it versatile for any kitchen or crafting space. The unique shape not only looks great but also provides functionality, allowing for ease of movement while you work.
The apron features a convenient front pocket, perfect for holding utensils or small tools. This practical addition keeps everything you need within reach, making your tasks smoother and more efficient.
To create a similar apron, start by choosing your fabric. Cut the main piece into an asymmetrical shape, ensuring one side is longer than the other. Sew the edges to prevent fraying. Next, add straps that can tie around the neck and waist for a secure fit. Don’t forget to include a pocket for added convenience!
With this unique design, you can express your personal style while enjoying the practicality of an apron. Whether you’re cooking, baking, or crafting, this apron will keep you looking chic and feeling comfortable.
Child’s Apron with Fun Prints

This adorable child’s apron features a delightful mix of fun prints that are sure to bring a smile to any little chef’s face. The bright colors and playful designs make it perfect for cooking, crafting, or any messy activity. With cheerful characters and whimsical patterns, this apron not only protects clothing but also sparks creativity.
Making a child’s apron like this can be a simple and enjoyable project. Start by choosing a fabric that has fun prints. Look for cotton or canvas, as these materials are durable and easy to clean. You’ll need a basic apron pattern, which you can find online or create yourself.
To begin, cut out the fabric pieces according to your pattern. Don’t forget to add seam allowances! Next, sew the sides and bottom edges, leaving the top open for the neck strap. For the neck and waist ties, cut long strips of fabric, fold them in half, and sew along the edges. Turn them inside out for a neat finish.
Once everything is sewn together, attach the ties to the apron. You can add a pocket for extra functionality, perfect for holding small utensils or snacks. Finally, give it a good press with an iron to smooth out any wrinkles, and it’s ready for your little one to wear!
Vintage-Style Apron with Ruffles
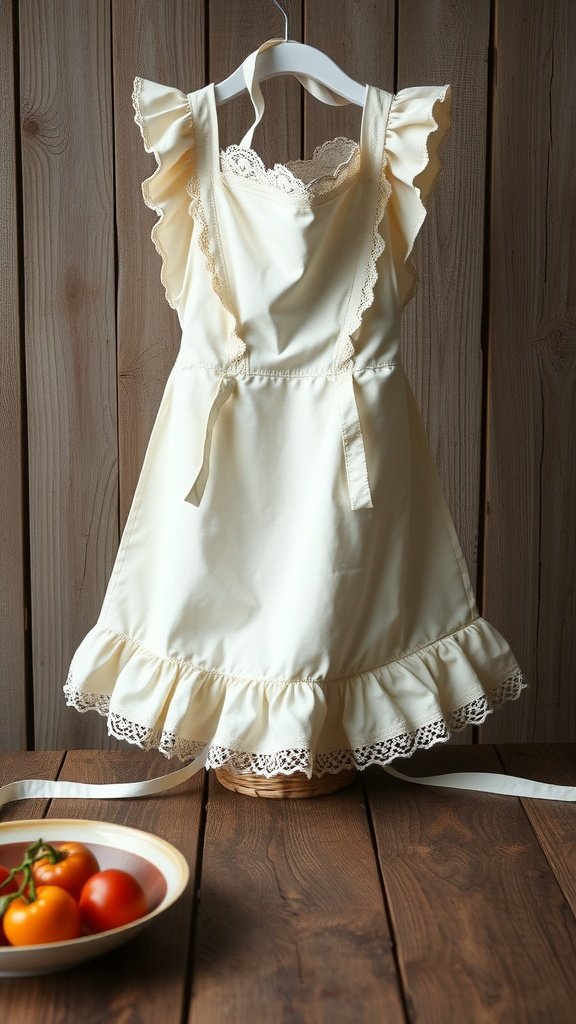
This vintage-style apron is a charming addition to any kitchen. The soft, creamy color gives it a warm, inviting feel. The ruffles along the edges add a touch of whimsy, making it perfect for those who love a classic look with a modern twist.
The apron features delicate lace trim, enhancing its vintage appeal. It’s not just pretty; it’s practical too! The adjustable straps ensure a comfortable fit, whether you’re baking cookies or whipping up a family dinner.
To make your own vintage-style apron, start by gathering your materials: fabric, lace trim, and matching thread. Cut your fabric to your desired size, allowing extra for the ruffles. Sew the lace along the edges, then gather the fabric to create ruffles. Attach the straps securely, and you’re ready to show off your handiwork!
Pair this apron with some fresh ingredients, like the tomatoes on the table, and you’ll be all set for a delightful cooking session. This apron not only protects your clothes but also adds a stylish flair to your culinary adventures.
Classic Bib Apron Design

The classic bib apron design is a staple in kitchens and craft rooms. This image showcases a simple white bib apron laid out on a wooden table, surrounded by sewing supplies. The apron features a large front pocket, perfect for holding tools or utensils while you work.
Creating your own bib apron is a fun and rewarding project. Start by choosing your fabric. Cotton is a great choice for its durability and ease of cleaning. Measure and cut your fabric according to your desired apron size, making sure to include extra for seams.
Next, sew the main body of the apron. Fold the edges to create clean seams and secure them with a sewing machine. Attach the straps by sewing them to the top corners of the bib. You can make the straps adjustable for comfort.
Don’t forget to add pockets! Cut out fabric pieces for pockets and sew them onto the front of the apron. This adds functionality and style. Finally, give your apron a good press with an iron to smooth out any wrinkles.
Once complete, your classic bib apron will not only protect your clothes but also showcase your personal style. Enjoy your sewing project!
Apron with Embroidered Design

This lovely apron showcases a beautiful embroidered design that adds a personal touch to your cooking or crafting experience. The floral patterns in vibrant colors make it not just functional, but also a stylish accessory in the kitchen.
The apron features a simple yet elegant layout, with pockets that are perfect for holding utensils or recipes. The design reads ‘Monthing Clist,’ which adds a unique flair to its overall look.
Creating your own embroidered apron can be a fun project. Start with a plain apron and choose your favorite embroidery patterns. Gather your materials, including embroidery thread, needles, and fabric markers. You can sketch your design lightly on the fabric before stitching.
Once your design is ready, begin by threading your needle and securing the fabric in an embroidery hoop. Work on one section at a time, using different stitches to bring your design to life. Don’t forget to add pockets for practicality!
After finishing your embroidery, give the apron a gentle wash to remove any fabric markers. Hang it up in your kitchen or gift it to a friend. This apron not only protects your clothes but also showcases your creativity.
Reversible Apron for Versatility

A reversible apron is a fantastic choice for anyone who loves to cook or craft. This design allows you to switch up your look with ease. One side might feature vibrant floral patterns, while the other could be a solid color, like a calming green. This versatility means you can match your apron to your mood or the occasion.
Making a reversible apron is simple and fun. Start by choosing two fabrics that complement each other. Cut out the apron shape from both fabrics, ensuring they are the same size. You’ll want to add pockets to both sides for functionality. Sew the two pieces together, leaving an opening to turn it inside out. Once flipped, sew up the opening and add straps. You’ll have a stylish and practical apron ready for any task!
This apron is perfect for cooking, crafting, or even gardening. You can easily wipe off spills or dirt, making it a practical choice for any activity. Plus, with two designs in one, it’s like having two aprons without taking up extra space!
Apron with Adjustable Waist Ties

This apron features adjustable waist ties, making it a practical choice for anyone who loves to cook or craft. The neutral color gives it a classic look, while the two front pockets add functionality. You can easily store utensils or small items right at your fingertips.
To make your own adjustable waist tie apron, start by gathering your materials. You’ll need fabric, scissors, a sewing machine, and thread. Cut the fabric to your desired apron shape, ensuring you leave enough for the ties and pockets.
Next, sew the pockets onto the front of the apron. Make sure they are securely attached, as they will hold your tools. For the waist ties, cut two long strips of fabric. Attach them to the sides of the apron, ensuring they are long enough to tie comfortably around your waist.
Finally, hem the edges of the apron to prevent fraying. This simple design is not only easy to make but also stylish and functional. Enjoy your time in the kitchen or at your craft table with this handy apron!
Bistro Apron for Professional Look

The bistro apron is a classic choice for anyone wanting a polished appearance in the kitchen. Its simple design and practical features make it a favorite among chefs and home cooks alike.
This apron typically has a sleek, minimalist style, often made from durable fabric that can withstand spills and stains. The neutral color in the image adds to its professional vibe, making it suitable for both casual and formal cooking environments.
To create your own bistro apron, start by gathering your materials. You’ll need a sturdy fabric, scissors, a sewing machine, and some thread. Measure and cut the fabric to your desired size, ensuring it’s long enough to cover your clothes effectively.
Next, sew the sides and bottom edges to create a pocket for your waist. Add straps that can tie around your neck and waist for a secure fit. You can also personalize it with pockets for utensils or a towel, enhancing its functionality.
Once finished, try it on and make any adjustments needed for comfort. This DIY project not only gives you a stylish apron but also a sense of accomplishment.
Patchwork Apron for Creative Flair
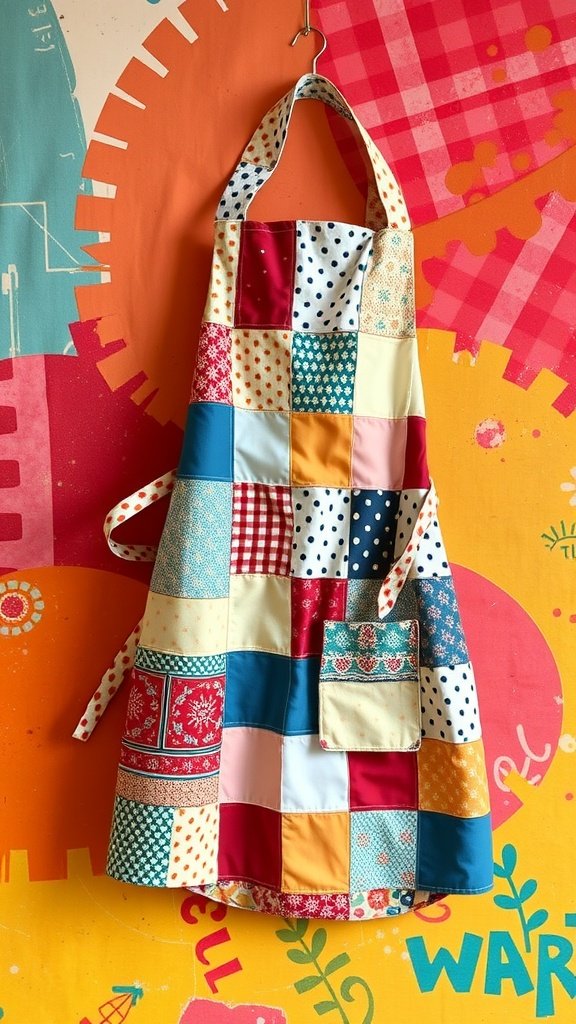
This patchwork apron is a delightful blend of colors and patterns, showcasing a fun and creative flair. Each square tells a story, with vibrant prints that can brighten up any kitchen. The mix of polka dots, floral designs, and solid colors makes it a unique piece that stands out.
The apron features a handy pocket, perfect for holding utensils or recipe cards while you cook. The adjustable straps ensure a comfortable fit, making it suitable for anyone who loves to whip up delicious meals.
Creating your own patchwork apron can be a fun project. Start by gathering various fabric scraps in different colors and patterns. Cut them into squares, then sew them together in a way that feels right to you. Once your patchwork is complete, add a pocket and straps to finish it off. This DIY project not only gives you a functional apron but also a piece of art that showcases your creativity.
Garden Apron with Tool Pockets

This garden apron is a practical and stylish accessory for anyone who loves to dig in the dirt. The rich green color blends beautifully with the garden setting, making it both functional and visually appealing.
The apron features two spacious pockets, perfect for holding essential gardening tools. You can see a trowel, pruners, and a measuring tape neatly stored, ready for use. This design keeps your tools close at hand, so you can easily switch between tasks without having to run back to the shed.
Making your own garden apron is a fun DIY project. Start by choosing a durable fabric that can withstand dirt and wear. Next, cut the fabric to your desired size, allowing enough length to cover your clothes. Sew the edges to prevent fraying.
For the pockets, cut out two rectangles and sew them onto the front of the apron. Make sure they are deep enough to hold your tools securely. Finally, add straps that can be tied around your neck and waist for a comfortable fit.
With this garden apron, you’ll not only stay clean while working in your garden, but you’ll also have everything you need right at your fingertips. It’s a simple yet effective way to enhance your gardening experience.
Sustainable Apron from Recycled Fabrics

This apron is a wonderful example of sustainability in action. Made from recycled fabrics, it showcases a mix of colorful patches that not only add charm but also tell a story. Each piece has its own history, making the apron unique and eco-friendly.
The neutral base of the apron allows the vibrant patches to stand out. It’s perfect for anyone who loves to cook or craft while being mindful of the environment. This design proves that you can be stylish and sustainable at the same time!
Creating your own sustainable apron is simple. Start by gathering old fabric scraps or clothes you no longer wear. Cut them into squares or fun shapes. Then, sew or iron them onto a base fabric, like canvas or denim. You can even mix and match colors and patterns to make it truly yours!
Once your patches are attached, finish the edges to prevent fraying. Add some straps made from sturdy fabric, and your apron is ready to use. This project not only reduces waste but also gives you a functional piece that’s full of personality.
Holiday-Themed Apron Design

Holiday-themed aprons bring a festive touch to any kitchen. The image showcases a cheerful apron adorned with classic holiday motifs like snowflakes, Christmas trees, and stockings. This design is perfect for those who love to cook or bake during the holiday season.
Creating your own holiday apron can be a fun project. Start by choosing a fabric that reflects your holiday spirit. Look for patterns that include festive colors like red, green, and white. You can also consider adding personal touches, like embroidery or appliqué designs.
Here’s how to make your own holiday apron:
Step 1:Gather materials. You’ll need fabric, scissors, a sewing machine, thread, and any embellishments you want to add.
Step 2:Cut the fabric to your desired apron shape. A simple rectangular shape works well for beginners.
Step 3:Sew the edges to prevent fraying. You can use a straight stitch or a zigzag stitch for a decorative touch.
Step 4:Add pockets if you like. Cut out smaller rectangles and sew them onto the front of the apron.
Step 5:Decorate your apron with holiday-themed designs. Use fabric paint or iron-on patches to add your favorite motifs.
Step 6:Finally, attach straps to the top and sides of the apron. Make sure they are long enough to tie comfortably around your waist.
This DIY project not only makes a great gift but also adds a personal touch to your holiday cooking. You’ll be ready to whip up those festive treats in style!
Apron with a Modern Minimalist Style

This apron showcases a sleek and modern minimalist design. Its clean lines and neutral color make it a versatile addition to any kitchen. The simple yet elegant style allows it to blend seamlessly with various kitchen aesthetics.
The fabric appears durable, ensuring it can withstand daily use while maintaining its fresh look. The tied waist adds a touch of functionality, allowing for an adjustable fit. This design is perfect for those who appreciate simplicity without sacrificing style.
To create your own modern minimalist apron, start by selecting a high-quality fabric in a neutral tone. Measure and cut the fabric to your desired size, ensuring you leave extra for seams. Sew the edges for a clean finish. Next, create straps by cutting long strips of fabric, attaching them securely to the apron. Finally, add a simple tie at the waist for that perfect fit.
Apron with Bold Graphic Prints
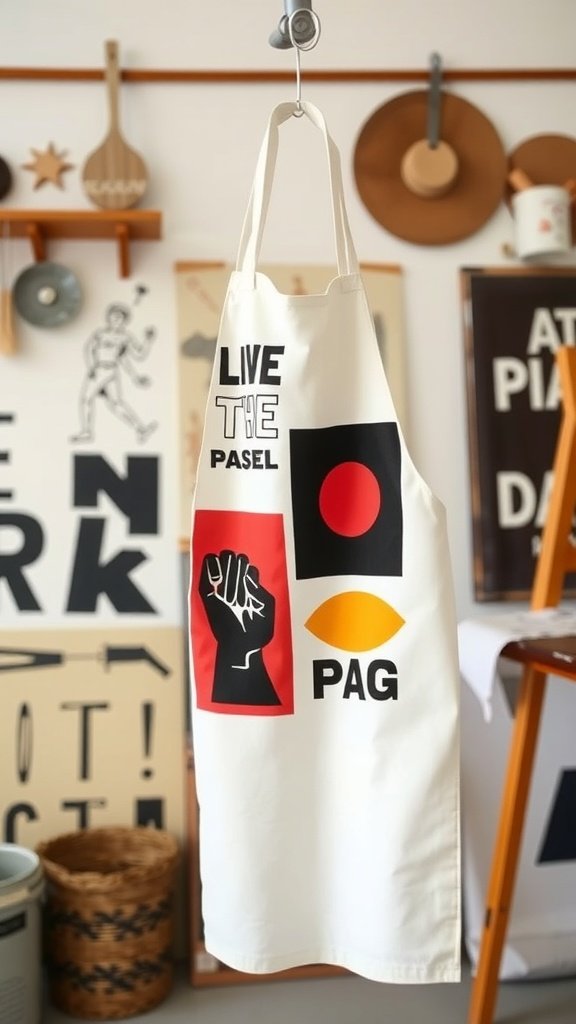
This apron features a striking design with bold graphic prints that instantly catch the eye. The combination of colors and shapes creates a modern and artistic vibe, making it a perfect addition to any kitchen.
The phrase ‘LIVE THE PASEL’ stands out prominently, encouraging a lively cooking experience. The black fist symbol adds a touch of empowerment, while the vibrant red and yellow shapes provide a playful contrast against the cream background.
To create your own apron with bold graphic prints, follow these steps:
- Choose Your Fabric:Start with a sturdy cotton or canvas fabric in a light color to make the prints pop.
- Select Your Graphics:Design or choose bold graphics that reflect your personality. You can use software like Adobe Illustrator or Canva for this.
- Print the Graphics:Use a fabric printer or iron-on transfer paper to print your designs. Make sure to follow the instructions for the best results.
- Cut and Sew:Cut the fabric to your desired apron size. Sew the edges and add straps for a secure fit.
- Finish Up:Iron the apron to remove any wrinkles and ensure the prints are set properly.
This DIY project not only enhances your cooking style but also allows for personal expression in the kitchen.
Fitted Apron with Contoured Shape

This fitted apron features a contoured shape that hugs the body nicely. The sleek design not only looks stylish but also provides comfort while you cook or craft. The black fabric gives it a modern touch, making it suitable for any kitchen or workshop.
The adjustable straps ensure a perfect fit, allowing you to move freely without any restrictions. Plus, the pocket in front is handy for keeping your tools or recipe cards close at hand. This apron is practical and chic, making it a great addition to your DIY apron collection.
To create your own fitted apron, start by gathering materials like fabric, scissors, and a sewing machine. Measure your body for the perfect fit, and cut the fabric accordingly. Sew the edges to prevent fraying, and attach the straps securely. Don’t forget to add a pocket for extra functionality!
Apron with a Layered Skirt

This apron design features a charming layered skirt that adds a playful touch to your kitchen attire. The top half is a vibrant red, while the bottom layers are a soft cream, creating a lovely contrast. The pockets on the front are practical and stylish, perfect for holding utensils or recipes.
Making this apron is a fun project that can be completed in a few simple steps. Start by selecting your fabrics. You’ll need a sturdy material for the top and a lighter fabric for the skirt layers. Measure and cut the pieces according to your desired size.
Next, sew the top part of the apron, including the neck strap and waist tie. Once that’s done, move on to the skirt. Cut the layers in varying lengths to create that lovely tiered effect. Gather the fabric at the top of each layer to add volume before attaching them to the waistband.
Finish by adding pockets to the front of the apron. This design not only looks great but is also functional, making it a perfect choice for cooking or crafting. Enjoy your time in the kitchen with this stylish apron!
Apron with Colorful Bias Tape Edging

This apron is a fun and vibrant addition to any kitchen. The colorful bias tape edging adds a playful touch, making it not just functional but also stylish. The neutral fabric serves as a perfect backdrop for the bright colors, creating a cheerful look.
The apron features two spacious pockets, ideal for holding utensils or recipe cards while you cook. The tie at the waist ensures a comfortable fit, allowing you to move freely as you whip up your favorite dishes.
Making your own apron with colorful bias tape is a simple project. Start by choosing a fabric for the main part of the apron. Cut it to your desired size, then attach the bias tape around the edges. This not only adds color but also prevents fraying. Finally, sew on pockets and a tie for the waist. It’s a great way to express your creativity while crafting something useful!
Utility Apron for Crafting and DIY
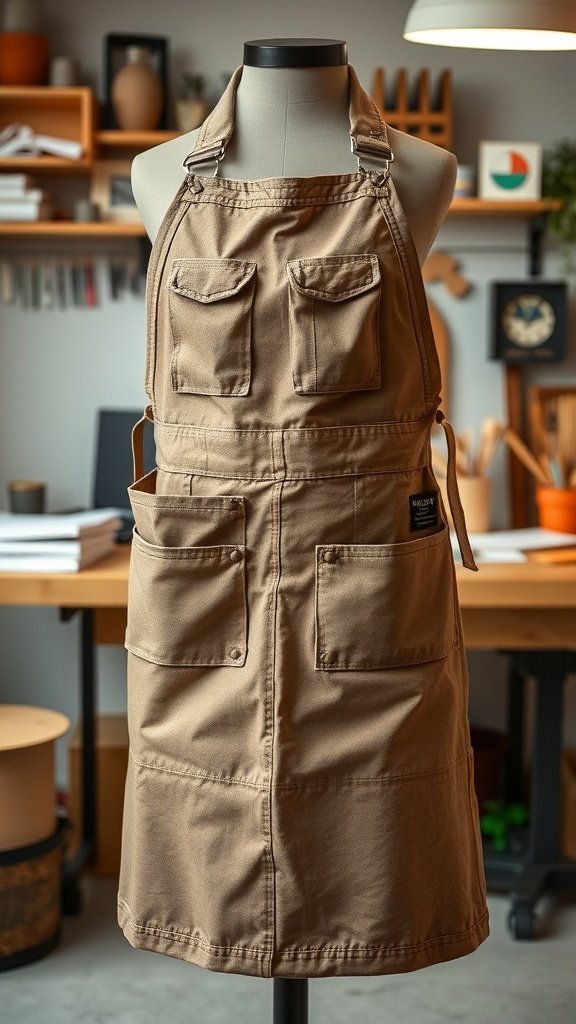
This utility apron is perfect for anyone who loves to get hands-on with crafting and DIY projects. Its sturdy design features multiple pockets, making it easy to keep tools and supplies within reach. The neutral color adds a touch of style while ensuring it fits in any workspace.
When you wear this apron, you can focus on your project without worrying about spills or messes. The durable fabric is made to withstand the rigors of crafting, whether you’re painting, woodworking, or sewing. Plus, the adjustable straps ensure a comfortable fit for everyone.
To make your own utility apron, start by choosing a sturdy fabric like canvas or denim. Cut the fabric to your desired size, adding extra for pockets. Sew the pockets onto the front, making sure they’re deep enough to hold tools securely. Finally, attach adjustable straps for a perfect fit.
This apron not only protects your clothes but also keeps your workspace organized. With everything you need at your fingertips, you can dive into your projects with ease. Whether you’re a beginner or a seasoned pro, a utility apron is a must-have for any crafting enthusiast.
Apron with Seasonal Motifs

This charming apron features beautiful seasonal motifs that bring a touch of nature into your kitchen. The design showcases vibrant leaves, a pumpkin, and delicate floral elements, making it perfect for autumn cooking. The warm colors and playful patterns create a cozy vibe, inviting you to whip up your favorite seasonal recipes.
To create your own apron with seasonal motifs, start by selecting a plain apron in a neutral color. Gather fabric paints or embroidery supplies in shades that reflect the season you want to represent. For autumn, think oranges, reds, and yellows.
Begin by sketching your design on paper. Once you’re happy with it, transfer the design onto the apron using a fabric pencil. If you’re painting, use fabric paint to fill in the shapes. For embroidery, choose a simple stitch to outline and fill in your motifs. Remember to let the paint dry completely before using the apron.
Finally, add a personal touch by including a fun phrase or your name. This not only makes the apron unique but also adds a warm, welcoming feel to your kitchen. Enjoy your time cooking while wearing your one-of-a-kind apron!