I always end up making a little mess in the living room when New Year’s Eve arrives, glitter everywhere and a playlist murmuring in the background. That first year I tried a handful of New Year’s Eve Party Crafts I discovered how small, bright projects change the mood faster than any playlist.
Table of Contents
These New Year’s Eve Party Crafts became my favorite way to slow down and add personal touches to the night.
Each craft brought a tactile pleasure—crackling paper, metallic shimmer, and the soft weight of handmade details on the table.
Tiny confetti poppers that feel delightfully theatrical

I love the simple, satisfying explosion of color when a confetti popper goes off; it always makes me grin. The sound is crisp, the shower of little metallic circles glints under party lights, and the tiny pieces scatter like miniature fireworks.
I usually assemble a handful and tuck them into a bowl by the countdown area, relishing the way guests reach in with bright, curious faces. There’s a tactile joy to shaking a popper and the momentary suspense before the burst, which always feels playful and slightly ceremonial.
Steps
- Cut a sheet of thin cardboard into short tubes and secure the edge with tape.
- Fill each tube with biodegradable confetti and a small folded paper strip for spring tension.
- Seal both ends with tissue and ribbon, adding a twist to hold contents.
- Decorate the outside with metallic washi, glitter glue, or a stamped greeting.
- Label a tray with times for popping and place them near the countdown spot.
Glitter-rimmed champagne glasses for toast-worthy sparkle

A glitter-rimmed glass always catches the light in a way that feels celebratory and a little nostalgic. I enjoy running my finger along the rim and feeling the subtle grain where adhesive met sparkle.
The glasses become small sculptures of light when a candle flickers nearby, and the clink of glass has a clearer, brighter ring. Guests often comment on the tactile shimmer and reach for a glass twice, as if the texture somehow promises a merrier sip.
They look especially charming grouped on a mirrored tray with tiny votives.
Steps
- Prepare a shallow dish of craft adhesive and another with fine glitter.
- Tilt a chilled glass and dip the rim lightly into the adhesive.
- Roll the rim in glitter until evenly coated, tapping off excess.
- Allow glasses to rest upright until fully dry to avoid drips.
- Arrange on a tray with napkins and a small sign indicating which is for toasts.
Shimmering metallic tassel garland for dramatic entrances

A tassel garland across a doorway instantly changes a room’s personality; it feels like a curtain of tiny celebrations. I love the soft rustle the tassels make when people brush past, a whispering, cheerful sound that hints at movement.
The metallic sheen picks up every stray beam from lamps or fairy lights, creating a living curtain that flickers. Once hung, it frames the entrance like a little stage and guests instinctively pause beneath it, smiling as the strands catch on sleeves and hair, leaving a trail of glitter in their wake.
Steps
- Cut long strips of metallic tissue or foil and fringe them along one edge.
- Roll each fringed strip into a compact tassel and secure the top with thin twine.
- Thread the tassels onto a sturdy cord, spacing them evenly by eye.
- Hang the garland across a doorway or against a wall using removable hooks.
- Gently adjust tassel lengths and spacing so the curtain reads as layered shimmer.
Bold photo booth backdrop with geometric foil panels

I remember the first time a backdrop turned a corner of the living room into a spontaneous stage; the foil panels snapped and shimmered in the camera flash, creating instant glamour. The surface is reflective enough to catch smiles and the odd lamp glow, and the geometry adds a modern edge to chaotic party photos.
People tend to lean into the backdrop, drawn by that bright, glossy surface, and it becomes a natural meeting spot. The result is a collage of candid expressions and glossy highlights that look lively even as memories age.
Steps
- Cut sturdy backing material to the desired backdrop size and lay flat.
- Arrange metallic foil panels in a geometric pattern across the backing.
- Adhere panels smoothly, smoothing out any air pockets to maintain reflection.
- Mount the backdrop securely to a wall or freestanding frame at photo height.
- Position a small stool or sign in front to invite posing and provide even lighting.
Countdown clock board that builds anticipation naturally

There is a tangible thrill in gathering around a handmade countdown board as the hour approaches; each number reveals a small collective intake of breath. Chalky numbers on a dark board have a theatrical quality, changing the room’s energy step by step.
I often watch as friends crowd closer, fingers tracing the edge of the frame, the ticking becoming a steady companion to the music. The texture of chalk or marker against the matte surface feels improvisational and alive, and the board becomes a focal point where conversation softens to listen to the moment.
Steps
- Choose a sturdy board and paint or cover it with matte dark paint or paper.
- Measure and mark areas for numbers, choosing a bold, legible style.
- Write or affix removable numbers in reverse order so they can be revealed.
- Place the board on an easel or lean it where everyone can see the countdown.
- Prepare small props or lights to highlight the final reveal at midnight.
Sparkler holders in jars for safe, glowing moments

Sparks in the night always feel intimate; the warm, crackling light of a sparkler shifts party tempo to something quieter and almost reverent. I like the way jars soften the brightness, catching tiny rainbows as sparks scatter, while offering a reassuring barrier to curious sleeves.
The glass holds a faint warmth after each use and carries a scent that mixes metal and smoke into the winter air. Guests often pause to watch the last embers die, holding the jar like a small lantern, and the sound blends into the evening soundtrack.
Steps
- Fill heat-resistant jars with sand or small pebbles to create stable bases.
- Place sparklers upright in the packed sand so they stand securely.
- Group several jars together on a tray with handles for easy carrying.
- Light sparklers one at a time and allow the jars to contain any falling embers.
- Extinguish used sparklers in a dedicated water-filled jar and let jars cool.
Sequined party hats with a vintage flair

There is something playfully nostalgic about a sequined party hat; it evokes old celebration photos and a slightly theatrical self-consciousness. The little reflective discs catch light and paint fleeting patterns on faces nearby, and the hat’s gentle weight on the head feels oddly comforting.
I always notice the soft rustle as someone adjusts their hat and the quiet laugh that follows. Displayed on a side table they look like tiny crowns, each one different in pattern and shine, promising a night of smiles and light-hearted posing.
Steps
- Form conical hat bases from lightweight cardstock and secure the seams.
- Brush the base with adhesive and layer sequins in overlapping rows for full coverage.
- Allow the sequins to dry completely before trimming excess along the base.
- Add elastic chin straps and a soft felt edge for comfort when worn.
- Arrange hats on a decorative tray so guests can pick one before midnight.
Retro noisemaker shakers with playful rhythms

A handheld noisemaker brings a tactile rhythm to the party; the little rattles and beads create a sound that feels both celebratory and communal. I like the moment when someone starts a rhythm and others join in, layering textures of clack and rattle.
The wooden handle feels worn in the palm, and painted stripes pick up the flash of nearby lights. Displayed in a mason jar by the music source, they invite participation, and their compact clamor somehow makes the room feel full without overpowering conversation.
Steps
- Select small cylinders and secure a lightweight wooden handle into each base.
- Fill the cavity with small beads or seeds to achieve the desired rattle sound.
- Seal the open end tightly and decorate the exterior with paint or washi tape.
- Test several samples to balance sound and weight for easy handling.
- Place the finished shakers in a communal container near the dance area.
Lantern centerpieces that glow through midnight

Lanterns on the table bring a steady, comforting glow that transforms chatter into intimate conversation. I enjoy the way the flame’s warmth picks out grain in wood and brings out warm tones in linens and flatware.
The glass panes hold tiny shifting reflections, and the scent of a softly burning candle adds another layer to the room. Guests tend to cluster in small pockets of light, leaning in as if the lanterns create private islands.
The centerpieces become anchors for dinner plates and small keepsakes left beside them.
Steps
- Choose glass or metal lanterns that fit the table proportions and style.
- Place unscented candles or LED alternatives inside, ensuring stable bases.
- Surround the lanterns with low foliage, metallic accents, or confetti for texture.
- Light candles shortly before the main event to capture the freshest glow.
- Monitor flames and replace candles as needed to maintain a steady ambiance.
Resolution cards displayed like tiny wish notes
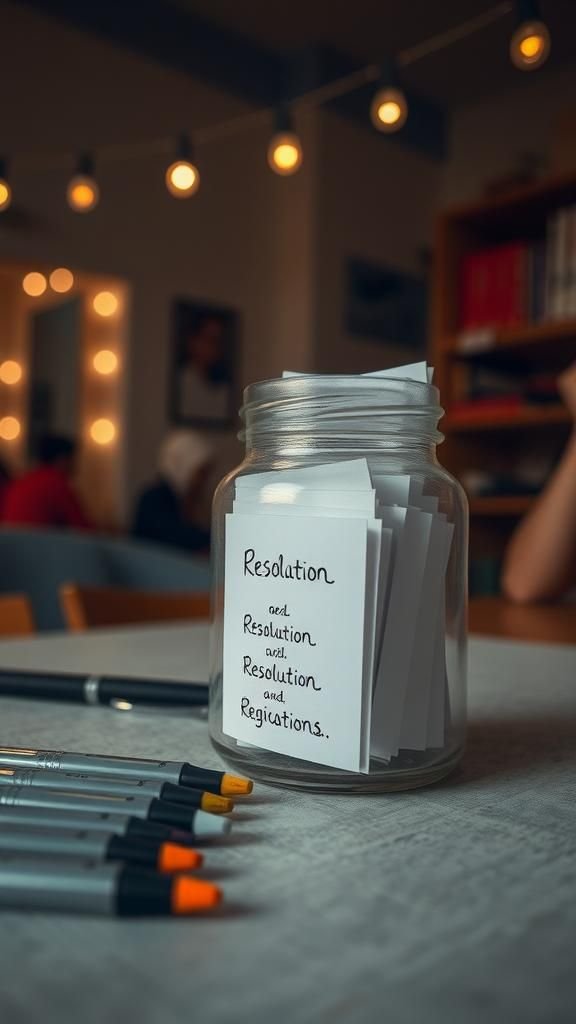
Watching a stack of small resolution cards grow through the evening always feels quietly hopeful. The cards rustle when shuffled, and the inked lines look intimate, like miniature portraits of intentions.
I enjoy seeing handwriting variations—some loops neat, some hurried and breathless—each carrying a different tone. Guests sometimes tuck cards into a jar or clip them to a string, and the display becomes a mosaic of hopes.
The paper edges catch light in a way that makes each scribble seem a little more precious than it would on a phone screen.
Steps
- Cut thick cardstock into uniform small rectangles for writing resolutions.
- Provide pens in a few ink colors and arrange the cards alongside prompts.
- Place a decorative jar or clipping line nearby for collecting completed cards.
- Invite guests to write and add their cards to the display at leisure.
- Later, review the cards together or seal them in an envelope for safekeeping.
Personalized favor boxes tied with metallic ribbon

Little favor boxes on plates feel like miniature gifts that set a thoughtful tone for the evening. I like the varied textures of paper finishes against the smoothness of ribbon, and the soft clink when a small token is lifted from inside.
Guests often take a moment to read a handwritten name tag, and the act of untying a ribbon slows the night in the nicest way. The scent of a small chocolate tucked inside or a touch of dried citrus adds an extra sensory layer, making each favor both tactile and edible.
Steps
- Fold small favor boxes from sturdy paper and crease edges for neat lines.
- Place a modest treat or keepsake inside each box before closing.
- Handwrite or print name tags and affix them to each box lid.
- Thread metallic ribbon through tags and tie a neat bow to finish.
- Arrange the boxes at each place setting so guests find them on arrival.
Balloon confetti bombs for a dramatic midnight shower

A burst of confetti from a balloon has a cinematic quality; the slow arc of paper caught mid-air always draws a delighted murmur. I like the contrast between the smooth sheen of the balloon and the feathery scatter of confetti once it breaks.
Floating pieces catch overhead lights and fall like bright snow, landing on shoulders and tables in unexpected patterns. The moment of anticipation as someone readies a balloon is often filled with laughter and friendly jostling, and the aftermath leaves a playful, colorful carpet that guests admire with little foxed smiles.
Steps
- Fill clear balloons with small metallic or tissue confetti and partially inflate.
- Secure balloons with a strong knot and attach them to a lightweight string.
- Suspend balloons over the party area using removable hooks or a frame.
- Pop balloons at the chosen moment using a pin or similar sharp object.
- Sweep up large pieces promptly and dispose of confetti responsibly afterward.
Ambient mason jar lights with subtle color washes

Mason jar lights feel like little repositories of warmth; the glass magnifies the glow and the soft filament or LED inside creates a gentle pool of light. I like alternating jars with cool and warm tones to build a layered mood across the room.
When placed at different heights the jars form a landscape of luminescence that invites leaning in and quiet conversation. The faint hum of electricity is absent with candle alternatives, leaving only the visual warmth.
Their rustic charm pairs well with metallic accents for a balanced, lived-in look.
Steps
- Select mason jars and clean them thoroughly for a clear glow.
- Place battery-operated lights or small candles into each jar.
- Add thin layers of colored tissue or dye to the inside for a soft tint.
- Group jars in clusters at different heights for visual depth.
- Turn lights on shortly before guests arrive to maximize fresh ambiance.
Hand-glittered napkin rings for tactile table accents

A napkin ring with a glittered band invites a small, delighted touch as guests settle in; the texture is a tiny surprise against soft linen. I often notice the way light kisses a glittered edge and then bounces across a glass, scattering specks of warmth.
The rings make place settings feel layered and intentional, and the occasional dislodged sparkle becomes a playful badge of the evening. They’re quiet performers on the table, contributing to an overall shimmer that doesn’t shout but hums contentedly in the background as people eat and chat.
Steps
- Cut sturdy rings from thick cardstock or thin wood to match napkin width.
- Apply adhesive around the exterior and roll the rings in fine glitter.
- Allow the rings to dry upright to prevent smudging or clumping.
- Slide rings onto folded napkins and place at each setting.
- Gently brush away loose glitter from the table before guests are seated.
Paper star lanterns to scatter soft overhead light

Paper star lanterns floating above a table create the sensation of dining under a low, handmade sky. The folded points catch light in delicate ways, throwing soft shadows that move as people pass.
I enjoy how the paper’s slight translucence turns bulbs into gentle moons, dimming glare and lending everything beneath a cozy glow. The stars have an old-fashioned charm that often prompts a comment or two, and they make the ceiling an active participant in the party rather than empty space.
Steps
- Purchase or fold star lantern templates from sturdy paper stock.
- Assemble the star shapes and insert small LED bulbs designed for paper lanterns.
- Hang the stars at varying heights with thin, nearly invisible string.
- Ensure bulbs are cool to the touch and compatible with the paper material.
- Dim surrounding lights to allow the star lanterns to create a soft canopy.
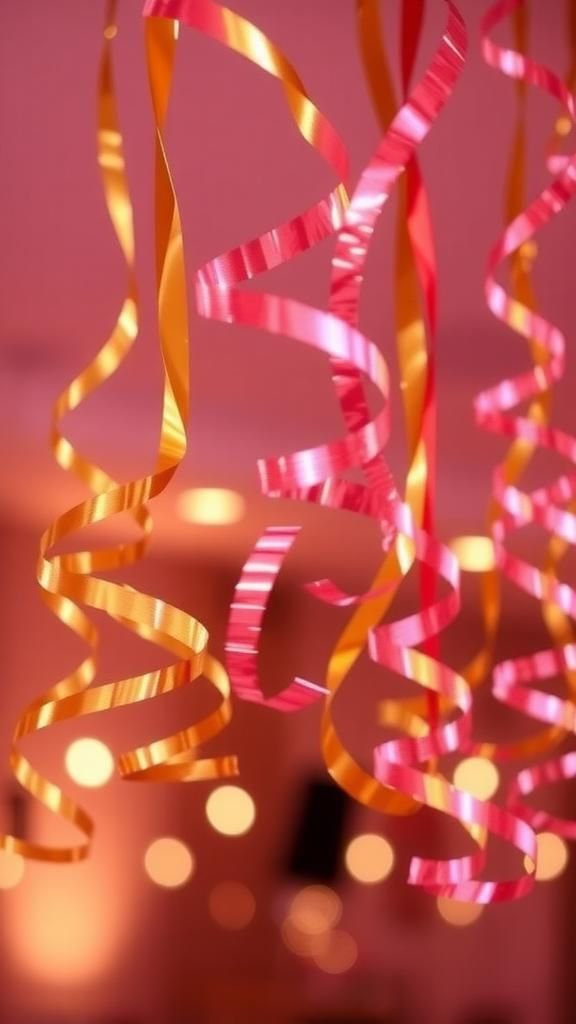
Metallic streamer wreath that frames a celebratory corner

A streamer wreath on a wall turns a blank corner into a mini stage, its layered shimmer creating depth and motion every time a breeze passes. I like the visual density where papers overlap, producing a rich metallic tapestry that seems to move on its own.
Visitors pause and run their fingers along the edge, admiring how light shifts across each strip. The wreath offers a backdrop for photos or a place to hang small props, adding an unforced focal point that complements the rest of the room without shouting for attention.
Steps
- Form a ring base from sturdy wire or cardboard to define the wreath frame.
- Cut metallic streamers into long strips and gather them into small bundles.
- Secure each bundle around the base, layering to achieve full coverage.
- Add a few contrasting color strips for depth and visual interest.
- Hang the wreath at eye level to create a framed party corner.
Hand-lettered place cards with a festive flourish

A hand-lettered place card feels like a tiny, personal gesture that sets a gracious tone at the table. The curl of a capital letter or the pressure variation in a stroke reads as someone took a moment for detail, and that small care tends to be noticed.
I enjoy watching guests lift their cards with a smile, reading names aloud as if pronouncing an invitation. The texture of thick paper holds ink in a satisfying way, and a metallic ink adds a subtle sheen that catches light without overwhelming the design.
Steps
- Cut high-quality cardstock into uniform rectangles sized for each seat.
- Practice lettering styles on scrap paper and then write names with a steady hand.
- Embellish with a small metallic dot or flourish to tie into the party palette.
- Place each card atop the napkin or beside the plate at each setting.
- Save a few extras for last-minute additions or unexpected guests.
Floating foil whirls for kinetic overhead decoration
Suspended foil whirls bring a sense of gentle motion to a room, twirling slowly and catching light with every tiny turn. I like the hypnotic effect as they rotate, throwing glittering slivers across walls and ceilings.
The sound is nearly silent, just a faint whisper when they brush past each other, and that quiet movement makes the space feel alive. Guests often look up and follow a particular spiral with their eyes, a soft, pleasing diversion from conversation that adds a subtle festive rhythm to the evening.
Steps
- Cut long spirals from lightweight metallic foil and reinforce the top loop for hanging.
- Suspend the whirls at varying heights using clear fishing line attached to the ceiling.
- Space them so they can turn freely without tangling.
- Gently stir air in the room to set them in motion before guests arrive.
- Check periodically to ensure lines remain secure and tangles are avoided.
Custom champagne bottle labels to mark the night

A custom label on a champagne bottle turns an ordinary object into a keepsake. The paper weight and the way adhesive settles around the curve of glass give each bottle a slightly different personality.
I remember writing small messages on a batch and watching guests study the typography, tasting the thought behind the design. The labels make bottles feel curated and part of the event’s identity, and later someone will often tuck a label into a scrapbook.
There’s a small pride in seeing a row of uniformly dressed bottles waiting for the toast.
Steps
- Design a label template matching the bottle’s shape and print on adhesive paper.
- Trim labels carefully for a clean edge that follows the bottle curve.
- Apply labels to chilled bottles, smoothing out air bubbles as you go.
- Optionally add a wax seal or ribbon around the neck for extra detail.
- Line the bottles on a tray so the labels read outward for guests to admire.
Cocktail marker charms to keep drinks distinct

Small charms clipped to cocktail glasses help everyone keep track of their drink without fuss, and they bring a playful personalization to the table. I enjoy the sound of tiny clasps and the small movement as a charm brushes a tabletop.
The charms catch the light and sometimes jostle against ice with a delicate clink, creating a pleasing micro-audio detail in the background of the party. People often choose charms that feel like mini-messages, which opens short conversations and small laughs mid-evening.
Steps
- Gather tiny charms or beads and small metal rings suitable for glass stems.
- Thread charms onto the rings and close them securely with pliers.
- Attach a charm to each glass stem before guests arrive.
- Provide a small dish with spare charms for swaps during the night.
- Collect charms at the end of the evening for guests to take home.
LED ice cubes for playful, spill-proof color

LED ice cubes lend a whimsical, color-shifting glow that makes every drink feel a little theatrical. The smooth plastic surfaces glint in the glass and the changing colors create brief, shifting moods across the room.
I enjoy watching how the light refracts through different mixers, turning a simple cocktail into a glowing object of curiosity. They add a safe sense of show without cooling the drink, which guests appreciate in seated gatherings.
The small hum of electronics is absent, leaving only visual charm to entertain.
Steps
- Charge or insert batteries into reusable LED ice cubes according to manufacturer guidance.
- Test cubes for color cycles and brightness before adding them to drinks.
- Place one or two cubes in each glass as drinks are served.
- Turn off cubes and retrieve them after use to preserve battery life.
- Store cubes in a cool, dry place in between events for longevity.