Air-dry clay offers a versatile and accessible way to create beautiful handmade items without the need for a kiln or oven. Exploring 21 creative projects using air-dry clay can spark your imagination and help you craft unique decorations, jewelry, and more.
Table of Contents
Whether you’re a beginner or an experienced crafter, these ideas show how air-dry clay transforms simple materials into artful creations. I remember the first time I shaped a small bowl with air-dry clay — the satisfaction of watching it dry and turn solid was truly rewarding.
These projects are perfect for adding a personal touch to your home or gifts.
Handcrafted Air-Dry Clay Jewelry Pieces
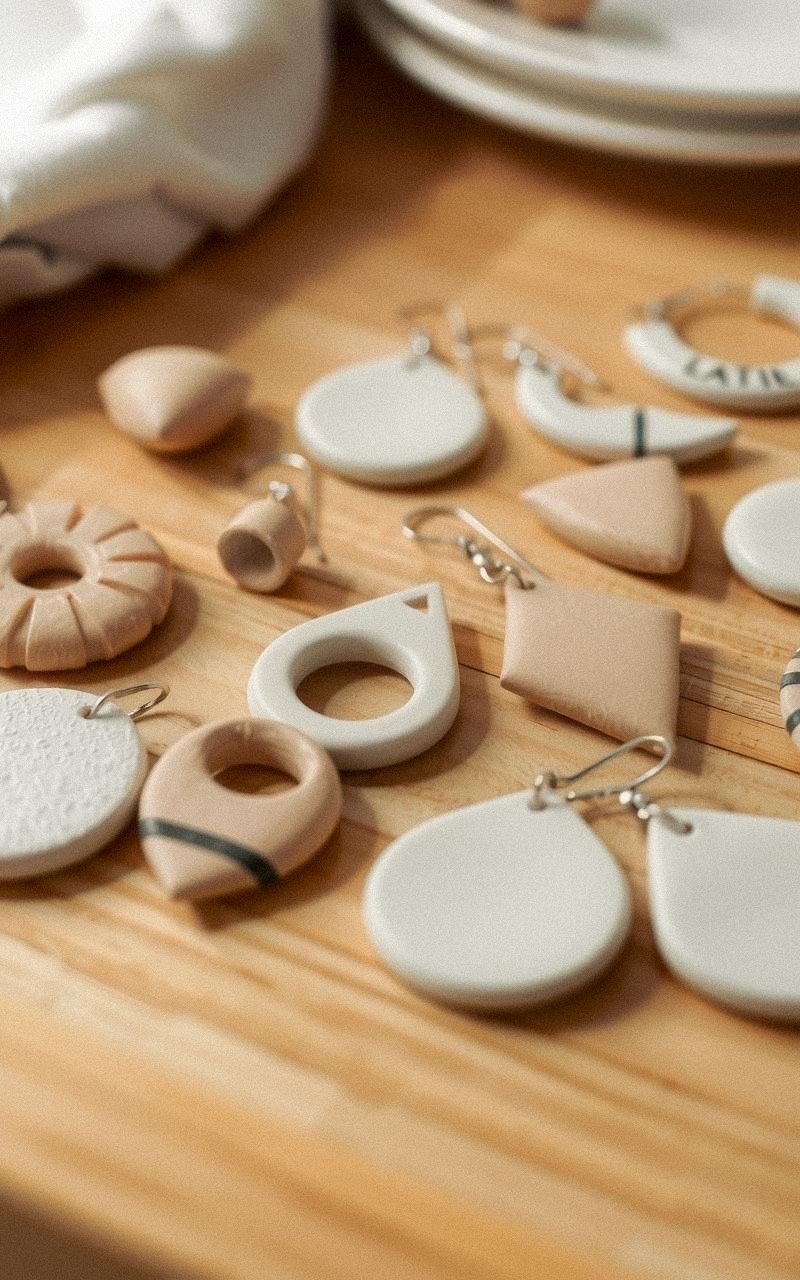
Creating jewelry with air-dry clay lets you design custom necklaces, earrings, and rings. The clay is easy to shape, allowing intricate details or simple geometric shapes.
After drying, paint or seal the pieces for a polished look. This project is ideal for making gifts or matching accessories that reflect your style.
Steps:
- Condition the clay by kneading it until soft.
- Shape the clay into desired jewelry forms.
- Use tools to add texture or patterns.
- Allow the pieces to air dry completely.
- Paint and seal the finished jewelry.
Personalized Air-Dry Clay Name Tags

Name tags made from air-dry clay add a personal touch to gifts, events, or workspace organization. You can mold the clay into various shapes and imprint names or initials before drying.
These tags can be painted or left natural, then attached to ribbons or clips for versatility.
Steps:
- Roll out the clay into a flat slab.
- Cut out shapes using cookie cutters or a knife.
- Imprint names or initials with stamps or tools.
- Let the tags dry thoroughly.
- Decorate with paint or varnish if desired.
Miniature Air-Dry Clay Plant Pots

Craft tiny plant pots from air-dry clay to hold succulents or air plants. These miniature pots brighten up desks and shelves and can be customized with textures or colors.
Because they’re lightweight and easy to make, they’re perfect for gifting or personal use.
Steps:
- Shape the clay into small pot forms.
- Smooth the edges and add texture if desired.
- Create drainage holes if needed.
- Allow the pots to dry completely.
- Paint or decorate before placing plants inside.
Decorative Air-Dry Clay Wall Hangings
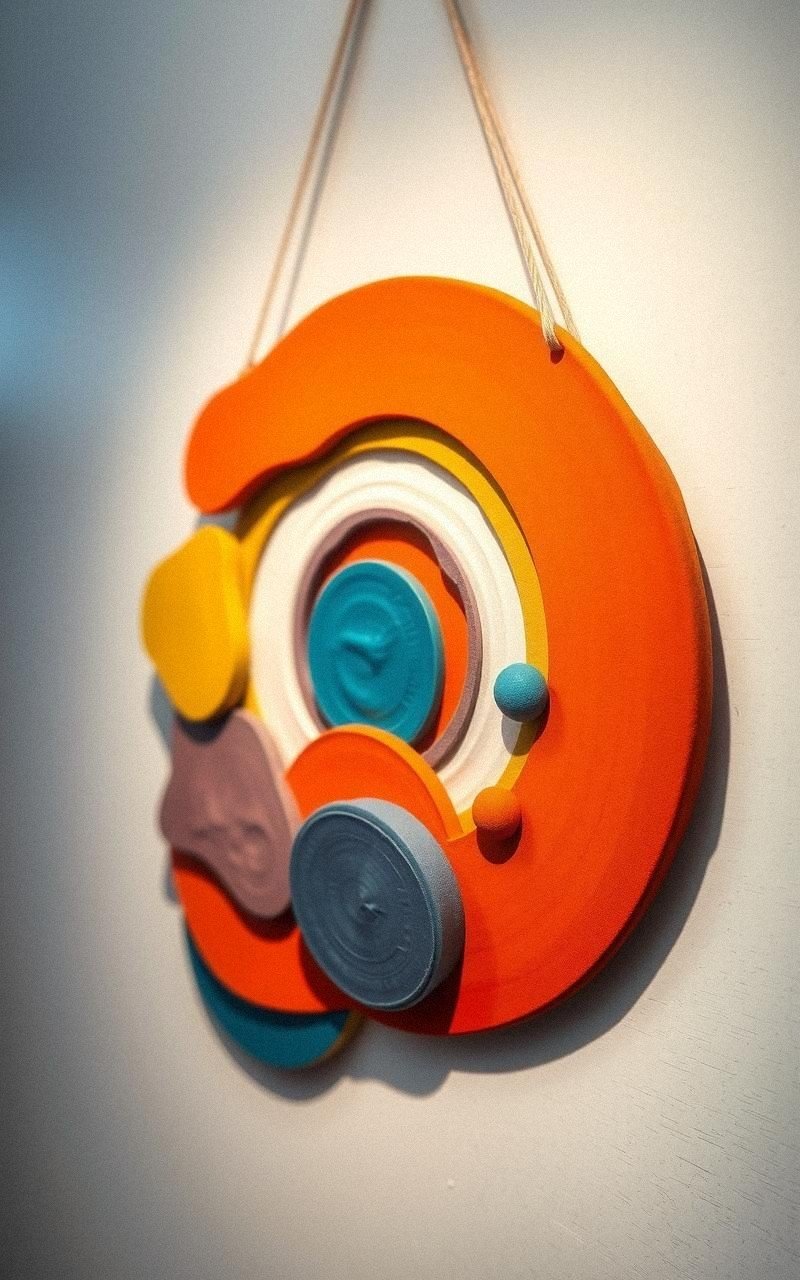
Wall hangings made from air-dry clay can feature abstract shapes or nature-inspired designs. By combining different clay pieces, you create a layered effect that adds dimension to any space.
Hanging these art pieces brings a handmade charm to your walls.
Steps:
- Design shapes and cut them from rolled clay slabs.
- Add texture or carve patterns.
- Assemble pieces with clay slip if needed.
- Dry completely, then paint or varnish.
- Attach hanging hardware or string.
Custom Air-Dry Clay Coasters with Patterns

Create functional art with air-dry clay coasters decorated with stamped or carved patterns. These coasters protect surfaces and bring a handmade touch to your table setting.
Sealing them ensures durability against moisture and wear.
Steps:
- Roll out clay to an even thickness.
- Cut into coaster-sized circles or squares.
- Imprint patterns using stamps or tools.
- Dry completely and paint if desired.
- Seal with waterproof varnish.
Charming Air-Dry Clay Animal Figurines
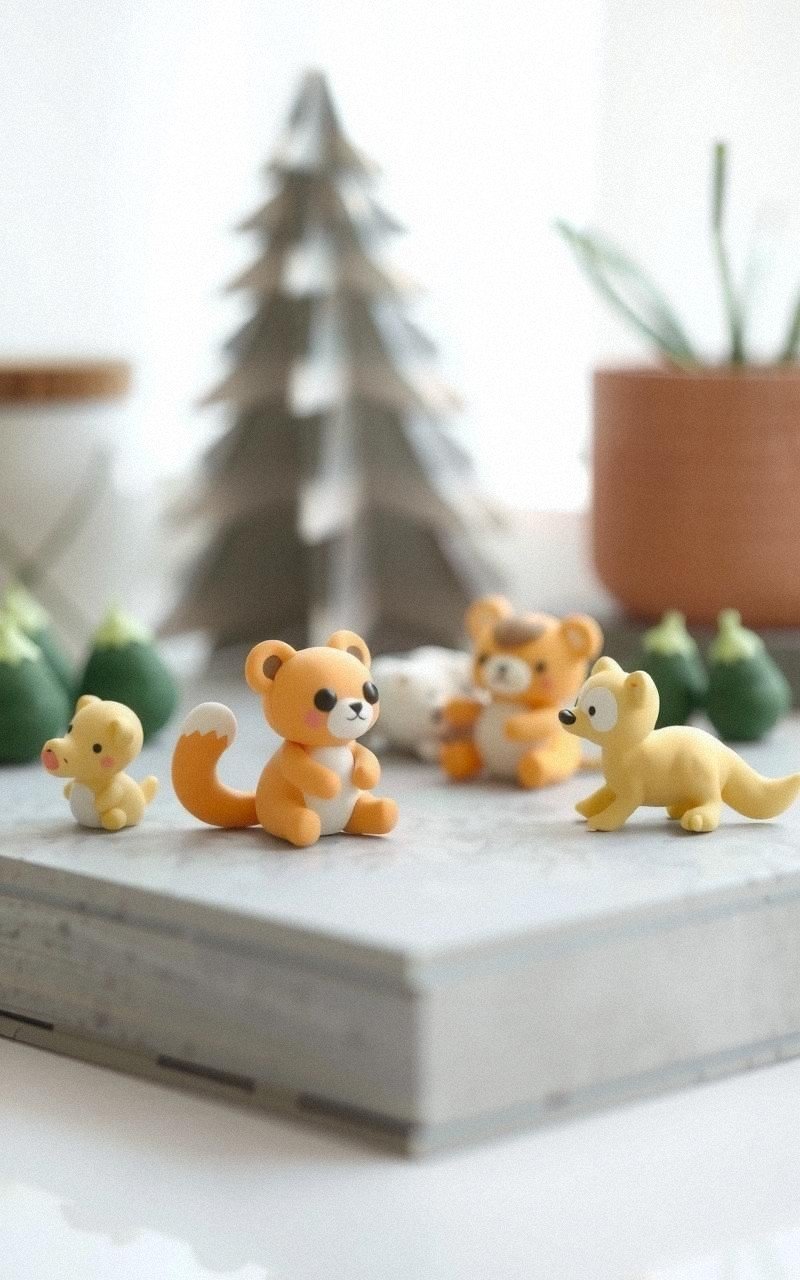
Sculpt adorable animal figurines using air-dry clay for decoration or play. Start with basic shapes and add details like eyes and fur texture.
These figurines can be painted after drying to bring them to life with color and personality.
Steps:
- Shape the body and appendages separately.
- Attach parts using clay slip.
- Add texture details with sculpting tools.
- Let the figurine dry thoroughly.
- Paint and add finishing touches.
Unique Air-Dry Clay Keychains and Charms
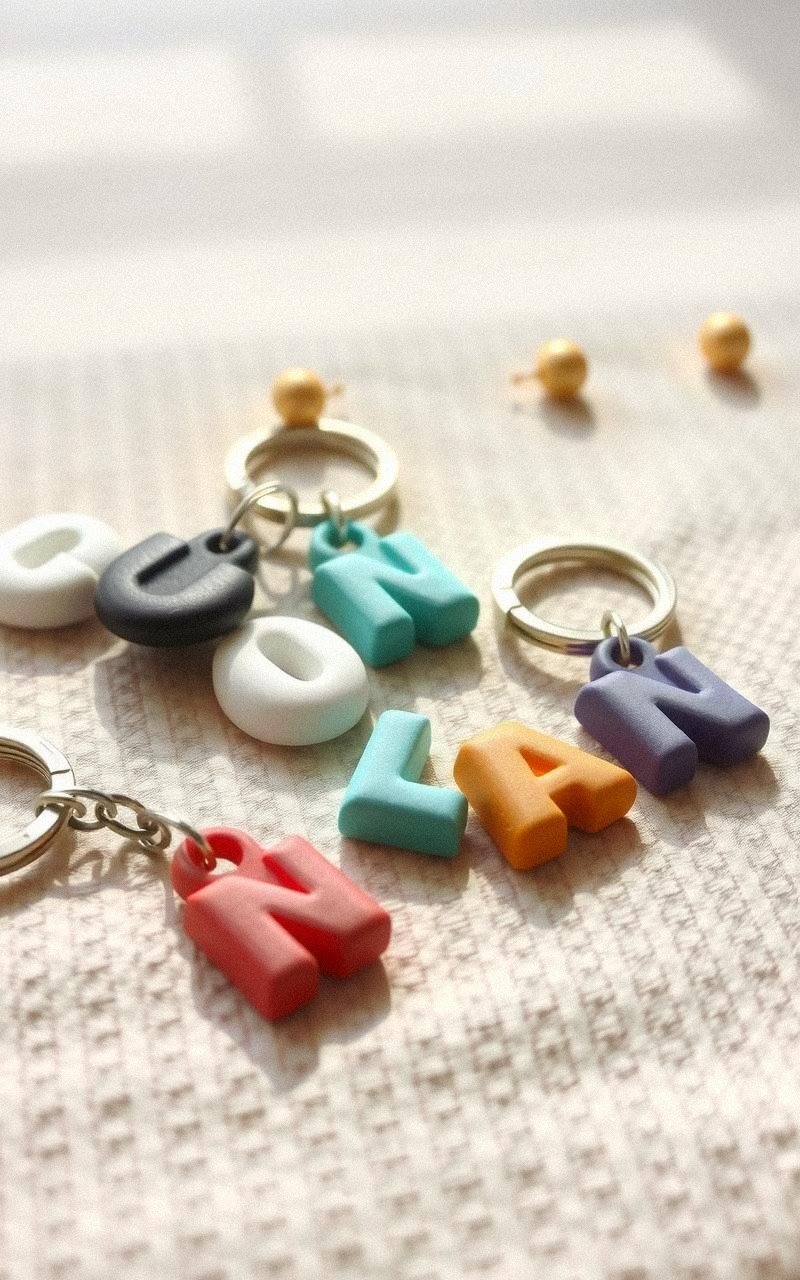
Make personalized keychains and charms with air-dry clay by shaping initials, symbols, or miniature items. Adding a hole before drying allows easy attachment to keyrings or bags.
Painted or natural, these accessories are stylish and practical.
Steps:
- Shape clay into desired charm designs.
- Make a hole for attaching hardware.
- Smooth and refine shapes.
- Air dry completely.
- Paint and attach key rings or hooks.
Creative Air-Dry Clay Candle Holders

Design custom candle holders from air-dry clay to add warmth and style to your space. Mold shapes that fit small candles or tealights, and decorate with carvings or paint.
These holders combine function and artistic expression beautifully.
Steps:
- Form the base and sides to fit candle size.
- Smooth surfaces and add decorative details.
- Create openings for candles to sit securely.
- Allow to dry fully.
- Paint or seal before use.
Air-Dry Clay Magnets with Fun Designs

Design fridge magnets from air-dry clay featuring playful or thematic designs. After shaping and drying, attach magnets with glue for a cute and functional kitchen accessory.
You can create sets matching seasons, hobbies, or colors.
Steps:
- Shape small flat designs from clay.
- Add texture or patterns.
- Dry completely.
- Paint or decorate as desired.
- Glue magnets to the back.
Elegant Air-Dry Clay Ring Dishes
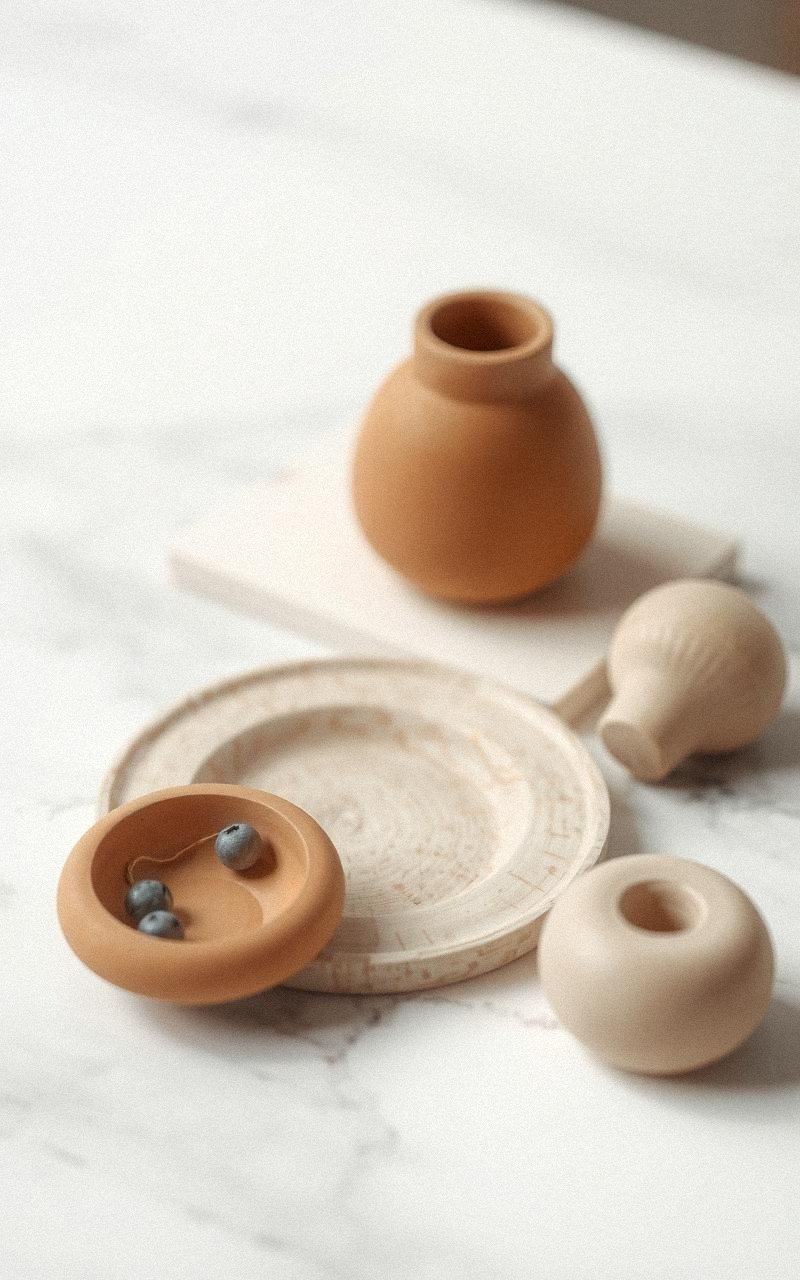
Craft small ring dishes from air-dry clay to keep jewelry organized in style. Shape a shallow bowl and personalize it with textures or paint.
These dishes are both practical and decorative additions to your vanity or bedside table.
Steps:
- Roll clay and form a shallow bowl shape.
- Smooth edges and add surface designs.
- Let dry completely.
- Paint or glaze with sealant.
- Use to store rings and small jewelry.
Whimsical Air-Dry Clay Ornaments for Holidays

Create festive ornaments from air-dry clay to decorate your home during holidays. Cut shapes like stars, hearts, or trees, and decorate with paint or glitter.
Adding a hole allows for hanging with ribbons or hooks.
Steps:
- Roll out clay and cut festive shapes.
- Add texture or carved patterns.
- Pierce holes for hanging.
- Dry thoroughly.
- Paint and add ribbons or hooks.
Stylish Air-Dry Clay Desk Organizers

Design unique desk organizers using air-dry clay to hold pens, clips, or notes. Customize compartments and shapes to fit your workspace.
Painted or natural, these organizers blend creativity with functionality.
Steps:
- Plan shapes and compartments.
- Mold clay accordingly.
- Join parts securely with slip.
- Allow drying completely.
- Paint or finish as desired.
Playful Air-Dry Clay Puppet Characters
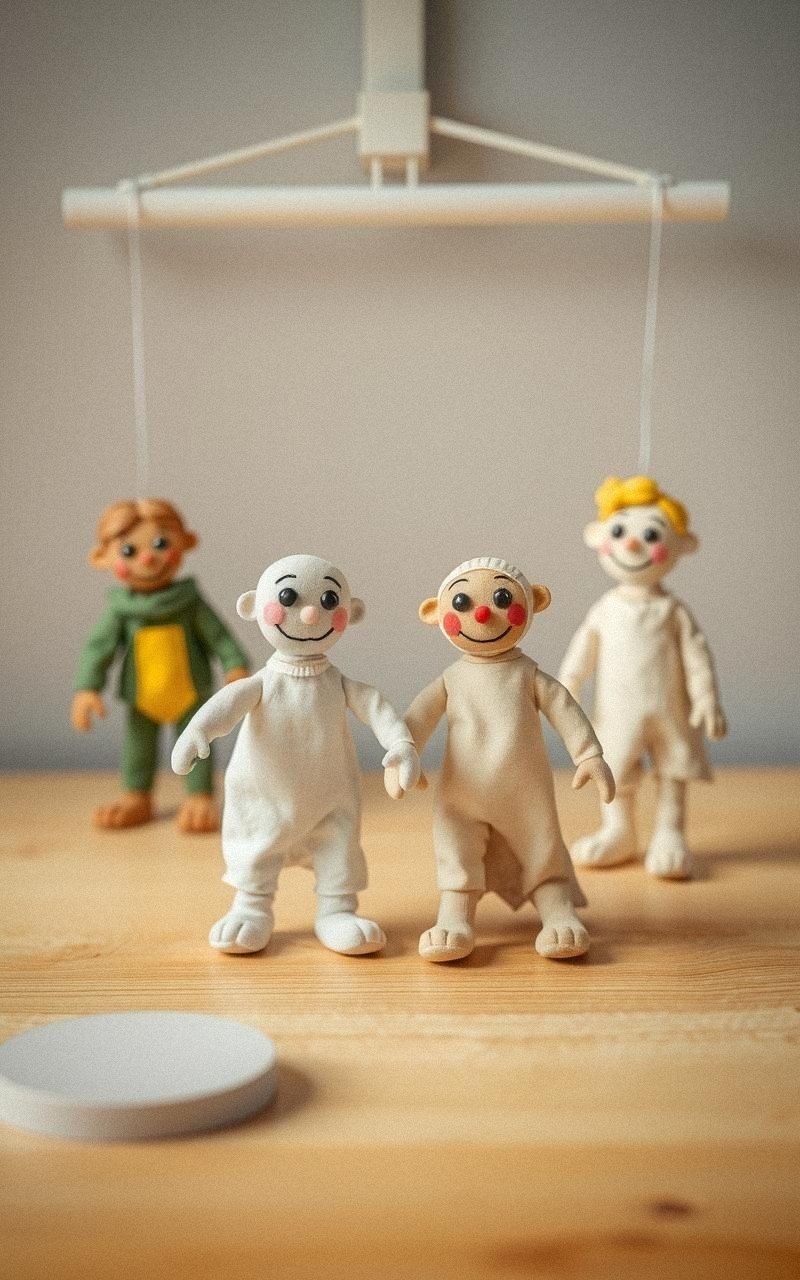
Sculpt puppet characters from air-dry clay for storytelling or decoration. Form heads and body parts, then join.
Painting brings out personality. Add movable parts with string or wire for interactive play.
Steps:
- Model head and body parts separately.
- Attach parts with clay slip.
- Add details and textures.
- Dry completely.
- Paint and assemble movable parts.
Custom Air-Dry Clay Buttons for Sewing

Create unique clay buttons to add charm to your sewing projects. Shape small discs, add holes, and decorate before drying.
These handmade buttons offer a personal touch to clothing or accessories.
Steps:
- Roll out clay and cut small discs.
- Create two or four holes with a tool.
- Decorate surfaces with texture or carving.
- Let buttons dry fully.
- Attach to fabric as needed.
Air-Dry Clay Photo Frame Embellishments

Enhance plain photo frames by attaching air-dry clay decorations. Sculpt flowers, leaves, or geometric shapes, then glue or press them onto frames.
Paint for cohesion and create personalized keepsakes.
Steps:
- Make small decorative clay pieces.
- Dry pieces individually.
- Attach to photo frame with strong glue.
- Paint or varnish the frame and decorations.
- Allow to dry fully before use.
Air-Dry Clay Decorative Bowls and Trays
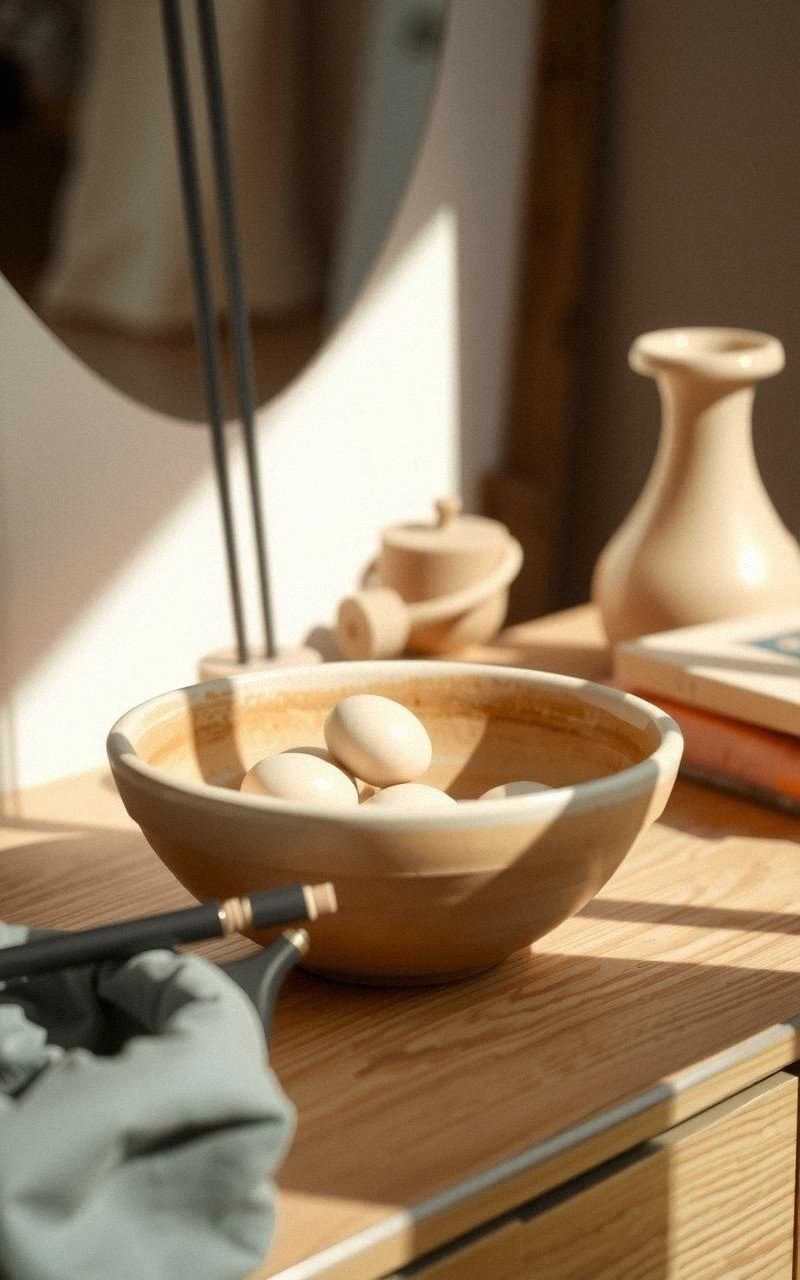
Shape bowls or trays from air-dry clay for catching keys, coins, or other small items. Smooth the surfaces and add textures or paint for a stylish look.
These pieces add handmade appeal to any entryway or dresser.
Steps:
- Form the base and sides of bowl or tray.
- Smooth edges and add patterns if desired.
- Allow to dry completely.
- Paint or seal for finish.
- Use for storage or decoration.
Air-Dry Clay Plant Markers for Garden
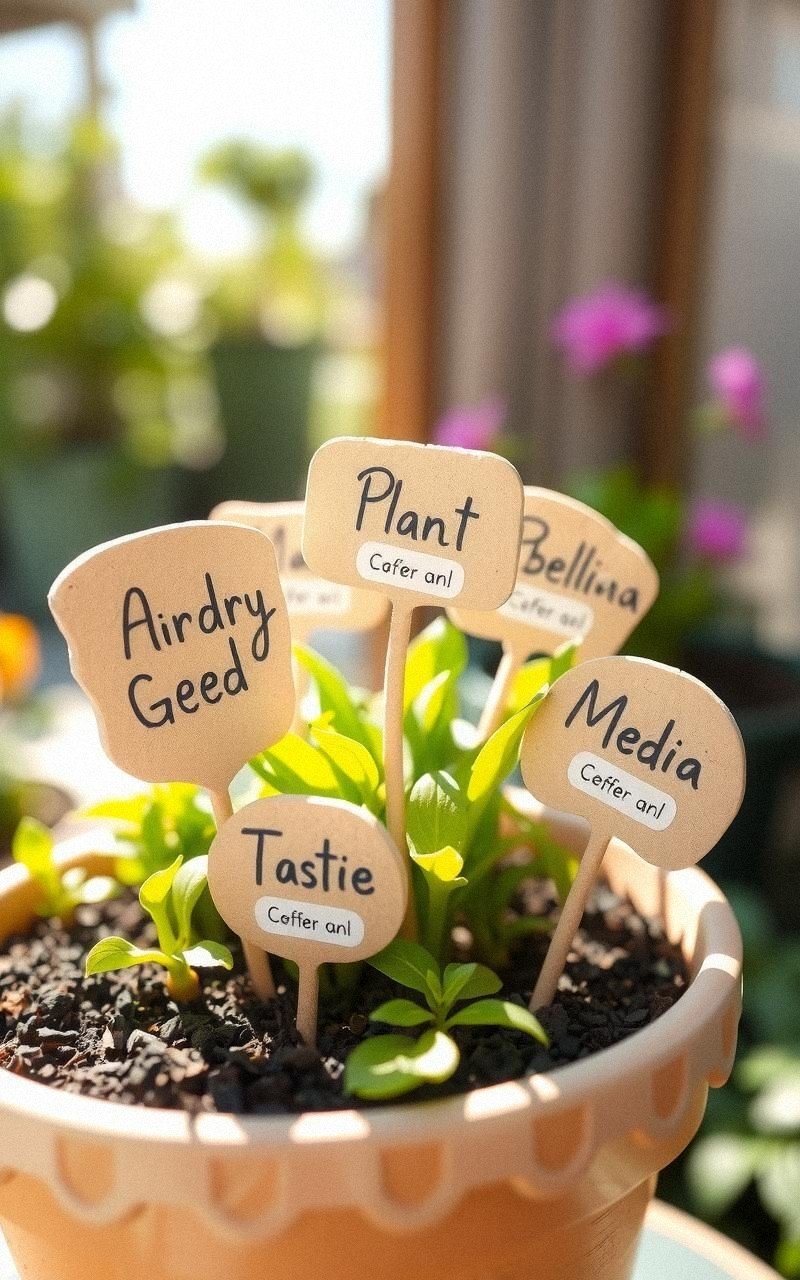
Make durable plant markers by shaping air-dry clay tags to label herbs or vegetables. Write plant names before drying and seal to protect against moisture.
These markers add charm and organization to your garden or pots.
Steps:
- Roll out clay and cut into tag shapes.
- Write or carve plant names while clay is soft.
- Dry thoroughly.
- Seal with waterproof varnish.
- Place markers in soil near plants.
Chic Air-Dry Clay Phone Holders

Craft phone holders from air-dry clay by molding a stable base with a slot to hold the device. Customize with colors or patterns.
These holders provide a functional and artistic desk accessory.
Steps:
- Shape a sturdy base with a slot for the phone.
- Smooth surfaces and add decoration.
- Dry completely.
- Paint or seal for durability.
- Use to hold phone upright.
Air-Dry Clay Decorative Buttons for Home Decor

Design large decorative buttons from air-dry clay to adorn pillows, curtains, or upholstery. These oversized buttons add texture and interest to home textiles.
Paint or glaze to match your style.
Steps:
- Form large button shapes from clay.
- Add holes or carved designs.
- Dry fully.
- Paint or glaze as desired.
- Sew or glue onto fabric.
Air-Dry Clay Fridge Handle Knobs

Replace plain fridge or cabinet handles with custom clay knobs. Mold shapes to fit screws or fixtures, dry, and decorate.
These knobs personalize kitchen or furniture with a handmade feel.
Steps:
- Shape knob forms with a flat back for attachment.
- Create hole or flat surface for screw fitting.
- Dry completely.
- Paint or glaze.
- Attach securely to handles.
Bright Air-Dry Clay Sun Catchers

Craft sun catchers from air-dry clay by cutting shapes and adding translucent paint or embellishments. Hang them by windows to catch light and brighten rooms with color and texture.
Steps:
- Roll clay and cut out shapes.
- Add holes for hanging.
- Dry fully.
- Paint with translucent or bright colors.
- Attach string and hang in sunlight.