I still remember the first time a blank wall felt like an invitation rather than a challenge. One rainy afternoon I gathered scraps of paper, yarn, and a thrifted frame and ended up with a piece that made the whole room feel cozier.
Table of Contents
That small experiment led me to a habit of turning found materials into wall art.
This list of DIY Wall Art Projects is a mix of tactile, textile, and tidy paper ideas that I keep returning to when a wall needs personality. Each project carries a sense of making by hand and a story worth living with.
String Art on Reclaimed Wood with Nails
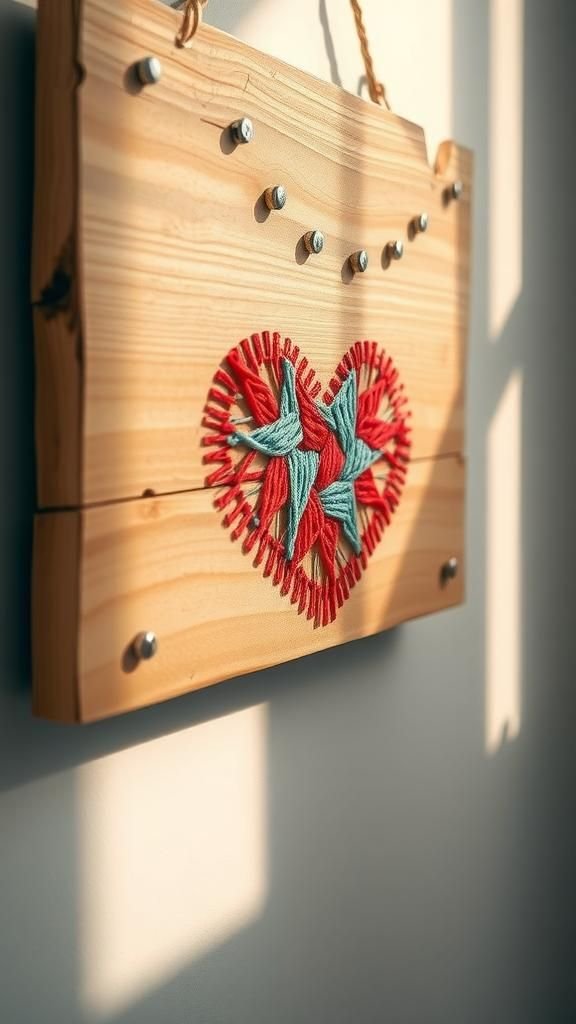
I love the sound of nails tapping into a weathered plank and the way the thread catches light against rough grain. This board feels lived in, warm under the fingertips, and the contrast between sharp metallic nails and soft fiber creates a pleasing tension.
Colors of thread sit like small rivers across the wood, and when afternoon sun passes over the piece it throws thin, graphic shadows. It often becomes the first thing guests notice because it has both texture and a kind of deliberate casualness that feels welcoming.
Steps
- Select a smooth reclaimed wooden board free of splinters and wipe it clean with a dry cloth.
- Sketch a simple outline of the design lightly with a pencil on the surface.
- Place nails along the outline at steady intervals and set them firmly with a hammer until they hold.
- Wrap colorful thread around the nails following the drawn path, finishing by tying small knots and tucking ends beneath nearby wraps.
Dried flowers displayed between glass panes
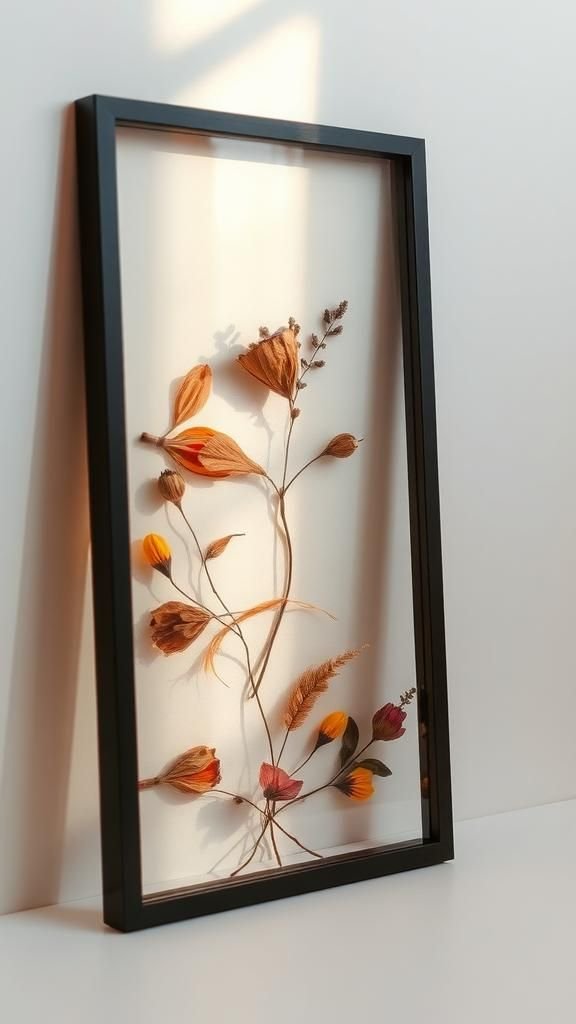
There is an intimate, fragile feeling when petals are seen against clear glass. Each petal becomes a tiny stained-glass fragment that catches light and throws delicate color onto the wall.
The paperlike scent lingers faintly in the room for a short while and the thin pressed shapes create soft, botanical silhouettes that shift with daylight. I often find myself pausing to look at veins, edges, and the little imperfections that tell a season.
When hung near a window the whole piece becomes a quiet, living map of memory.
Steps
- Gather fresh blooms and lay them flat between sheets of absorbent paper within a heavy book to dry until they feel crisp.
- Arrange the dried flowers on one pane of a double-frame so the composition balances across the glass.
- Place the second pane over the arrangement and close the frame, then secure with small clips or the frame’s fasteners.
- Hang the framed glass where backlighting will let the petals glow and form faint colored shadows.
Embroidered hoop portraits with textured thread
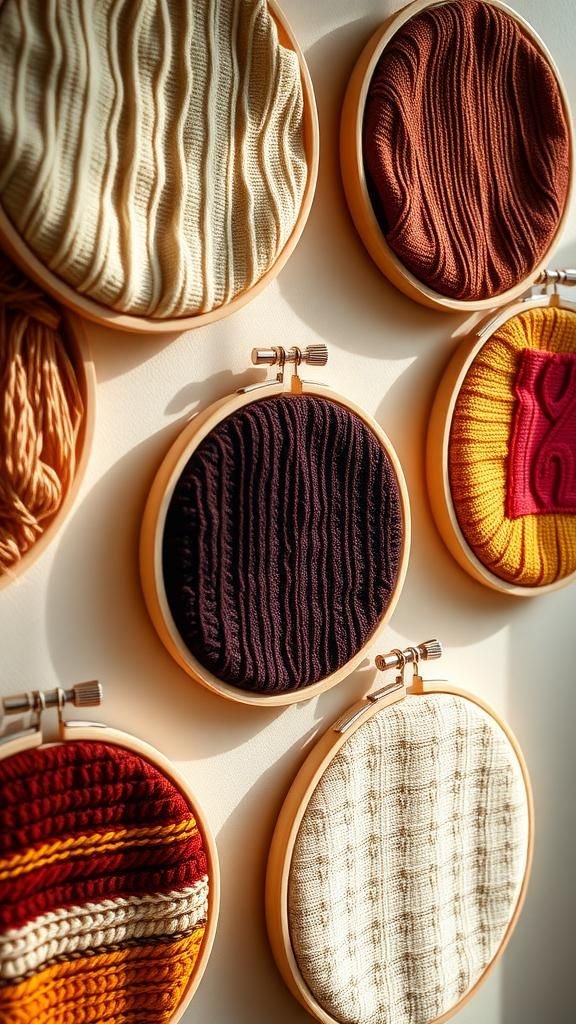
Needlework has a slow cadence that feels like a quiet conversation. The round hoop contains a tiny world of stitches where threads create ridges and valleys that catch light in different ways.
I often find the tactile surface comforting to touch, the raised stitches casting micro shadows that change with the angle of a lamp. Color choices can be playful or muted, and small imperfections add character rather than detracting.
Hung in a cluster, the hoops read like a gallery of intimate moments, each one holding a little pattern of time and attention.
Steps
- Stretch a piece of fabric into an embroidery hoop until it sits smooth and steady.
- Trace a simple portrait or motif onto the fabric with a light pencil line to guide placement.
- Work a few embroidery stitches such as satin and backstitch to build up texture and form across the motif.
- Tidy ends by slipping them beneath nearby stitches and finish the back for a neat appearance before hanging.
Macramé plant hanger turned wall tapestry
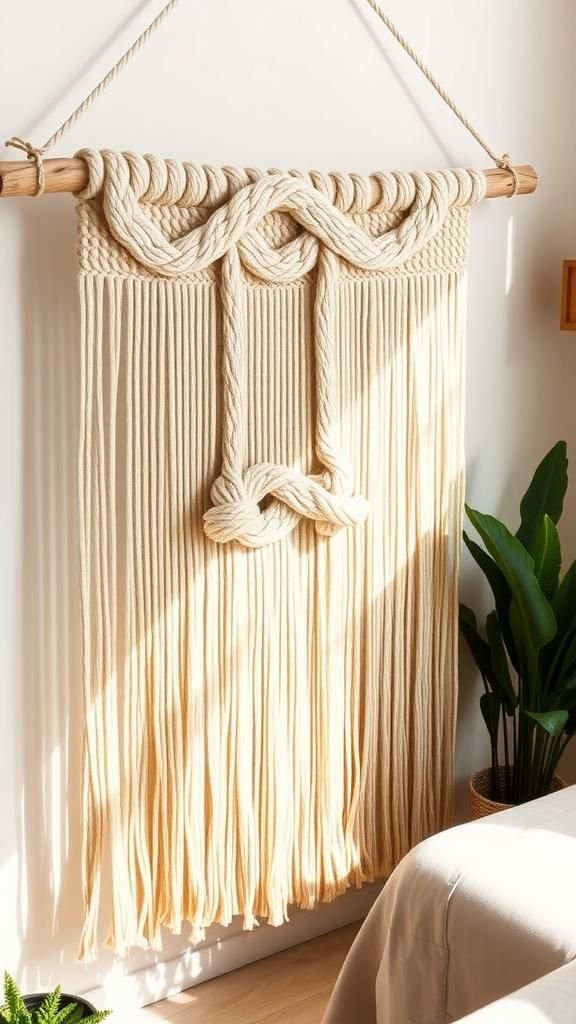
Thick rope knotted in repeating patterns brings a cozy, bohemian rhythm to a room. The knots form ladders and loops that move slightly with the air, giving the wall a living, breathing quality.
Rope has a warm, fibrous scent and the soft matte of natural fiber complements woven fabrics nearby. I like how the negative spaces between knots create geometry that changes when viewed from different angles.
A small plant nestled within a pocket adds a burst of green, but even without greenery the macramé reads as a sculptural presence.
Steps
- Choose several lengths of natural rope and suspend them from a sturdy dowel or reclaimed branch secured to the wall.
- Form a series of square knots and alternating knot patterns across pairs of cords to create a repeating texture.
- Continue knotting down the cords until the piece reaches the desired length and balance.
- Finish by tying a secure knot at the base and trimming any uneven tails before hanging the tapestry.
Washi tape geometric mural for renters
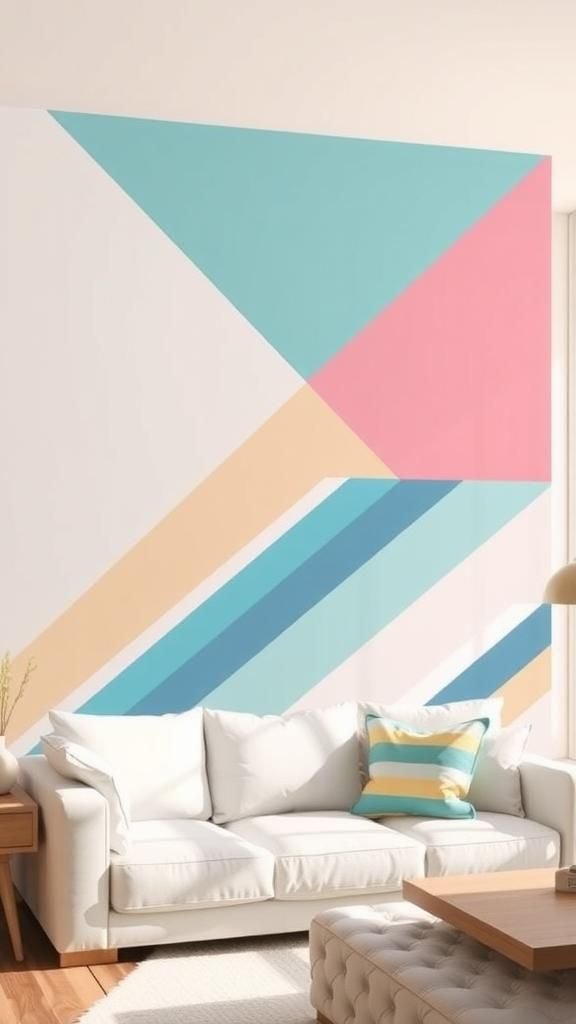
Washi tape brings instant color and crisp lines without the permanence of paint, and that removable quality feels freeing for short-term spaces. The paper surface is slightly matte, which helps colors read true under soft light, and the edges lift gently when peeled, leaving the wall intact.
I enjoy the way simple strips can create complex shapes when layered and how the pattern changes with vantage point. There is a playful, graphic energy to a series of intersecting lines that reads modern and cheerful without heavy commitment.
Steps
- Choose a harmonious selection of washi tapes in complementary colors and textures and lay them out for reference.
- Mark a loose grid or guideline with a light pencil where the main geometric lines will fall.
- Place tape strips along the pencil marks, smoothing edges gently with fingers to ensure even adhesion.
- Build up the mural by layering parallel and intersecting strips until the composition feels balanced across the wall.
Layered fabric and yarn tactile collage panel
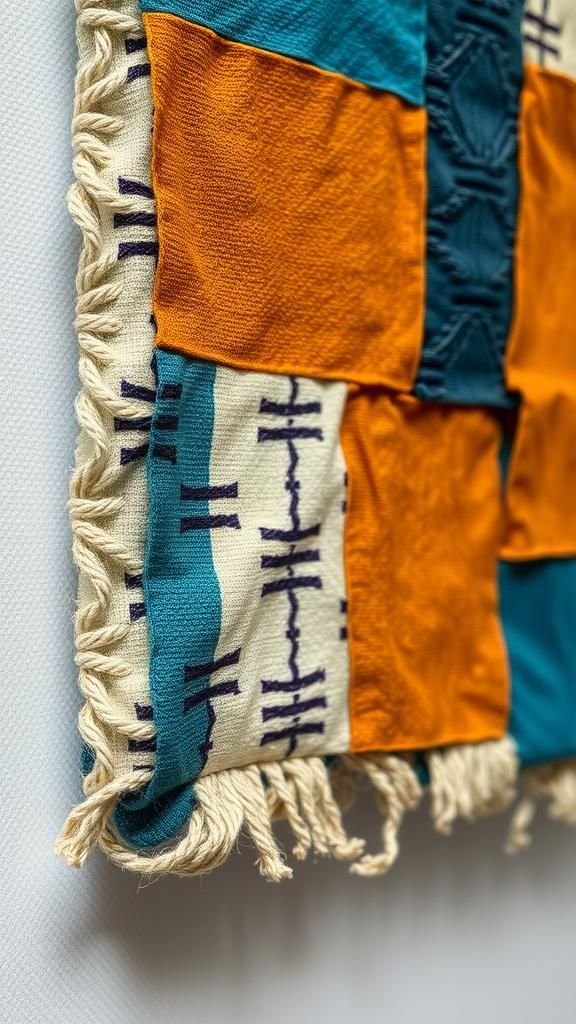
A collage of fabrics and yarn feels like a quilted memory, full of soft textures and gentle volume. Different weaves sit next to each other—silky rayon, nubby wool, smooth linen—and that contrast is both visible and tactile.
Thicker yarns create raised ridges that invite a fingertip to trace along them, while frisks of frayed edge add an impermanent, lived-in look. The overall surface reads like a small landscape of textiles, and there is a comfort in the color transitions and the way loose threads catch light at the edges.
Steps
- Select a sturdy backing such as canvas or heavy linen and arrange scraps of fabric and lengths of yarn across it until a pleasing composition appears.
- Secure fabric layers at discrete points with running stitches or small staples along hidden seams so textures overlap neatly.
- Weave or loop yarn through the layered fabrics to add raised lines and pockets of texture.
- Finish edges by tucking raw edges under border fabric or by stitching a neat perimeter to frame the collage.
Shadow box of found tiny keepsakes

Tiny objects gathered over a season tell a particular kind of story when placed in a shallow box and given space to breathe. There is a museum quality in the way light falls across small metal charms, a worn ticket stub, or a smooth stone picked up on a beach.
The depth of the shadow box allows those items to float visually, and the play of shadow and light becomes part of the composition. I often catch myself reading the arrangement like a map of recent afternoons and travels.
Steps
- Choose a shallow shadow box with a neutral backing that allows small objects to sit without crowding one another.
- Lay out keepsakes on the backing to test positions until the negative space feels balanced around each item.
- Secure items discreetly with small dots of museum putty or tiny pin supports so they remain stable.
- Close the box and hang it at eye level where the contained objects cast subtle shadows and invite close viewing.
Miniature framed collage gallery wall

Small framed collages arranged together read like a single, curated landscape. Paper scraps, snippets of printed text, and tiny fabric swatches create pockets of color that feel intimate in scale.
The frames add rhythm and repetition, and when hung in a thoughtful cluster the wall starts to feel like a map of small moments. I enjoy how each tiny piece invites close inspection, revealing layered edges and whispers of past projects.
The overall effect is lively without overwhelming the room because each element occupies a modest, approachable size.
Steps
- Collect small frames and create mini collages on sturdy paper using cut scraps of patterned paper, ephemera, and fabric bits.
- Layer scraps to build depth, pressing down edges so pieces sit flat within the frame window.
- Place each finished collage in its frame and close securely, cleaning the glass for a clear view.
- Arrange the framed pieces on the floor first to test a composition, then hang them together as a tight cluster on the wall.
Typography cluster with mixed letter styles

A wall planted with letters feels playful and a touch theatrical. Different typefaces and materials—pressed metal, wooden blocks, chipboard—speak in their own voices and create a lively dialog when clustered.
The physicality of letterforms invites interaction; letters cast thin shadows and the negative spaces inside curves change with breathing room. I often mix a handwritten script tile with a bold block letter to create contrast.
It becomes a tactile wordscape that reads like a personal headline for the room, clever without needing to be loud.
Steps
- Gather an assortment of letters in contrasting materials and styles and lay them out on the floor to test visual rhythm.
- Select a short word or phrase and arrange the letters so they balance in scale and spacing.
- Secure each letter to the wall with small adhesive strips or picture hanging putty that allows for repositioning.
- Step back and adjust until the overall cluster feels playful and well spaced across the chosen wall area.
Book page butterflies creating a paper migration

Thin book pages transformed into fluttering shapes bring movement to a still wall. The crinkly paper has a soft ivory tone and the print peeking through adds a vintage whisper.
When arranged starting from a corner and fanning outward the swarm reads like a breeze frozen in time. Light touches the folded center and casts tiny shadows from the wings, creating a delicate relief.
It feels like a small literary wind caught mid-flight and the whole arrangement carries an old-world charm that is both delicate and spirited.
Steps
- Select pages from old books or prints and create winged silhouettes with a craft punch or a stencil for consistent shapes.
- Form a slight central pinch in each paper silhouette to suggest a body and give the wings a gentle lift.
- Arrange the paper forms on the wall in a flowing pattern and secure them with removable adhesive tabs so they appear to hover.
- Vary angles and spacing slightly to enhance the sense of motion across the wall surface.
Foil embossing panels with botanical textures
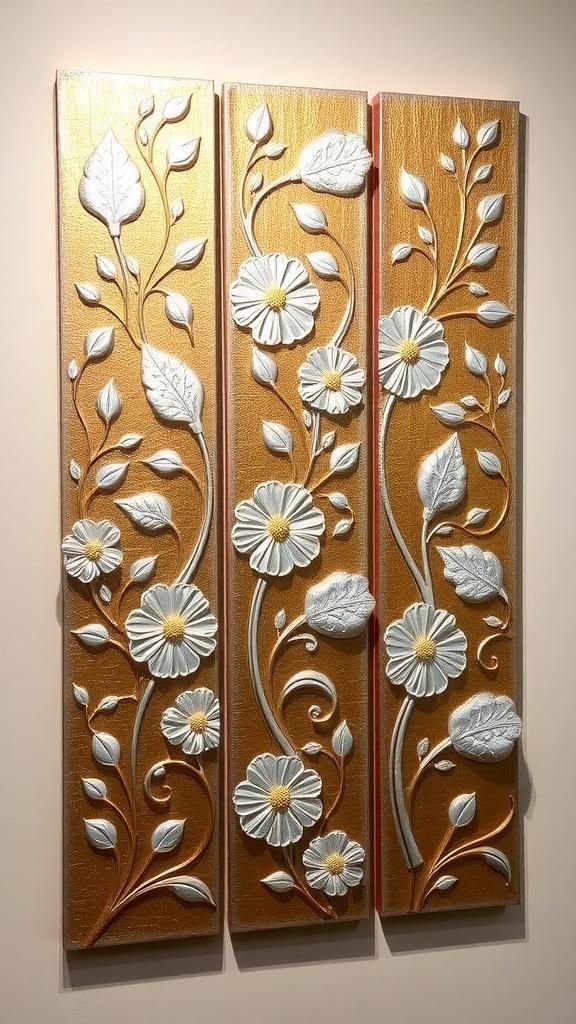
Thin metal sheets embossed with botanical patterns gleam softly and pick up ambient light in shimmering bands. The process of creating raised veins and petals leaves a tactile, sculptural surface that is cool to the touch.
I am drawn to how light plays across ridges, emphasizing highlights and shadows and giving the metal a sense of depth that changes across the day. The metallic finish reads modern yet organic, and when grouped the panels form a quiet orchard of reflective motifs that feel both crafted and elemental.
Steps
- Cut or select metal leaf or thin foil panels sized to the intended frame or backing.
- Lay botanical motifs over the metal and impress the outlines with an embossing stylus or rounded tool on a soft pad.
- Work slowly to build up raised veins and textures, lifting sections gently to enhance relief.
- Mount the embossed panels in shallow frames or onto dark backing to emphasize highlights and hang them in a simple grid.
Sunburst mosaic mirror with reclaimed tile bits
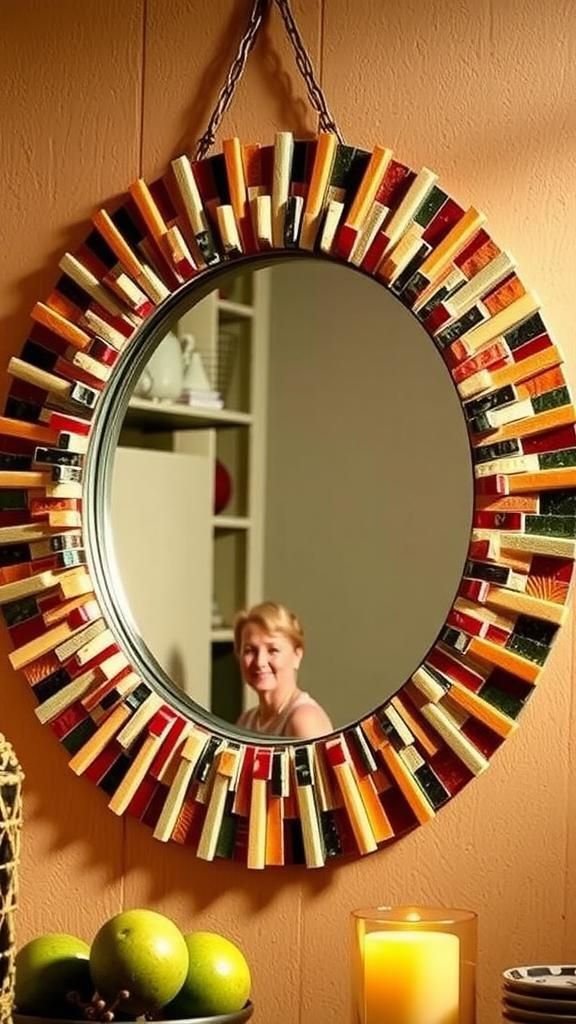
A circular mirror surrounded by tiny tile fragments becomes a radiant accent that catches light like a handcrafted halo. The tiles vary in glaze and thickness, creating a lively surface where glossy sheen meets matte clay.
Colors can be warm earthen tones or bright ceramics, and the grout between pieces adds a drawn line that ties the composition together. I find the ritual of placing each shard calming and the resulting shimmer changes with movement, reflecting room lights and shifting into a compact, gleaming spectacle.
Steps
- Select a mirror for the center and gather an assortment of reclaimed tile shards in complementary colors and finishes.
- Arrange tile fragments around the mirror edge in a radial pattern until the sunburst shape feels balanced.
- Secure tiles to a backing with a tile adhesive and once set fill the gaps with grout to unify the surface.
- Clean grout haze from the tiles and mount the completed mosaic mirror on the wall with sturdy hardware.
Photo transfer printed onto weathered wood planks
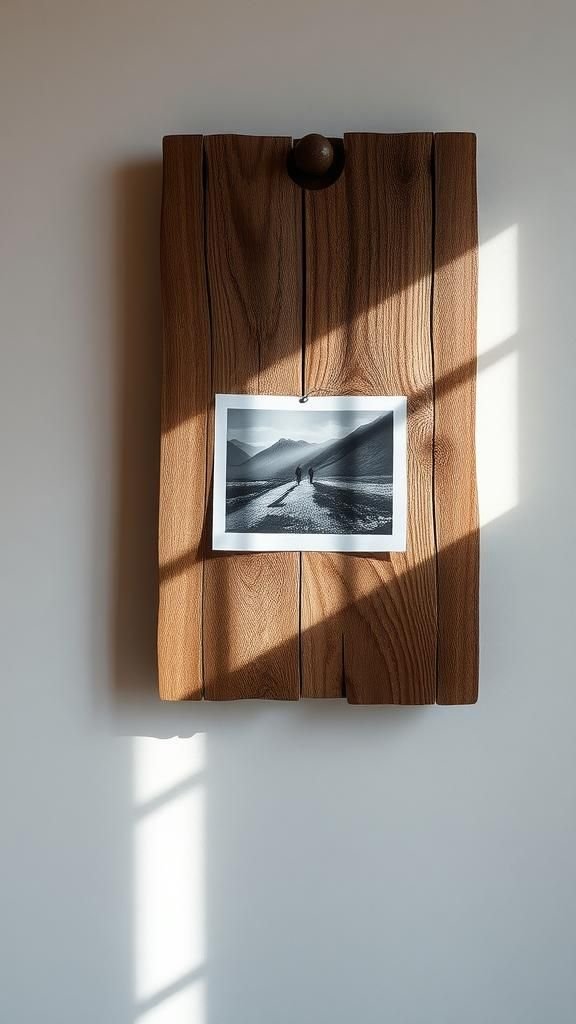
A photograph melded with wood grain looks like memory translated into material. The natural lines of the plank show through faintly, giving the image a lived-in softness and a tactile quality that feels archival.
Edges of the image fade into the wood, and small knots and fissures become part of the story. When hung in a place that catches light at an oblique angle the transferred ink highlights grain peaks and lives within the wood’s texture.
The whole object reads like a weathered photograph carried from another life.
Steps
- Choose a high-contrast photo and print it on transfer paper sized to a reclaimed wood plank with a gently textured surface.
- Apply a thin coating of transfer medium over the printed side and press the paper firmly onto the wood, smoothing out air pockets.
- Allow the transfer to set, then moisten the paper and gently rub away the backing to reveal the image embedded in the grain.
- Seal the finished surface with a clear varnish if a slight sheen and extra protection are desired before hanging.
Minimalist wire constellation map sculpture

Thin wire traced into constellations reads like a map of stories drawn with lightness. The linear forms cast crisp shadows that complement the slender silhouette of the wire itself, creating a double drawing on wall and shadow.
The metallic gleam is subtle, and the negative spaces between lines feel open and serene. I enjoy the almost cartographic quality of a few well-placed connections that imply a broader pattern.
Placed above a small reading nook it feels quiet and contemplative, like a night sky simplified into an elegant sketch.
Steps
- Select a lightweight wire and sketch a simplified constellation layout on paper to serve as a guide.
- Bend and shape the wire along the drawn lines and connect intersections by winding ends around one another for secure joins.
- Mount small pins or nails into the wall at key points and loop the wire structure onto them so it appears lifted off the surface.
- Adjust the wire tension to refine line curves and the shadow pattern cast on the wall beneath.
Paper relief topography in layered tones
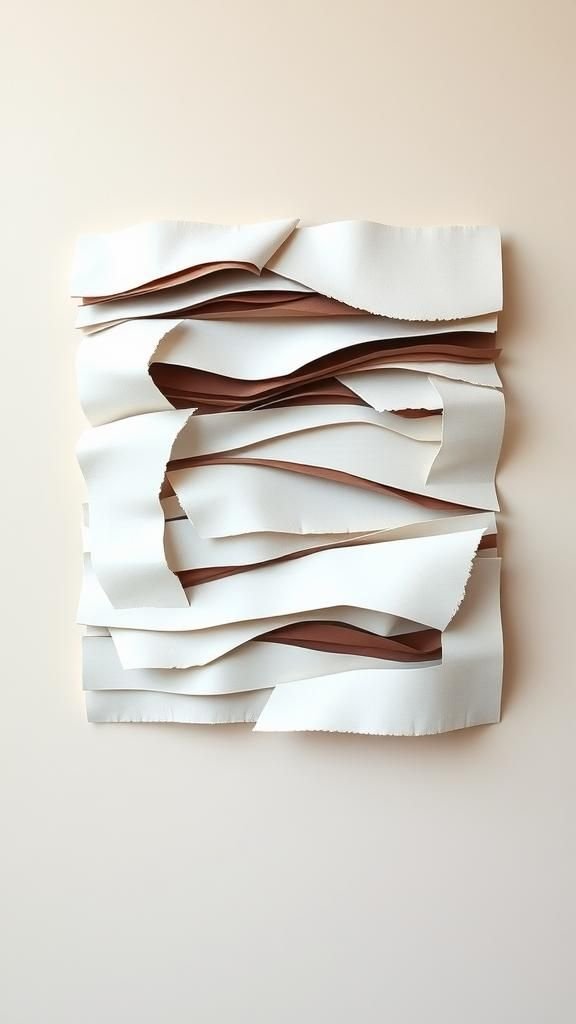
Torn paper layered into soft ridges reads like a topographic map rendered by hand. The edges of each torn sheet catch light differently, and the staggered heights create gentle valleys and peaks that invite a fingertip to trace contours.
Paper texture ranges from smooth to deckled, and the subtle play of shadow between layers gives a sense of landscape without literal representation. I find this approach calming because it balances restraint with tactile interest, and when hung low it seems to invite a slower viewing posture that feels restful.
Steps
- Choose papers of different weights and tones and tear them into organic strips to suggest contour lines.
- Layer the strips onto a backing board from darkest to lightest, staggering edges to build up gentle relief.
- Secure select contact points with small dots of adhesive so layers remain settled while preserving edge lift.
- Frame or mount the finished relief so the layered edges can cast defined shadows when lit from the side.
Leather panels embossed with botanical stamps
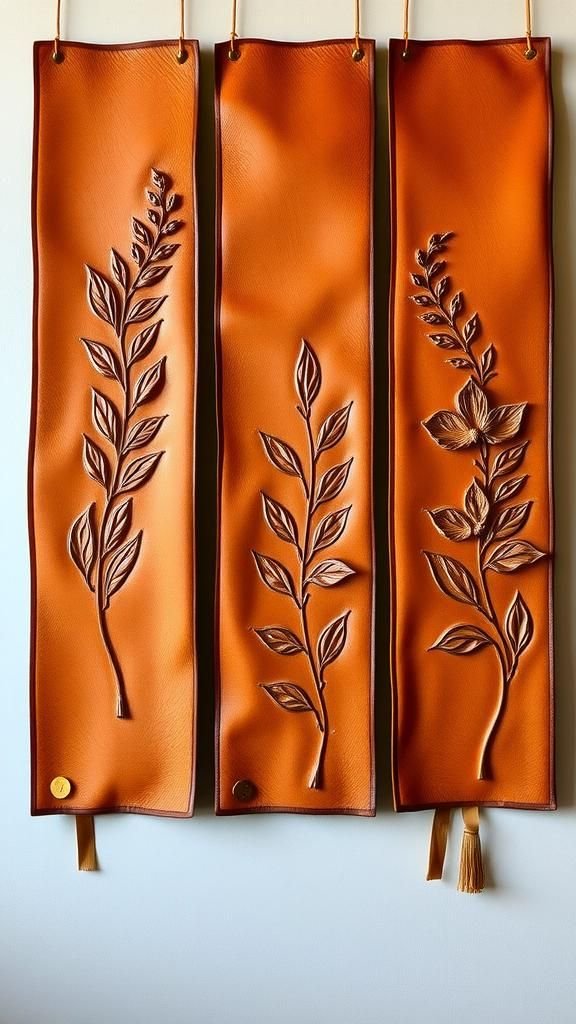
Leather brings a warm, tactile richness to a wall, and when botanical motifs are impressed into it the result feels grounded and refined. The surface holds subtle variations in color that deepen with touch, and the impressed lines form crisp shadows that catch low light.
There is the faint, natural scent of leather and a satisfying firmness under the palm. Hung in a series, the panels read like a small grove of rendered leaves, each one carrying a faint sheen and a calm, organic rhythm that complements wood and stone elements in a room.
Steps
- Soak vegetable-tanned leather lightly until it is pliable and lay it over a soft backing such as a stack of felt.
- Position botanical stamps or carved tools onto the leather and press firmly with a rounded tool to impress veins and shapes.
- Allow the leather to dry and deepen in tone, then apply a light leather conditioner to bring out the patina.
- Mount the panels onto framed boards so that the embossed designs read clearly against a contrasting backing.
Tufted wall hanging with plush, shaggy loops
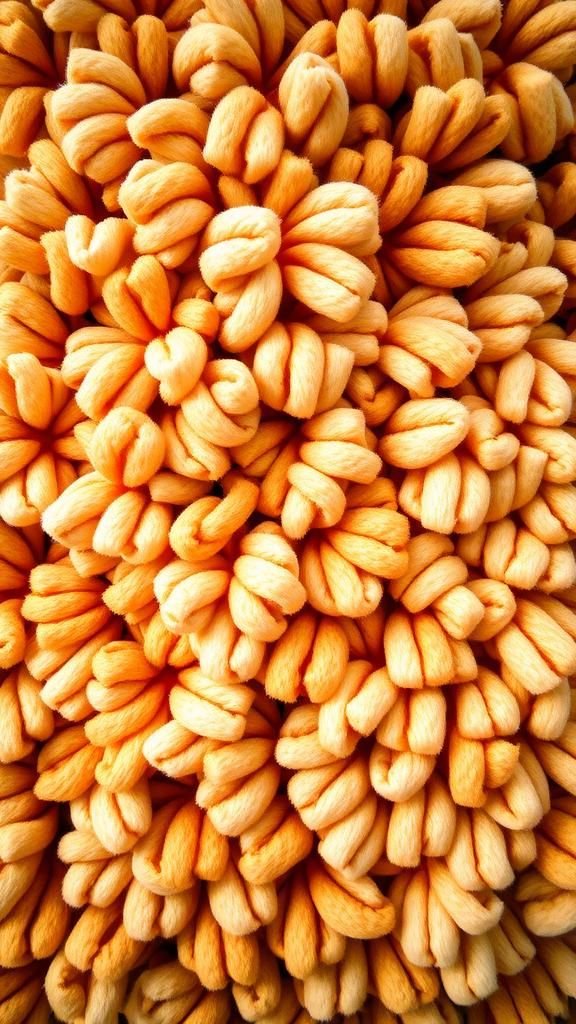
A tufted panel turns a wall into an inviting, tactile surface reminiscent of a plush rug. The loops and shags have a softness that reads as comfort and warmth, and light grazes the surface leaving tiny highlights.
The density of pile creates zones of depth that feel luxurious when brushed casually by a hand. Color can be restrained or exuberant, and the overall presence of the piece anchors the room with a cozy, textile-centric energy.
It becomes a place one wants to lean toward rather than away from.
Steps
- Prepare a sturdy backing and mark a rough composition for the tufted areas to guide placement.
- Work yarn or roving through the backing with a handheld tufting tool or by looping through with a needle to form dense rows of loops.
- Trim select loops slightly to vary pile heights and create a tactile pattern while leaving other loops tall for plush texture.
- Secure the back with a fabric backing and attach hanging hardware to display the panel on the wall.
Woven textile panel in tonal color blocks
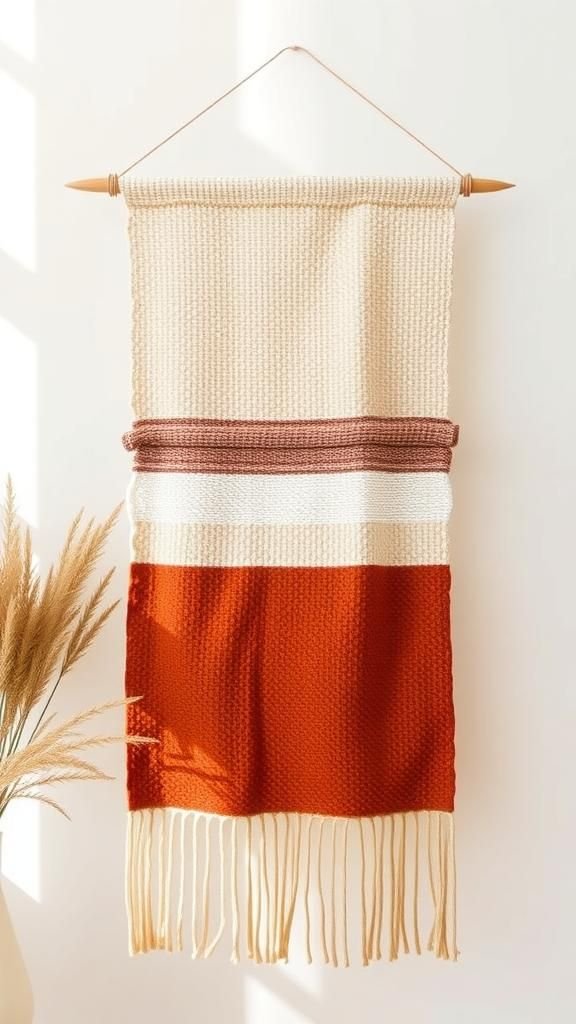
A woven panel made from hand-dyed yarn offers a subtle play of color and texture. The warp lines give structure while the weft threads create soft bands that shift from one hue to the next.
There is a comforting slow rhythm to the weave where colors graduate and small irregularities add personality. The finished fabric sits slightly away from the wall, allowing a delicate shadow that enhances depth.
I like the way a woven surface feels simultaneously rustic and refined, and how it softens a room with quiet, artisanal presence.
Steps
- Stretch warp threads on a simple frame loom and plan color zones for the weft to create tonal blocks.
- Weave weft yarn across the warp, alternating colors and textures to build subtle gradients and raised areas.
- Finish the panel by securing the warp ends with tidy knots and adding a simple dowel for hanging.
- Hang the piece so it can float slightly off the wall and cast soft, linear shadows.
Ink wash abstracts on heavy rag paper

Ink on rag paper creates organic pools and feathered edges that read like atmospheric sketches. The paper takes the pigment in a way that produces soft halos and subtle granulation, and the smell of ink has a focused, studio-fresh quality.
I appreciate the unpredictable blooms where pigment meets water, and how those accidental shapes can become the heart of a composition. Framed without glass, the pieces have a raw, immediate presence that invites quiet looking and pairs well with raw wood frames and soft textiles in a room.
Steps
- Select heavy rag paper and a few tones of ink for a restrained palette.
- Wet the paper lightly then apply ink washes, allowing pools and gradients to form naturally as the liquid settles.
- Tilt or rotate the sheet to influence the flow and introduce subtle blooms and edges.
- Allow the ink to dry flat, then mat and frame the work without glass to preserve texture.
Pressed herb and leaf framed study series

Green herbs and leaves pressed flat reveal a lacework of veins and a thin, papery texture that feels botanical and intimate. The aroma of a recently pressed sprig can be faintly herbal for a while, and the flattened shapes create refined silhouettes against cream paper.
Grouped in a small series, the leaves read like a scientific study and offer a quiet nod to the seasons. I like that each specimen retains an echo of place and time, and that the arrangement invites slow looking and small discoveries at close range.
Steps
- Collect fresh herb sprigs and leaves and place them between absorbent sheets, then set them under weight until fully dry and flat.
- Arrange the pressed specimens on clean archival paper to create balanced compositions that highlight veins and shapes.
- Secure the paper into shallow frames with glass so the botanical forms read clearly against the backing.
- Label each frame with a small handwritten note for a curated study feel before hanging in a linear series.
Chalkboard quote panel with soft-wipe finish
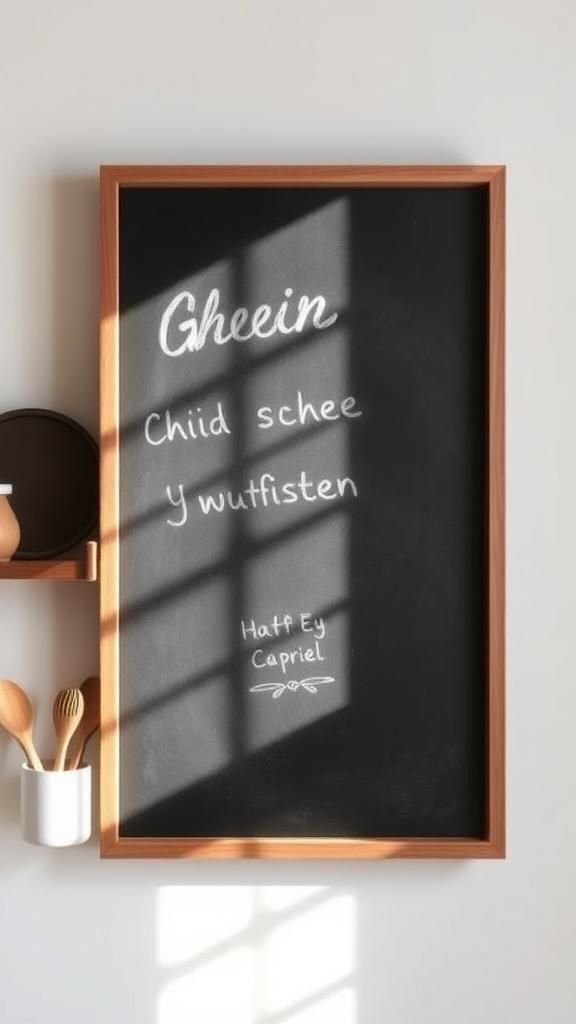
A matte chalkboard panel brings a transient charm to a wall where lettering can be refreshed often. The surface takes chalk with a velvety hold and the strokes leave a slight dust halo that feels homey.
I enjoy the ritual of adding a new line now and then and watching how the chalk crumb settles into micro texture. Paired with a simple frame the panel adds a handmade quality and a place for notes, quotes, or quick sketches that change with mood.
The overall feel is casual, welcoming, and a bit conversational.
Steps
- Select a smooth chalkboard panel sized to the intended wall space and mount it in a simple frame.
- Condition the surface by rubbing a chalk stick across it and wiping gently to create an even base.
- Write a short quote or doodle with chalk markers or traditional chalk, varying line weight for interest.
- Wipe or refresh the surface as desired to rotate messages and keep the panel lively.