No Sew Fleece Blanket Tutorials make warmth feel immediate and personal, from braided borders to ribbon-laced edges. I discovered no sew fleece blanket tutorials during a snowed-in weekend, when a quick tie blanket became a surprise keepsake for my sister.
Table of Contents
That first no sew blanket still anchors our movie nights and reminds me how simple comfort can be.
These No Sew Fleece Blanket Tutorials gather cozy finishes, color pairings, and playful textures without threading a needle. Each no-sew fleece blanket tutorial leans into plush layers, easy gifting ideas, and display-friendly styles that look charming on sofas, at tailgates, or tucked into a basket near the fire.
Classic Double-Layer Fringe Tie For Cozy Evenings
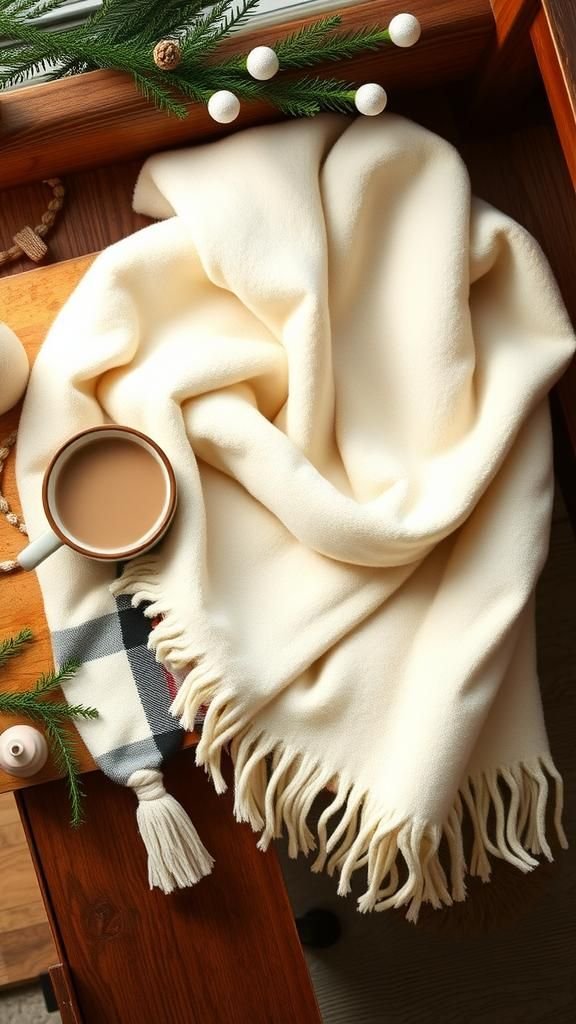
The familiar fringe design brings instant comfort with two layers of fleece framed by soft, knotted edges. Solid-and-print pairings feel lively, while tone-on-tone duos give a calming look.
Plush anti-pill fleece creates a smooth hand and drapes well over sofas or foot-of-bed layers. Checks, plaids, botanicals, or galaxy prints meet neutrals for balance.
A rolled throw with a leather tag or twine and a sprig of greenery turns into a heartfelt gift. On winter shelves, the fringe line adds texture, and a basket stack beside a reading chair makes an inviting display.
Steps
- Layer two equal fleece pieces with right sides facing out and square the edges.
- Cut a 5-inch square from each corner as a guide.
- Slice fringe along all sides, matching depth and spacing.
- Tie each top-and-bottom fringe pair into double knots around the perimeter.
Braided-Edge No-Sew Throw With Luxe Finish

A braided perimeter lends a refined look that reads like boutique bedding while keeping the plush ease of fleece. The braid creates a rounded cord effect that frames patterns such as buffalo check, marled heather, or watercolor florals.
Two contrasting layers heighten the woven detail, and a single-color duo feels understated and calm. This style lands beautifully on a chaise or guest bed, where the edge becomes the focal accent.
Gifting shines with a kraft-band label and a small wax seal. A ladder rack display lets the braid show fully, catching light and shadow along every curve.
Steps
- Stack two fleece layers and trim to matching size.
- Cut a border of slits and fringe around the edges.
- Snip small openings near each fringe base.
- Loop and braid fringes through neighboring slits to form a continuous braided edge.
Ribbon-Laced Perimeter For Playful Contrast

Satin or grosgrain ribbon winds around the border like a delicate frame, bringing sheen against the matte pile of fleece. Seasonal prints pair well with metallic ribbon, while soft pastels glow beside ivory or blush satin.
The laced detail echoes shoelace vibes for sporty spaces and brings whimsy to kids’ rooms. Lightweight throw sizes nest into gift boxes with tissue and a stamped card.
On shelves, ribbon peeks through stacked folds, delivering a hint of shine. The materials palette invites bold color stories, from crimson ribbon on black plaid to mint on snowy white.
Steps
- Cut matching fleece layers and lay them flat with right sides out.
- Punch or cut evenly spaced small holes along the perimeter through both layers.
- Thread satin or grosgrain ribbon through the holes in a lacing pattern.
- Tie neat bows at corners or finish with flat knots and trim ribbon ends.
Pom-Pom Trim Throw With Cheerful Texture

Pom-pom garland adds playful movement around a plush fleece field, turning a simple throw into a statement. Bold primaries pop on monochrome backdrops, while candy pastels create nursery sweetness.
The fuzzy or felted trim softens modern geometric prints and heightens cozy farmhouse vibes. A stack with alternating trims looks delightful in a basket near a fireplace, and a ribbon-tied bundle converts instantly into a birthday surprise.
Micro pom trims create a delicate outline, whereas jumbo strands feel exuberant. The result reads festive on movie nights, kids’ sleepovers, and porch lounging during crisp mornings.
Steps
- Cut a single or double fleece layer to the desired size.
- Measure and cut pom-pom trim to match each side.
- Bond the trim to the fleece edge with fabric adhesive or low-temp hot glue.
- Weight the perimeter while curing, then fluff the pom accents.
Scalloped Edge With Hidden Knotted Fringe

Soft scallops bring a romantic finish, while concealed knots tuck inside slits for a tidy silhouette. The rounded shapes complement florals, cottage checks, and pastel ombrés, and they soften bold stripes with a gentle rhythm.
Anti-pill fleece supports those smooth curves and keeps edges plush. Wrapped with lace ribbon and a pressed flower tag, it suits showers or anniversaries.
On a bed, the scallops cascade like waves; on a sofa, the repeated arcs catch ambient light. Neutral sand, clay, and fog tones feel serene; jewel tones produce a richer, gallery-worthy presence.
Steps
- Trace a scalloped border on stacked fleece layers and cut the shape.
- Cut interior slits just inside the scallop line.
- Create short fringe behind the scallops.
- Tie knot pairs through the slits so knots hide within the curves.
Stadium Blanket With Removable Carry Strap

Game-day spirit meets cozy convenience in a fleece throw built to roll small and travel light. Team colors, mascot prints, or bold stripes add personality, while a faux-leather or webbing strap brings utility and style.
The plush surface warms aluminum bleachers and picnic benches without fuss. Displayed at entryway hooks, the rolled bundle looks ready for spontaneous plans.
Gift presentation lands easily with a tag shaped like a ticket or pennant. Bright colorblocking coordinates with scarves and beanies, and a weathered canvas strap introduces a rugged counterpoint to the buttery texture of fleece.
Steps
- Cut fleece to a portable stadium size and finish the edges as preferred.
- Create a simple strap from webbing, faux leather, or canvas.
- Add snaps, hook-and-loop tape, or buckles to close the strap around the roll.
- Secure a small loop on the strap for hanging.
Hooded Fleece Blanket Cape For Reading Nooks

A cozy hood turns a throw into a cocoon for chilly mornings and slow evenings. Plush fleece pairs with sherpa accents or smooth microfleece for contrast.
Solid exteriors with patterned hoods feel playful, while monochrome sets stay minimal. Movie nights, camping trips, and balcony lounging gain an extra layer of comfort with that gentle head cover.
Presented with a bookmark and herbal tea sachet, it becomes a thoughtful, hygge-forward gift. On a coat hook, the hood drapes like a soft cowl, inviting a quick wrap between chapters or during a quiet break.
Steps
- Cut a large rectangle for the body and a smaller rectangle for the hood.
- Fold the hood piece and bond the curved back seam with fabric adhesive.
- Mark the center of the blanket’s long side and affix the hood along that line.
- Let adhesive cure fully before wearing.
Pocket Throw For Hands, Snacks, And Remotes

Front pockets transform a fleece throw into a lounge companion, keeping fingertips warm and small items close. Oversized patch pockets match bold prints or contrast with solids for a graphic note.
A cozy palette of amber, forest, and denim blue supports cabin style, while blush and fog gray suit modern minimal rooms. A wrapped bundle with a chocolate bar tucked in the pocket becomes a sweet gift.
On an ottoman, the pockets face up like a friendly invitation. Texture mixing with corduroy patches or faux sherpa trims heightens the tactile appeal without straying from the plush foundation.
Steps
- Cut the main blanket to size and finish the perimeter.
- Cut two pocket rectangles from matching or contrasting fleece.
- Bond three sides of each pocket to the blanket with fabric adhesive, leaving the top open.
- Press lightly with a weight and allow to cure.
Color-Blocked Panels With Bold Graphic Lines

Large sections in complementary hues create an artful presence that works beautifully in modern spaces. Think mustard beside slate, blush meeting rust, or teal aligning with cream.
Fleece panels meet in tidy seams that read like stripes, yet the surface remains plush and inviting. The geometry brings order to eclectic rooms and energy to minimalist corners.
Gift-giving feels special when a swatch card shows the palette. Folded on a bench, the blocks display like a soft abstract painting, with edges that invite touch and a weight that settles easily over knees or shoulders.
Steps
- Cut multiple fleece panels in chosen colors to matching widths and lengths.
- Join panels by creating rows of matching fringe along edges.
- Tie fringe pairs to connect each seam securely.
- Finish outer perimeter with a complementary edge treatment.
Reversible Pattern-And-Solid Movie Night Throw

A lively print on one side and a soothing solid on the other deliver two moods in one piece. Woodland creatures, constellations, or mid-century motifs appear when the print side faces up; flip to the solid for a calmer look.
The double layer adds warmth without bulk and gives a pleasing weight over legs. Gift sets shine with a streaming gift card and popcorn tucked nearby.
Draped over an armchair, the reversible quality shows in a casual fold that reveals both sides, blending into seasonal decor with ease from autumn through spring.
Steps
- Cut equal rectangles of patterned and solid fleece.
- Square the edges and remove corner squares for fringe depth.
- Cut matching fringe around all sides through both layers.
- Tie fringe pairs into secure knots to finish.
Pet Snuggle Blanket With Chew-Friendly Edges

Pets love the cushy feel of fleece, and a low-profile edge reduces tempting loose strands. Paw-print patterns, bones, or simple heathers charm without overwhelming home style.
A slightly smaller size fits pet beds and crates, while still feeling generous for naps on sofas. Rolled with a little name tag, it becomes a sweet adoption-day or birthday present.
A stack near the door supports car rides and park outings. Earthy browns, charcoal, and olive hide fur well; teal or berry brightens corners.
The surface brushes clean easily, keeping the cozy zone fresh between washes.
Steps
- Cut a sturdy single or double layer to pet-friendly size.
- Create a narrow fringe or folded edge and bond with adhesive for a flatter border.
- Add a small fleece loop for hanging on a hook.
- Let cure before placing in a crate or bed.
Round Fleece Blanket With Looped Perimeter

A circular throw breaks away from rectangles and feels sculptural on the floor or sofa. The shape frames coffee tables and creates a playful reading spot for kids.
Looped edges add a bead-like outline that reads artisanal against smooth fleece. Solid colors highlight the outline, while marled or speckled prints introduce movement.
Gift presentation looks charming rolled into a spiral circle and tied through the center. On a wall hook, the drape becomes a soft disc, adding a textural art moment.
Soft lavender, sage, and sand feel gentle; black and cream appear graphic and bold.
Steps
- Cut a large circle from fleece using a string-and-marker guide.
- Punch small evenly spaced holes around the edge.
- Feed a long fleece strip through the holes to create continuous loops.
- Join strip ends with adhesive and tuck neatly.
Chevron-Edge Fleece With Graphic Zigzag Fringe
![]()
A zigzag perimeter adds a crisp, rhythmic finish that complements chevron prints or energizes plains. Alternating angles throw tiny shadows that emphasize the blanket’s outline.
High-contrast colors like black and white feel punchy; desert hues such as sand and clay look warm and grounded. The repeating points suit modern living rooms and teen spaces.
A kraft box with tissue and a geometric sticker turns it into a stylish gift. Layered over a bed quilt, the jagged border peeks out playfully, framing the foot of the bed with movement and texture.
Steps
- Mark a chevron guide around the blanket’s edges and cut along the pattern.
- Remove corner squares if tying a two-layer version.
- Slice fringe aligned to the zigzag points.
- Tie corresponding strands to finish the edge.
Holiday Throw With No-Sew Felt Appliqués

Seasonal shapes like stars, trees, snowflakes, or gingerbread figures bring festive flair to soft fleece in jewel tones or winter whites. Felt appliqués add a matte, cozy contrast that photographs beautifully under twinkle lights.
A velvet ribbon bow and a gift tag complete a ready-to-share bundle. On a mantel ladder, the motifs peek between rungs, adding quiet charm.
Deep green, cranberry, and midnight pair with metallic accents around the room. The result feels celebratory without losing everyday usability once the season winds down, especially when motifs stay simple and timeless.
Steps
- Cut a single or double-layer fleece base in a rich seasonal color.
- Cut felt shapes for appliqués from contrasting sheets.
- Bond shapes to the fleece with fusible web or fabric adhesive.
- Weight and allow to set before folding or gifting.
Picnic Blanket With Water-Resistant Backing

A fleece front keeps picnics cozy, while a water-resistant back protects against damp grass. Bold gingham or citrus brights feel sunny and carefree; muted olive and cream suit calm park afternoons.
The double-sided approach keeps spills manageable and grounds outdoor seating with a soft landing. A carry strap or simple roll tie stows neatly in a tote or trunk.
Presented with a small picnic checklist card and napkins, it becomes a thoughtful outdoor bundle. On a porch rail, the backing peeks out slightly, adding a hint of function-chic style.
Steps
- Cut fleece and a vinyl tablecloth or waterproof fabric to matching size.
- Bond layers around the perimeter with strong double-sided tape or adhesive.
- Reinforce corners with extra adhesive patches.
- Add a strap or ties for transport and let cure.
Tassel-Corner Throw With Boho Flair

Yarn tassels suspended from each corner bring motion and a touch of boho personality. The main field of fleece stays clean and plush, while the tassels introduce playful dimension.
Monochrome schemes feel refined with tonal tassels; color-pop tassels spark joy on neutrals. This style sits well across a bed’s footboard or over a woven chair, where corners hang freely.
Wrapped with a braided cord and a small charm, it makes a chic housewarming gift. In a stack, tassels peek out like bookmarks, hinting at the personality inside each layer.
Steps
- Cut fleece to the desired size and finish the perimeter.
- Create four tassels from yarn in matching or contrasting colors.
- Tie or clip tassels onto reinforced corner loops.
- Trim tassel ends and steam lightly to settle strands.
Lattice-Woven Border For Subtle Dimension

A narrow band of interlaced strips near the edge forms a delicate lattice, giving the throw a hand-finished vibe. The technique shines with two-tone layers, where the weave flashes the undercolor in a rhythmic pattern.
Soft heathers meet saturated solids for balance, and minimalist rooms appreciate the quiet geometry. Gift boxes with a peek window let the lattice show before opening.
On a sofa back, the woven band aligns neatly and draws the eye across the width. A neutral field with a blush or sky-blue lattice adds a gentle accent without overpowering the room.
Steps
- Cut a channel of slits parallel to the edge on the top layer only.
- Slice narrow fleece strips from a contrasting color.
- Weave strips through the slits to form a lattice pattern.
- Secure strip ends on the underside with adhesive.
Button-Tab Edge With Cozy Cabin Character

Fleece tabs paired with chunky buttons bring a homespun look without threading a needle. Wood-look or horn buttons amplify cabin energy; sleek resin options tip modern.
The tabs fold over the edge like little closures, framing plaids, stripes, or speckles with tactile detail. Presented with a tiny button card, it becomes a charming maker-style gift.
Hung over a crate or bench, the tabs create a rhythmic edge that invites closer inspection. Color stories range from evergreen and charcoal to oatmeal and indigo, each gaining personality through the chosen button style.
Steps
- Cut small fleece tabs and space them along the blanket’s perimeter.
- Adhere buttons to the tabs or select no-sew snap buttons.
- Wrap tabs over the edge and fasten around the buttons.
- Secure tab bases with fabric adhesive and let cure.
Monogram Throw With No-Sew Lettering

Personal initials or names elevate a simple fleece into a keepsake. Crisp felt letters in bold fonts read clearly on solids and grounded prints.
Shadow effects appear when letters sit atop a slightly darker underlay. Gifting becomes effortless for graduations, dorm rooms, and baby name reveals.
Folded on a dresser or tucked into a gift bag, the monogram peeks out like a signature. Classic palettes such as navy with white or camel with black keep the look timeless, while hot pink on gray or lime on navy brings playful edge.
Steps
- Cut the blanket base to size and smooth it flat.
- Create letters from felt or flocked sheets using stencils.
- Bond letters with fusible web or strong fabric adhesive.
- Weight the area and allow to cure before folding.
Fringe-In-Channel Edge For Clean Lines

A recessed channel hides knot bulk and creates a neat, tailored outline while still reading soft and plush. The fringe nests within a slot near the perimeter, giving subtle movement without flaring outward.
This approach pairs well with minimalist interiors and emphasizes material quality. Heathered gray, oatmeal, and stone feel elevated; emerald or cobalt adds a crisp gallery note.
A belly band label suits gift-giving, allowing the quiet edge detail to shine. Draped over a bench, the channel draws a thin shadow line, reinforcing a modern, intentional silhouette in any room.
Steps
- Cut two matching fleece layers and mark a channel line inside the edge.
- Cut fringe between the raw edge and the channel line.
- Tie top and bottom fringes so knots sit within the channel.
- Smooth the perimeter and steam lightly to relax fibers.
Patchwork Look With Overlapped Fleece Squares

A mosaic of fleece squares creates the illusion of stitched patchwork while keeping the surface plush and smooth. Contrasting textures like sherpa fleece amid smooth panels add depth, and tonal gradients slide from light to dark for a subtle ombré.
The grid looks striking folded on a shelf or draped over a bed footboard. Gift-ready presentation features a color swatch tag that previews the palette.
Earthy terracotta, moss, and clay bring warmth; monochrome blacks and grays feel graphic. The finished piece reads artful yet cozy, with clean seams and a quilt-like rhythm.
Steps
- Cut uniform fleece squares in a chosen palette.
- Overlap squares slightly on a flat surface to form rows.
- Bond overlaps underneath with no-sew adhesive tape or fabric glue.
- Finish the outer edge with a complementary treatment.