Polymer clay crafts offer endless opportunities for creativity and fun, making them perfect for a relaxing weekend activity. Whether you’re a beginner or experienced, polymer clay projects allow you to experiment with colors, shapes, and textures to create unique items.
Table of Contents
From jewelry to home decor, polymer clay crafts bring a personal touch to everyday objects. I remember my first polymer clay project; shaping tiny fruits was so satisfying that I couldn’t stop creating more.
Exploring polymer clay crafts this weekend might just spark your next favorite hobby.
Create Colorful Polymer Clay Earrings
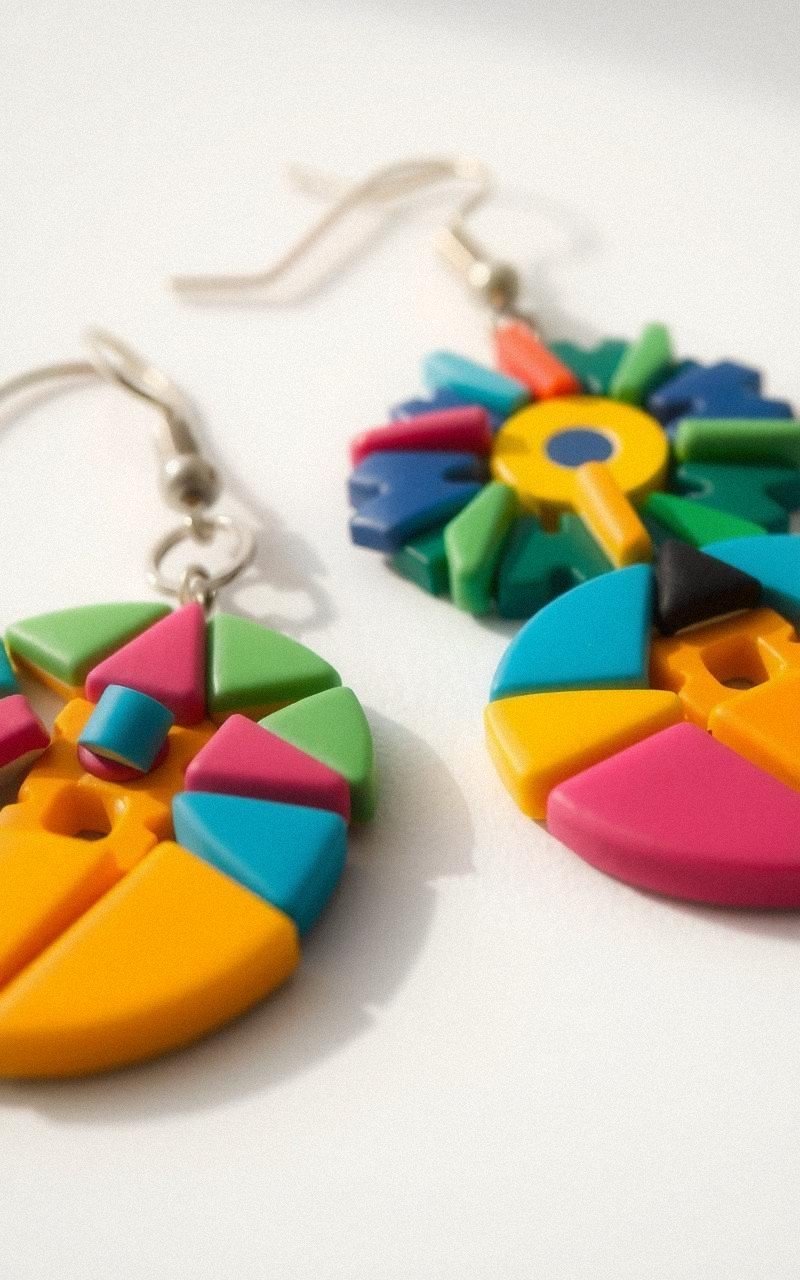
Polymer clay earrings are a great way to start crafting with this versatile material. You can mix colors, cut out shapes, and add texture to design earrings that match your style.
These lightweight accessories are easy to make and customize, perfect for gifting or personal use. Experiment with geometric shapes or floral patterns to find your favorite look.
Steps:
- Condition the clay by kneading it until soft.
- Roll out the clay to an even thickness.
- Cut desired earring shapes using cutters or a craft knife.
- Add texture or details with tools or stamps.
- Bake the clay according to package instructions.
- Attach earring hooks using jewelry glue or jump rings.
Make Miniature Polymer Clay Food Charms
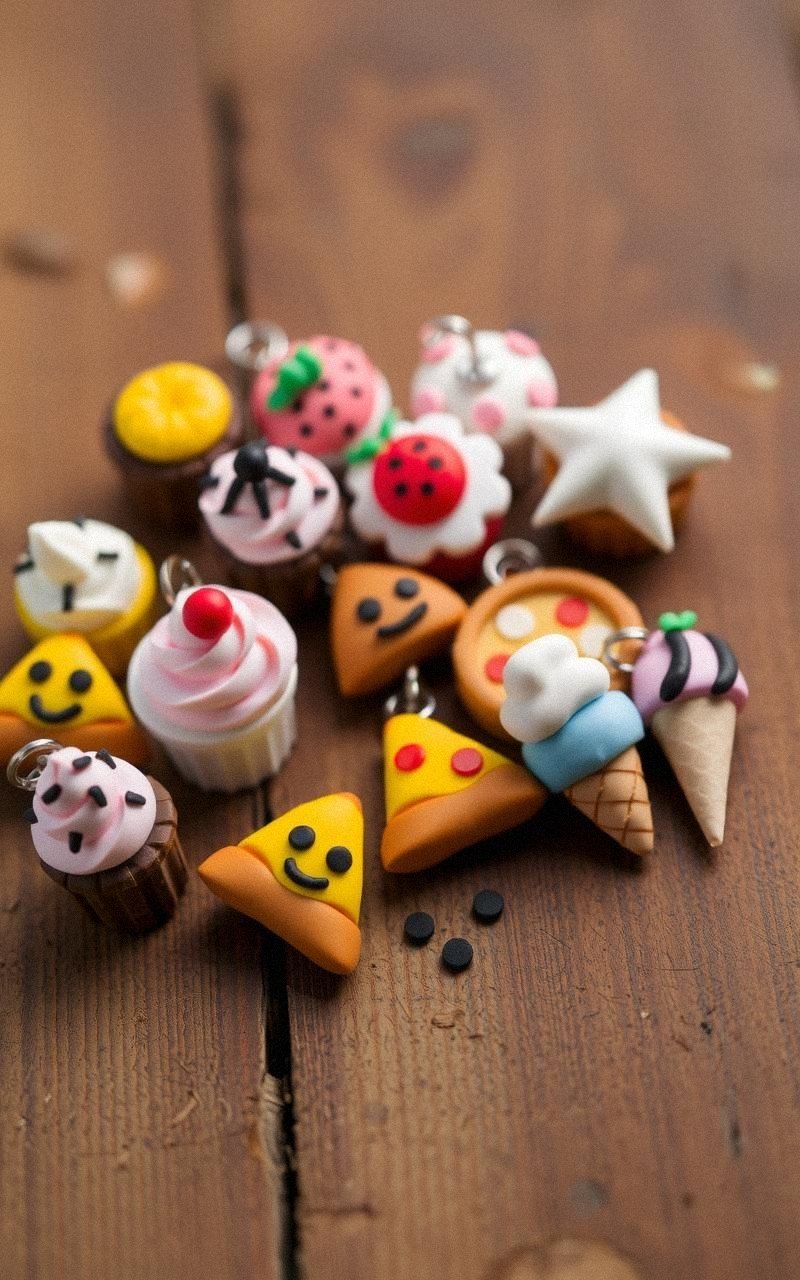
Miniature food charms made from polymer clay are adorable and fun to craft. These tiny creations can become keychains, necklace pendants, or dollhouse accessories.
From cupcakes to pizza slices, you can replicate your favorite snacks with vibrant colors and fine details. It’s a playful way to practice shaping skills and explore intricate designs.
Steps:
- Choose a food item to replicate.
- Condition and color the clay accordingly.
- Shape the base and add layers for toppings or details.
- Use fine tools to add texture or patterns.
- Bake the charms as directed.
- Attach small eye pins for use as charms.
Design Personalized Name Keychains

Personalized name keychains made from polymer clay make thoughtful gifts or personal accessories. You can craft letters in various fonts and colors, then combine them into one keychain.
Adding small embellishments like hearts or stars makes each piece unique. This project is beginner-friendly and allows for creative lettering styles.
Steps:
- Condition the clay and roll it flat.
- Cut out individual letters using alphabet cutters or by hand.
- Arrange letters to form the desired name.
- Add decorative elements around the letters.
- Bake the clay following instructions.
- Attach a keyring through a small hole or with an eye pin.
Craft Elegant Polymer Clay Rings

Polymer clay rings are a charming way to express creativity through wearable art. You can shape unique ring bases and decorate them with patterns, textures, or tiny sculptures.
These rings are lightweight and customizable, allowing you to explore different styles from minimalist to bold designs. Personalizing your rings adds a special touch to everyday looks.
Steps:
- Condition the clay and roll it into a thin sheet.
- Cut a strip wide enough for a ring band.
- Shape the band to fit your finger size.
- Decorate the band with patterns or small clay shapes.
- Bake the ring carefully according to instructions.
- Sand and finish any rough edges after baking.
Create Vibrant Polymer Clay Beads

Making polymer clay beads lets you design custom jewelry components in endless color combinations. You can shape round beads, cubes, or abstract forms and add texture or paint details before baking.
String your beads into necklaces or bracelets for unique handmade accessories that reflect your style and creativity.
Steps:
- Condition clay and shape it into bead forms.
- Make holes through beads using a toothpick or needle.
- Add texture or paint designs if desired.
- Bake beads according to package directions.
- After cooling, string beads onto cords or wires.
Design Charming Polymer Clay Magnets

Polymer clay magnets are a simple way to brighten up any space with handmade charm. Craft fun shapes like fruits, animals, or abstract designs, then attach magnets to the back after baking.
These small, colorful pieces add personality to your fridge or workspace and make delightful gifts.
Steps:
- Condition and shape the clay into small decorative forms.
- Add details or textures using tools.
- Bake the pieces following the instructions.
- Glue small magnets to the back of each piece.
- Let glue dry completely before use.
Build Textured Polymer Clay Coasters
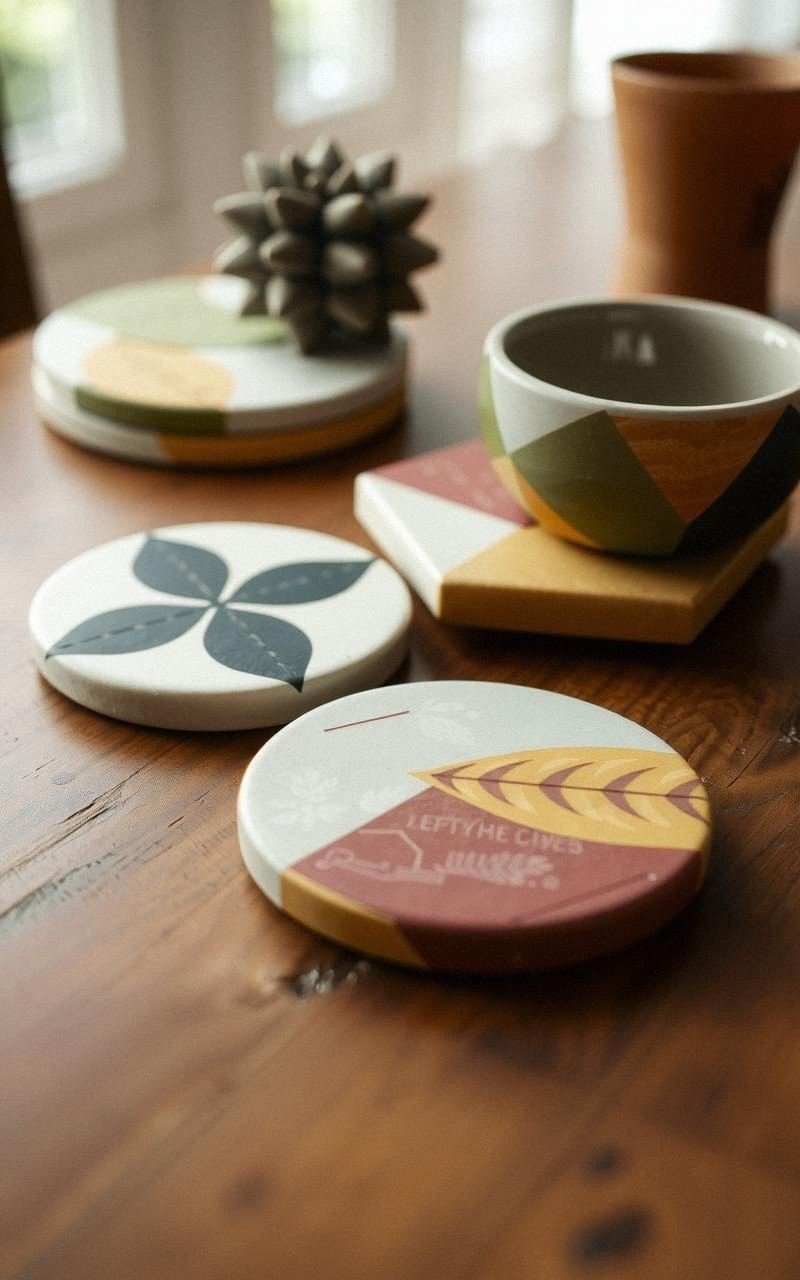
Polymer clay coasters combine functionality and art. You can create coasters by layering different colors and pressing textures onto the clay surface.
Once baked, these coasters protect your table while showcasing your crafting skills. Experiment with geometric patterns or natural textures like leaves for unique designs.
Steps:
- Roll out clay evenly to coaster thickness.
- Cut into coaster-sized circles or squares.
- Press texture stamps or natural objects onto clay.
- Add layered clay shapes if desired.
- Bake according to instructions.
- Seal coasters with a clear protective finish.
Assemble Whimsical Polymer Clay Pins
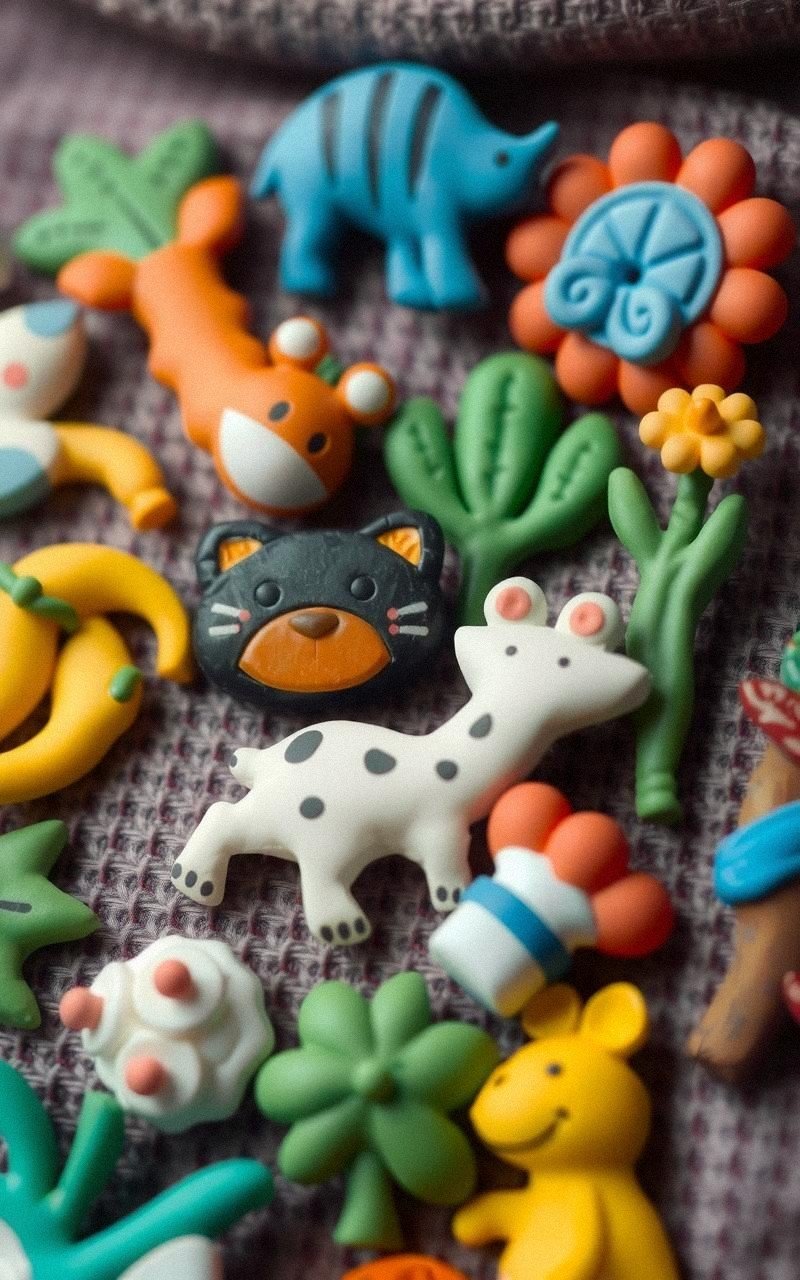
Whimsical pins made from polymer clay allow you to showcase playful designs such as animals, plants, or fantasy themes. These pins brighten up jackets, bags, or hats and are a fun way to wear your creativity.
After baking, attach pin backs for a functional accessory.
Steps:
- Shape clay into desired pin design.
- Add fine details using sculpting tools.
- Bake the clay as directed.
- Glue pin backs onto the reverse side.
- Allow glue to set fully before wearing.
Shape Adorable Polymer Clay Plant Pots
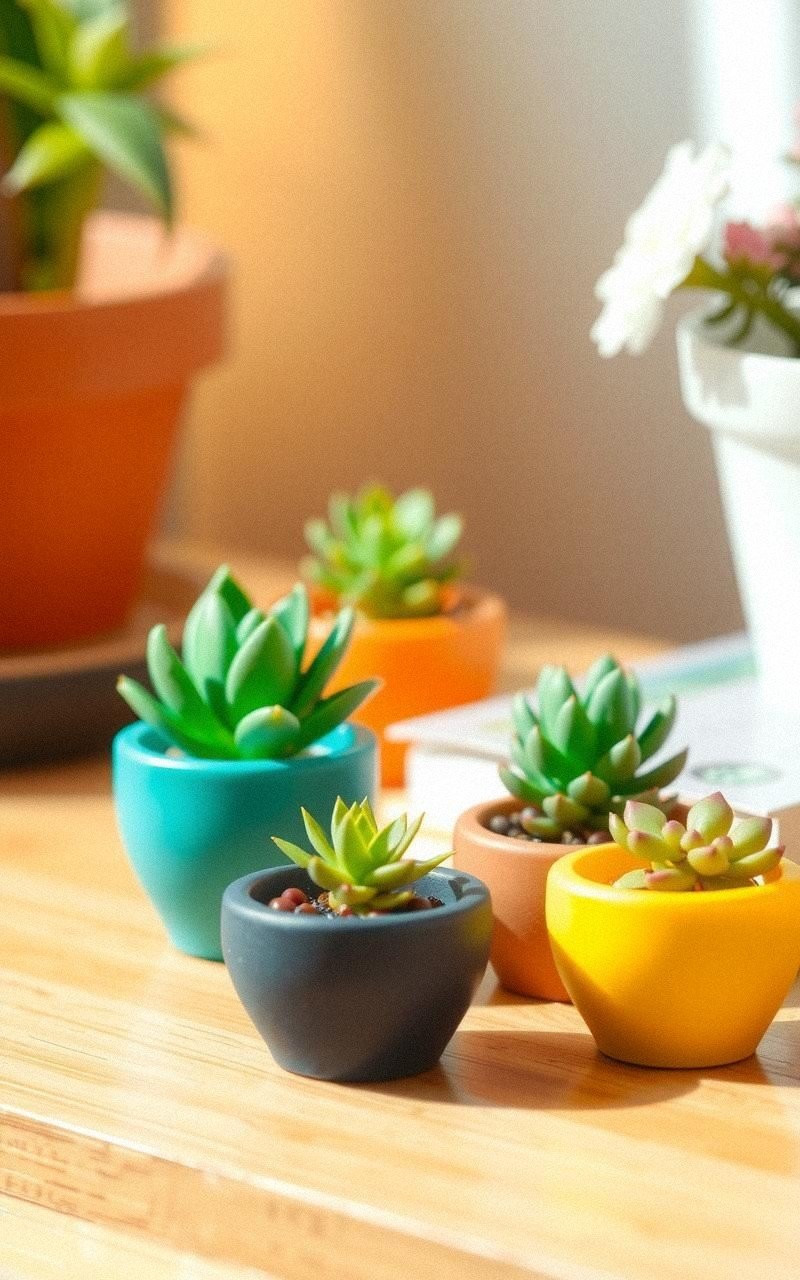
Small polymer clay plant pots are perfect for holding tiny succulents or air plants. You can create miniature pots in various shapes and colors, adding texture or painted designs for interest.
These pots make charming desk accessories or gifts for plant lovers, combining craft and nature.
Steps:
- Roll clay into a ball and hollow out the center to form a pot.
- Shape edges and smooth surfaces.
- Add textures or paint details if desired.
- Bake according to package instructions.
- Place a small plant or artificial greenery inside.
Fashion Unique Polymer Clay Hair Accessories
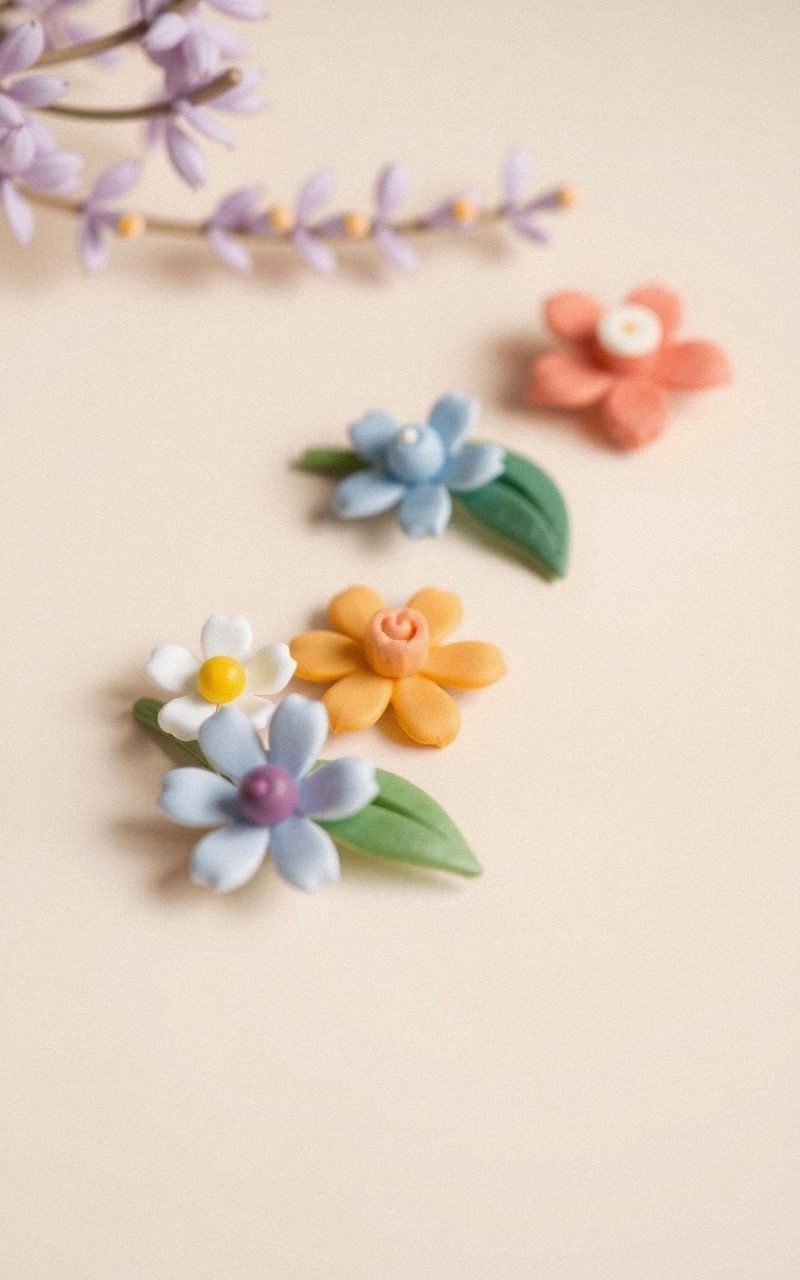
Polymer clay hair accessories like barrettes, clips, and hairpins let you craft personalized styles. Design flowers, abstract shapes, or geometric patterns to make your hair stand out.
Once baked, attach the clay pieces to hair clips or pins for a fun and wearable art piece.
Steps:
- Shape the clay into desired hair accessory designs.
- Add patterns or textures for detail.
- Bake the clay according to instructions.
- Glue pieces onto hair clips or pins.
- Let glue dry completely before use.
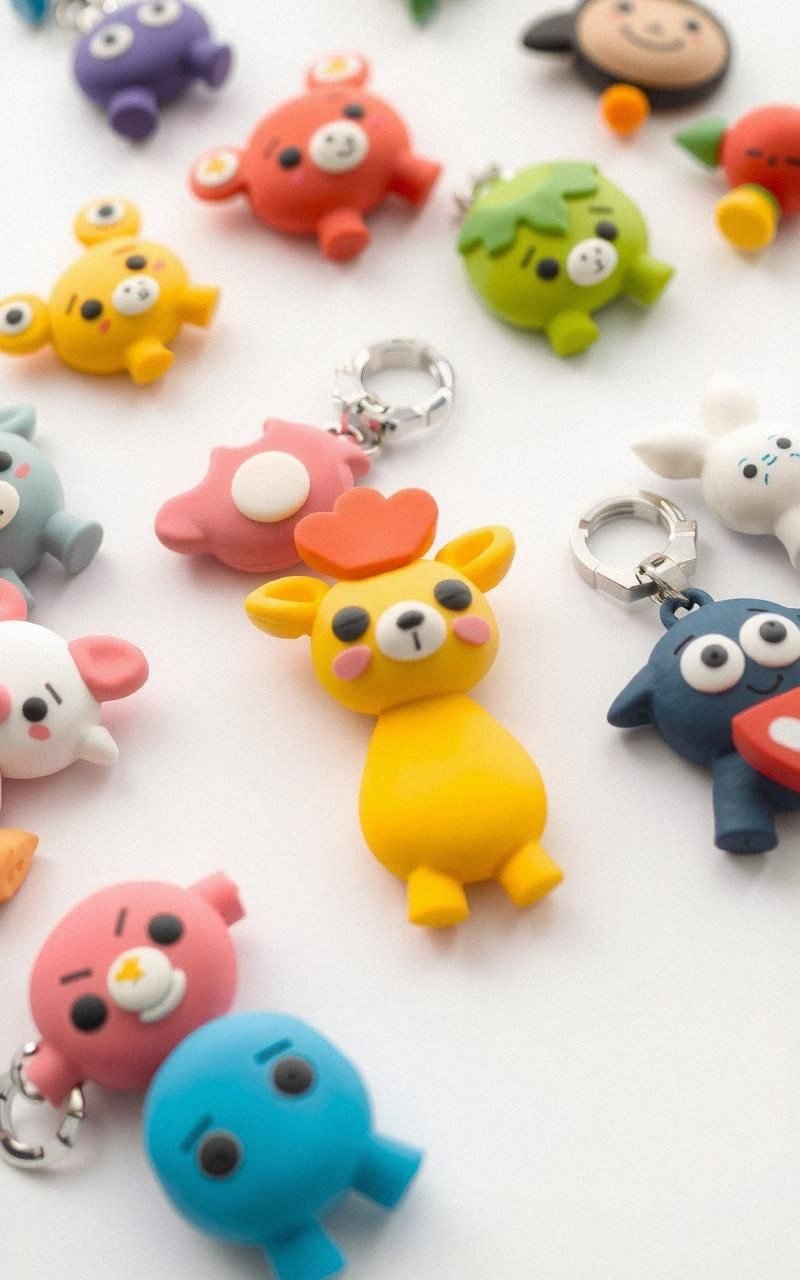
Construct Miniature Polymer Clay Animals

Miniature animals sculpted from polymer clay are delightful collectibles or gifts. You can create tiny birds, cats, or mythical creatures by layering clay and shaping details with tools.
This project encourages patience and precision and results in charming small sculptures.
Steps:
- Choose an animal to sculpt.
- Condition clay and shape the main body parts.
- Add smaller details like eyes, ears, or wings.
- Smooth surfaces and refine shapes.
- Bake according to package guidelines.
Create Personalized Polymer Clay Bookmarks

Polymer clay bookmarks combine creativity with practicality. Craft flat, lightweight shapes that slide easily between book pages.
Personalize bookmarks with names, patterns, or small decorations. These handmade items add charm to your reading experience or serve as thoughtful gifts for book lovers.
Steps:
- Roll out clay into a thin, flat sheet.
- Cut bookmark shapes or rectangles.
- Add textures, stamps, or small decorative details.
- Bake the bookmarks following instructions.
- Optionally, add a ribbon or tassel.
Design Cute Polymer Clay Phone Charms
Phone charms made from polymer clay give your device a personal touch. Craft miniature shapes or characters that can be attached to phone cases or straps.
These charms are easy to make and customize with your favorite colors and themes, adding a playful element to your tech accessories.
Steps:
- Shape clay into small, lightweight charms.
- Add details using sculpting tools or paint.
- Bake the charms as directed.
- Attach jump rings or small loops.
- Connect charms to phone straps or cases.
Build Decorative Polymer Clay Wall Hangings

Polymer clay wall hangings can be created by combining flat clay pieces with textures and shapes in artistic arrangements. Choose colors and forms that complement your space, then bake and assemble with string or wire.
These lightweight decorations bring a handmade vibe to your home.
Steps:
- Roll out clay and cut into desired shapes.
- Add texture or carve designs on the surface.
- Bake the pieces according to instructions.
- Assemble pieces using string or wire.
- Hang on walls using hooks or nails.
Craft Playful Polymer Clay Fridge Magnets

Polymer clay fridge magnets are easy to make and brighten up any kitchen space. Shape colorful motifs like fruits, animals, or abstract forms, then bake and attach magnets on the back.
These small crafts also make charming gifts or party favors.
Steps:
- Condition clay and shape into small flat designs.
- Add texture or paint details as desired.
- Bake the clay pieces following instructions.
- Glue magnets to the back of each piece.
- Let glue dry thoroughly before use.
Make Custom Polymer Clay Gift Tags
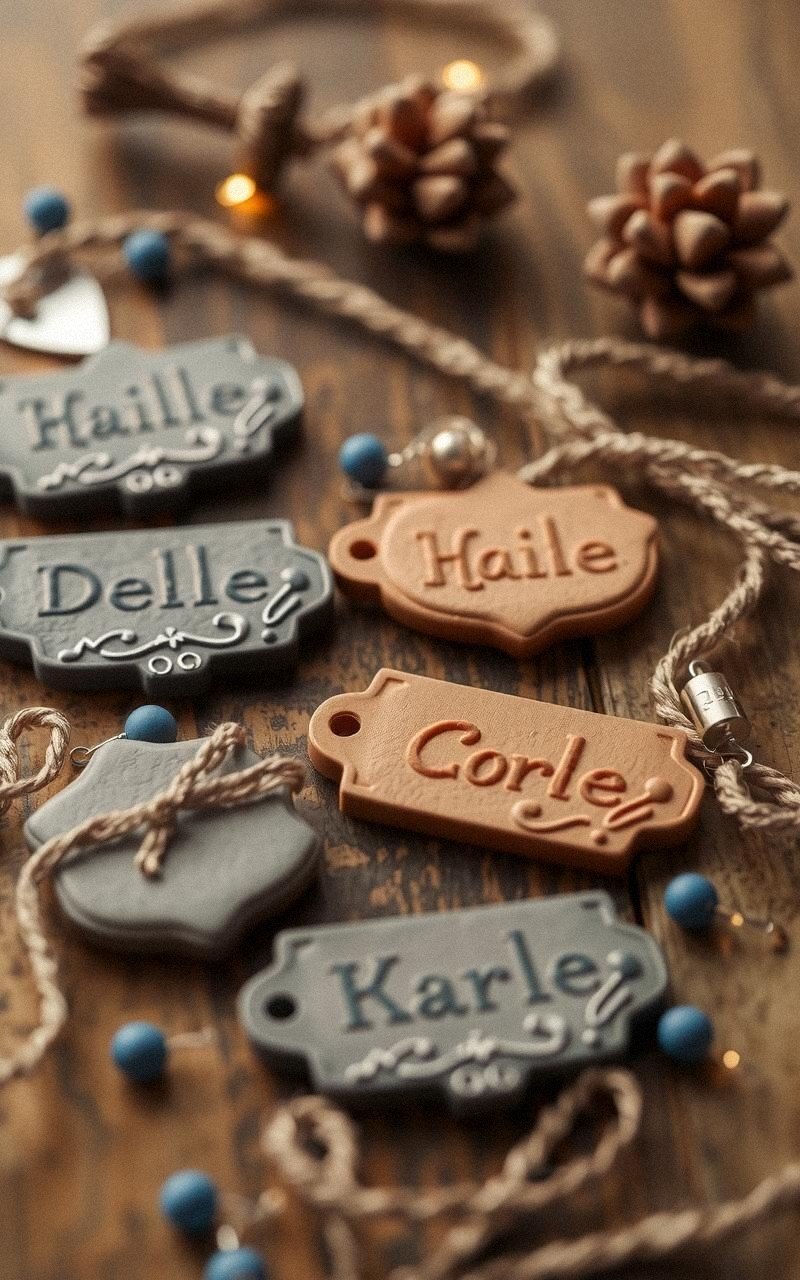
Personalized gift tags made from polymer clay add a special touch to presents. Create small flat tags, carve names or messages, and add holes for string.
Once baked, these tags are durable and reusable, perfect for birthdays or holidays.
Steps:
- Roll clay into thin sheets.
- Cut tag shapes with a hole for string.
- Carve or stamp names and messages.
- Bake as per instructions.
- Thread ribbon or twine through the hole.
Shape Colorful Polymer Clay Buttons

Polymer clay buttons offer a creative alternative to store-bought ones. You can make buttons in various shapes, sizes, and colors, adding textures or patterns for flair.
After baking, sew them onto garments or accessories for a unique handmade touch.
Steps:
- Condition and roll out clay evenly.
- Cut button shapes and create holes.
- Add texture or paint details if desired.
- Bake buttons according to package directions.
- Use buttons on clothing or craft projects.
Design Unique Polymer Clay Candle Holders

Polymer clay candle holders can be crafted in various shapes and sizes to hold small candles or tealights. Use layered colors or textured surfaces to add interest.
These holders add charm and a cozy feel to any room, perfect for handmade home decor.
Steps:
- Shape the base and walls of the candle holder.
- Smooth and add decorative patterns.
- Bake according to package instructions.
- Ensure the holder is stable and fits the candle.
- Place candle inside for use.
Assemble Polymer Clay Desk Organizers

Desk organizers made from polymer clay help keep small items tidy with a personal twist. Create compartments or trays decorated with patterns or shapes.
These organizers can hold paper clips, pens, or jewelry, making your workspace both functional and attractive.
Steps:
- Shape base and compartment walls from clay.
- Add textures or decorative elements.
- Bake the pieces carefully.
- Assemble parts if needed with glue.
- Use to organize desk supplies.
Create Intricate Polymer Clay Pendants
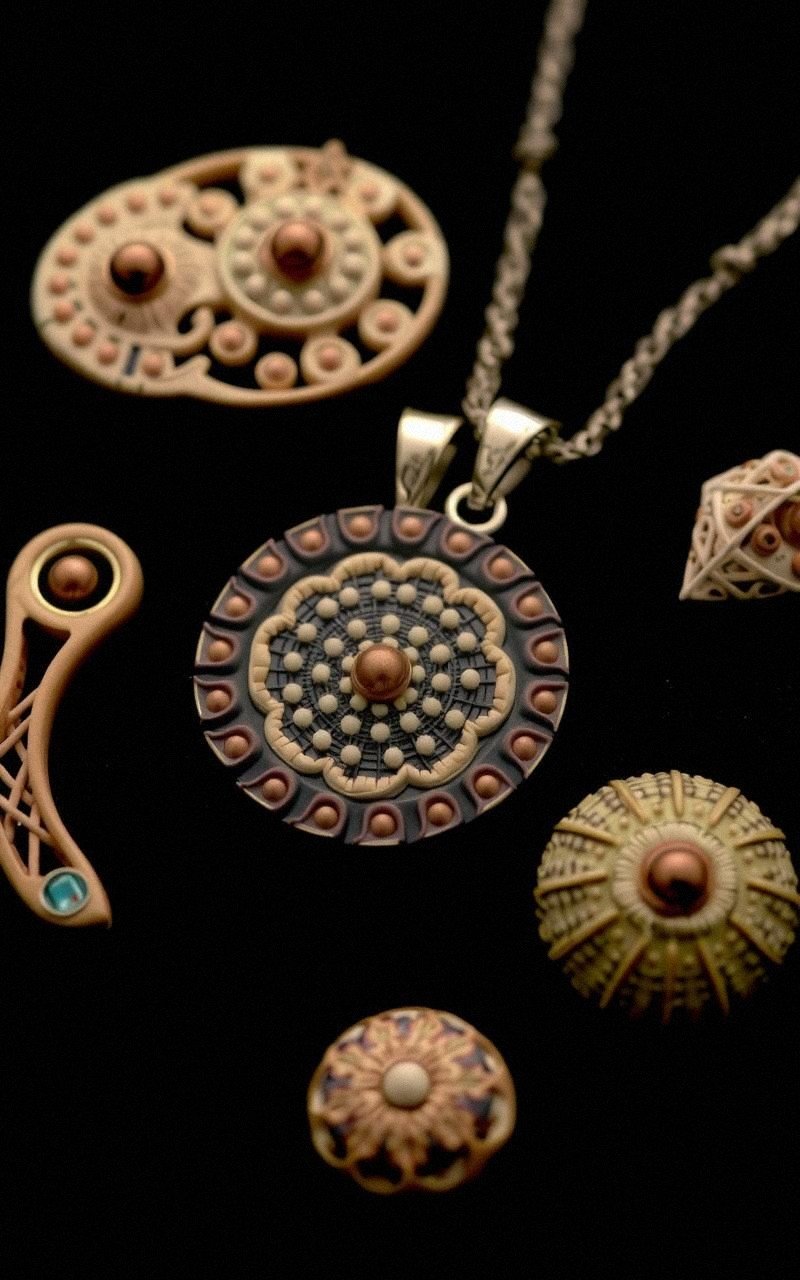
Polymer clay pendants can be shaped into intricate designs such as mandalas, abstract forms, or nature-inspired motifs. These pendants make beautiful jewelry pieces when paired with chains or cords.
Layering and texturing techniques add depth and interest to your creations.
Steps:
- Roll clay and cut pendant base shape.
- Add layers and textured details.
- Bake according to instructions.
- Attach a bail or drill a hole for stringing.
- Add chain or cord to complete necklace.
Fashion Playful Polymer Clay Fridge Clips
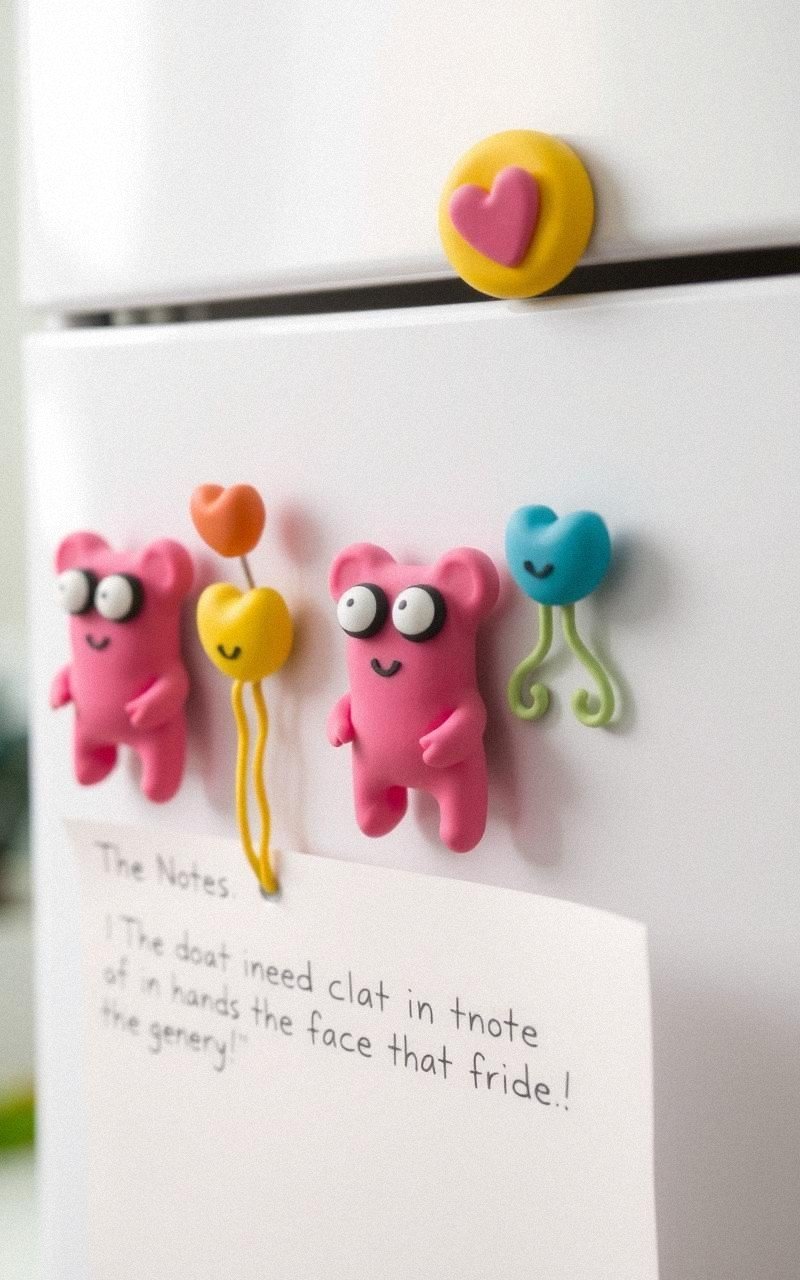
Polymer clay fridge clips are both useful and decorative. Shape colorful tops for clips and attach them after baking.
These clips can hold notes, recipes, or photos, adding a cheerful touch to your kitchen or office space.
Steps:
- Shape clay pieces to fit clip tops.
- Add texture or paint details.
- Bake as directed.
- Glue clay tops onto metal clips.
- Allow glue to dry before use.