 Elara Bennett
Ever since my grandma taught me the magic of stitches, I’ve been obsessed with Sewing Projects For Beginners. There’s something satisfying about gathering fabric, thread, and a trusty needle to bring Sewing Projects For Beginners to life.
From simple tote bags to cozy pillowcases, Sewing Projects For Beginners let you learn at your own pace and feel proud of each creation. The world of Sewing Projects For Beginners opens doors to creativity, and anyone can try Sewing Projects For Beginners without fear.
When I started with Sewing Projects For Beginners, I couldn’t even sew a straight line. But the more I explored Sewing Projects For Beginners, the more confident I felt handling patterns and fabrics. Now I love sharing easy Sewing Projects For Beginners ideas to inspire others.
Basic Skirt with Elastic Waist

The basic skirt with an elastic waist is a fantastic project for beginners. It’s simple, stylish, and perfect for any occasion. The image shows a lovely black skirt that is both comfortable and easy to wear. The elastic waistband allows for a flexible fit, making it a great choice for various body types.
To create your own basic skirt, start by gathering your materials. You’ll need fabric, elastic, a sewing machine, scissors, and pins. Choose a fabric that you love; cotton or jersey works well for this project.
Next, measure your waist and decide how long you want your skirt to be. Cut the fabric to your desired length, adding a few extra inches for the hem and waistband. For example, if you want a 20-inch skirt, cut the fabric to 24 inches to allow for seams.
Now, fold the top edge down about an inch to create a casing for the elastic. Pin it in place and sew along the edge, leaving a small opening to insert the elastic. Cut a piece of elastic that fits your waist comfortably and thread it through the casing. Once it’s in place, sew the ends of the elastic together and close the opening.
Finally, hem the bottom of the skirt by folding it up about half an inch and sewing it down. This gives your skirt a polished finish. And there you have it! A simple, stylish skirt that you made yourself.
Quick Fabric Headbands
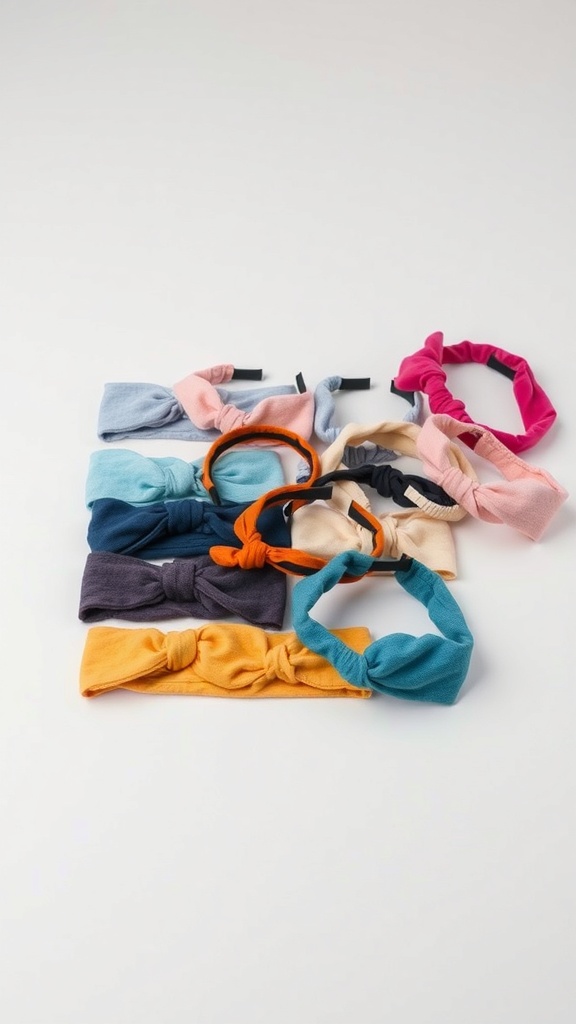
Quick fabric headbands are a fun and easy sewing project for beginners. They add a pop of color to any outfit and are perfect for keeping hair out of your face. The image shows a variety of headbands in different colors and styles, showcasing how simple it is to create your own unique accessories.
To make your own headbands, you’ll need some stretchy fabric, scissors, a sewing machine, and a few basic supplies. Start by measuring the length and width you want for your headband. A good size for most adults is about 20 inches long and 3 inches wide.
Next, cut your fabric according to these measurements. Fold the fabric in half lengthwise, right sides together, and sew along the long edge, leaving the ends open. Turn the fabric right side out, and then tuck in the raw edges at each end. Sew them closed, and you’re done! For a twist effect, you can add a knot in the middle before sewing the ends together.
Feel free to mix and match colors and patterns to create headbands that reflect your style. You can also experiment with different widths and lengths for a variety of looks. This project is not only quick but also a great way to practice your sewing skills!
Beginner-Friendly Apron

Making your own apron is a fun and practical sewing project for beginners. The image shows a simple, cream-colored apron hanging in a cozy kitchen. This apron has two front pockets, perfect for holding utensils or recipes while you cook.
To create your own apron, start by gathering materials. You’ll need fabric, scissors, pins, a sewing machine, and thread. Choose a fabric that you love; cotton is a great choice for its durability and ease of use.
Next, measure and cut your fabric. A standard apron size is about 28 inches wide and 30 inches long. Cut two pieces for the body and two strips for the neck and waist ties. Don’t forget to add a little extra for seams!
Now, it’s time to sew. Begin by hemming the edges of the body pieces to prevent fraying. Then, sew the two pieces together, leaving space for the pockets. Attach the pockets by sewing them onto the front of the apron.
Finally, attach the neck and waist ties. Fold the strips in half and sew along the edges, then turn them inside out. Attach these ties to the top corners of the apron. Once everything is sewn together, give it a good press with an iron, and your apron is ready to use!
Simple Fabric Coasters
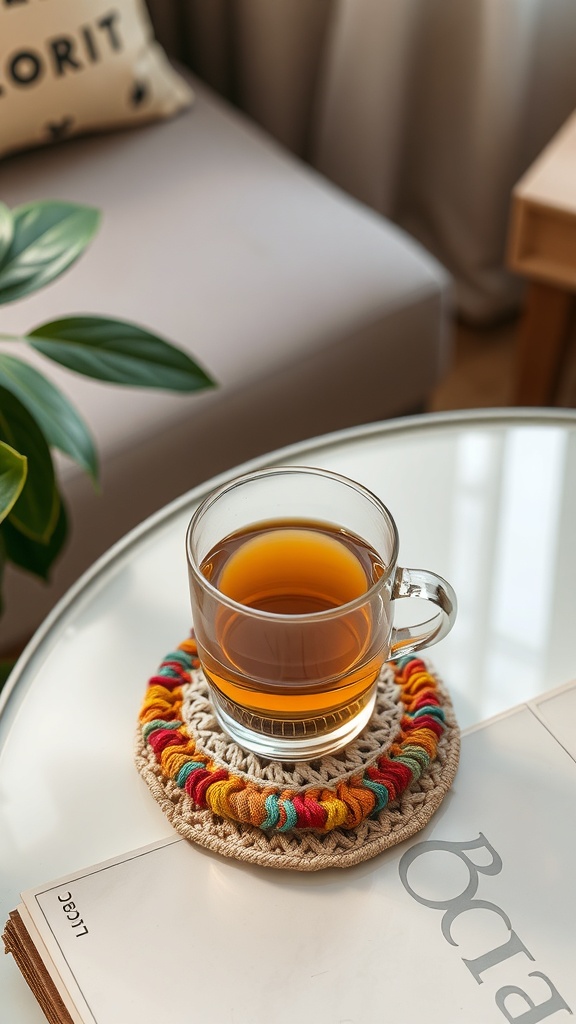
Making simple fabric coasters is a fun and easy sewing project for beginners. These coasters are not only practical but also add a personal touch to your home decor. The image shows a cozy setting with a cup of tea resting on a colorful coaster, highlighting how these little creations can brighten up any space.
To get started, gather your materials. You will need some fabric, batting or felt for padding, scissors, a ruler, and a sewing machine or needle and thread. Choose fabrics that match your style—this is your chance to get creative!
Here are the steps to create your coasters:
Cut your fabric into squares or circles. A good size is about 4-6 inches across.
Cut the batting or felt slightly smaller than your fabric pieces. This will help keep the coasters lightweight.
Place one piece of fabric right side down, add the batting on top, and then place another piece of fabric right side up on top of that.
Pin the layers together to keep them from shifting while you sew.
Sew around the edges, leaving a small opening to turn the coaster right side out.
Turn the coaster inside out and press it flat. You can hand-stitch the opening closed or sew it on the machine.
For a finishing touch, you can add decorative stitching around the edges or embellishments like buttons or fabric paint.
Now you have a set of beautiful coasters! They make great gifts or can be used to add a splash of color to your coffee table.
Easy Drawstring Backpack
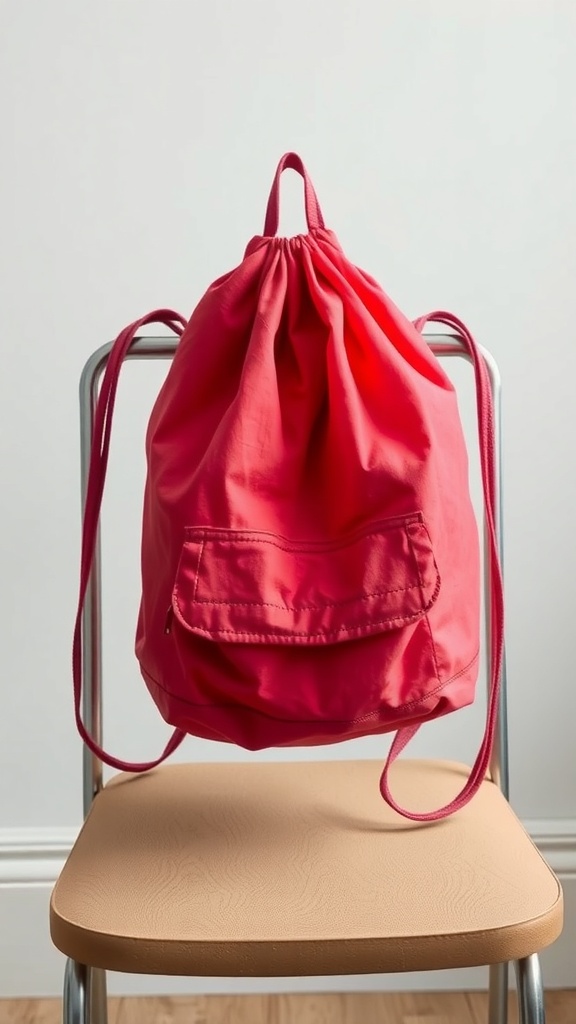
The drawstring backpack is a fun and practical project for beginners. This simple bag is perfect for carrying essentials like books, gym clothes, or snacks. The bright pink color adds a cheerful touch, making it a stylish accessory for any outing.
To make your own drawstring backpack, start by gathering materials. You’ll need fabric, a drawstring, scissors, a sewing machine, and thread. Choose a sturdy fabric that can hold up to daily use.
Begin by cutting two pieces of fabric into the desired size for your backpack. A common size is around 15 inches wide by 18 inches tall. Make sure to add an extra inch on each side for seams.
Next, place the two fabric pieces together, right sides facing each other. Sew along the sides and bottom, leaving the top open. This will create the main body of the backpack.
For the drawstring channel, fold down the top edge about 2 inches and sew along the edge, creating a pocket for the drawstring. Make sure to leave a small opening to thread the drawstring through.
Once the channel is ready, use a safety pin to help guide the drawstring through. After threading it, pull the ends to gather the fabric at the top. Finally, secure the ends of the drawstring to prevent it from slipping out.
Your easy drawstring backpack is now complete! It’s a great way to practice sewing skills while creating something useful. Enjoy your new bag!
No-Sew Fleece Blanket

A no-sew fleece blanket is a cozy and simple project perfect for beginners. You can create a warm and soft blanket without needing a sewing machine or any complicated techniques. Just grab some fleece fabric, and you’re ready to go!
The image shows a beautifully draped fleece blanket on a couch, paired with a refreshing drink. This setup highlights how inviting and comfortable a no-sew fleece blanket can be in your living space. It’s not just a practical item; it adds a touch of style to your home.
To make your own no-sew fleece blanket, follow these easy steps:
1. Gather Your Materials:You’ll need two pieces of fleece fabric, each measuring about 1.5 to 2 yards. Choose colors or patterns that you love!
2. Lay Out the Fabric:Place the two pieces of fleece on a flat surface, one on top of the other, with the patterned sides facing each other.
3. Cut the Edges:Cut a square (about 4 inches) from each corner of the fabric. This will help you tie the edges later.
4. Create Fringe:Cut 1-inch wide strips along the edges of the fabric, about 4 inches deep. Do this on all four sides of the blanket.
5. Tie the Strips:Take one strip from the top piece and one from the bottom piece. Tie them together in a double knot. Repeat this for all the strips around the blanket.
6. Finish Up:Once you’ve tied all the strips, your blanket is ready! Flip it over to reveal the soft fleece side.
This project is not only easy but also a great way to personalize your space. You can make it as a gift or keep it for yourself. Enjoy snuggling up with your new blanket!
Simple Tote Bag Creation
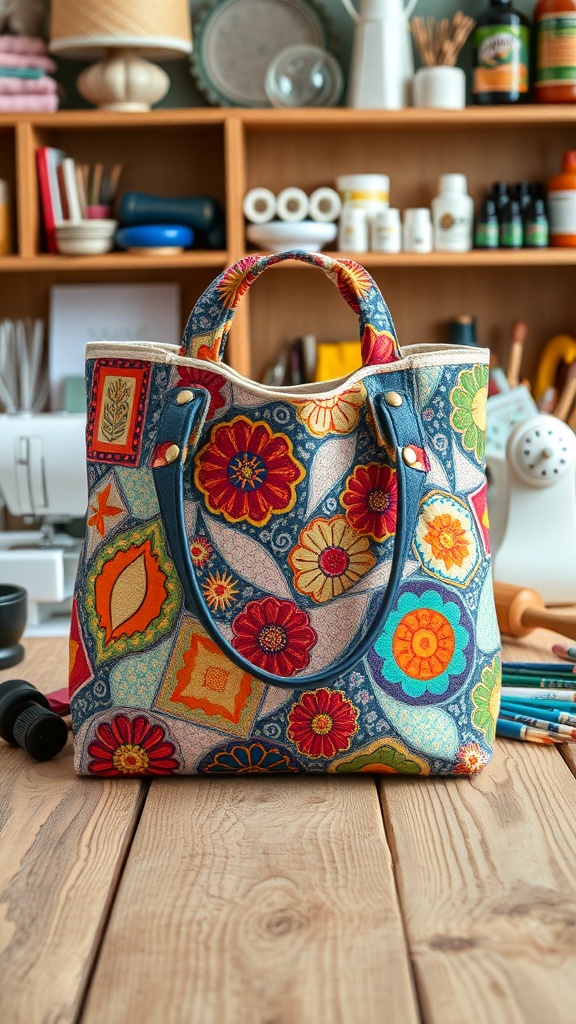
Creating a simple tote bag is a fantastic project for beginners. The image shows a beautifully designed tote bag, featuring vibrant flowers and patterns. This bag is not only stylish but also practical for everyday use.
To make your own tote bag, you’ll need some basic materials: fabric, scissors, a sewing machine, and thread. Choose a fabric that reflects your personality—something colorful or patterned can really make your bag stand out!
Start by cutting two rectangles of fabric for the bag body. A common size is 15 inches by 18 inches, but you can adjust this based on your needs. Next, cut two strips for the handles, about 3 inches wide and 20 inches long.
Now, place the two rectangles right sides together and sew along the sides and bottom, leaving the top open. For the handles, fold each strip in half lengthwise, press, and then fold the edges in towards the center. Sew along the open edge to secure the folds.
Attach the handles to the bag by pinning them to the inside of the top edge. Make sure they are evenly spaced. Sew around the top edge to secure the handles and finish your tote bag. You can add a lining for a more polished look, but this step is optional.
Once you’re done, turn your bag right side out, and you’re ready to show off your new tote! This project is simple and rewarding, making it perfect for anyone new to sewing.
Basic Pillowcase Design

Making a basic pillowcase is a fantastic project for beginners. It’s simple, quick, and gives you a great sense of accomplishment. Plus, you can customize it to match your bedroom decor!
The image shows a cozy pillow nestled among soft bedding. This pillowcase design is perfect for anyone looking to start sewing. It’s just a square or rectangular piece of fabric that you can easily sew together.
Here’s how to create your own pillowcase:
Materials Needed:
- 1 yard of fabric (cotton works great)
- Thread that matches your fabric
- Scissors
- Sewing machine
- Measuring tape
Steps:
- Measure and Cut:Measure your pillow. A standard pillow is usually 20×26 inches. Cut your fabric to 20×40 inches to allow for seams.
- Fold and Iron:Fold the fabric in half, right sides together, with the 20-inch sides aligned. Iron the fold to create a crease.
- Sew the Sides:Using your sewing machine, sew along the open edges, leaving a half-inch seam allowance. Don’t forget to backstitch at the beginning and end!
- Turn Inside Out:Once sewn, turn the pillowcase right side out. Use a pencil or a chopstick to push out the corners for a nice finish.
- Finish the Open End:Fold the open end over about an inch and iron it flat. Then, sew along the edge to create a clean finish.
- Insert Pillow:Finally, slip your pillow inside the case, and you’re done!
This simple project is a great way to practice your sewing skills. Plus, you’ll have a lovely pillowcase to show off!
Basic Stuffed Animal
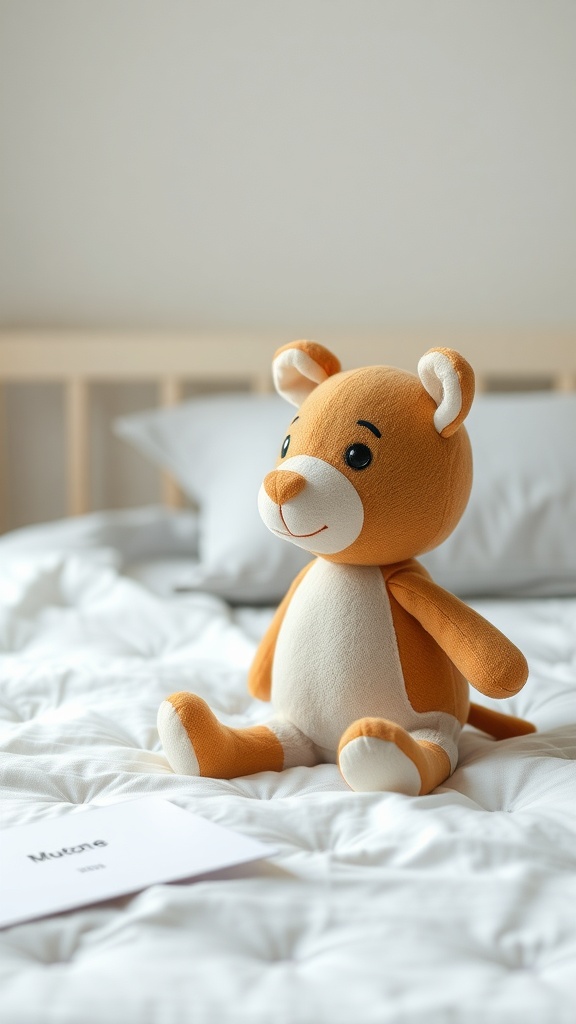
Making a basic stuffed animal is a fun and rewarding project for beginners. The image shows a cute, orange stuffed animal sitting on a bed, ready to be loved. This project is perfect for those just starting out in sewing.
To create your own stuffed animal, you will need some fabric, stuffing, a sewing machine or needle and thread, and a pattern. You can find many free patterns online or create your own. Choose soft, colorful fabric to make your animal inviting.
Start by cutting out the fabric pieces according to your pattern. Make sure to leave some extra fabric for seams. Next, sew the pieces together, leaving a small opening for stuffing. Turn the fabric inside out so the seams are hidden.
Once your animal is inside out, fill it with stuffing until it feels plush and cuddly. After that, sew up the opening securely. You can add eyes, a nose, and other features using fabric or felt. This adds personality to your creation!
Finally, give your stuffed animal a name and enjoy your new friend. This project not only helps you practice sewing skills but also results in a delightful toy that can be cherished for years.
Easy Zipper Pouch

The easy zipper pouch is a fantastic project for beginners. It’s simple, functional, and a great way to practice sewing skills. This pouch can hold pens, makeup, or any small items you want to keep organized.
To make your own zipper pouch, start by gathering your materials. You’ll need fabric, a zipper, scissors, pins, and a sewing machine. Choose a fabric that reflects your style; a bright color like the one shown in the image can add a fun touch.
Next, cut two pieces of fabric to your desired size. A common size is about 8 inches by 5 inches. Lay the pieces right sides together and pin them in place. Then, attach the zipper to the top edge of the fabric. Make sure to leave some fabric on either side of the zipper for a neat finish.
Once the zipper is attached, sew along the sides of the pouch, leaving the top open. Turn the pouch inside out through the zipper opening. Finally, give it a good press with an iron to smooth out any wrinkles. Your easy zipper pouch is ready to use!
Simple Quilt Squares
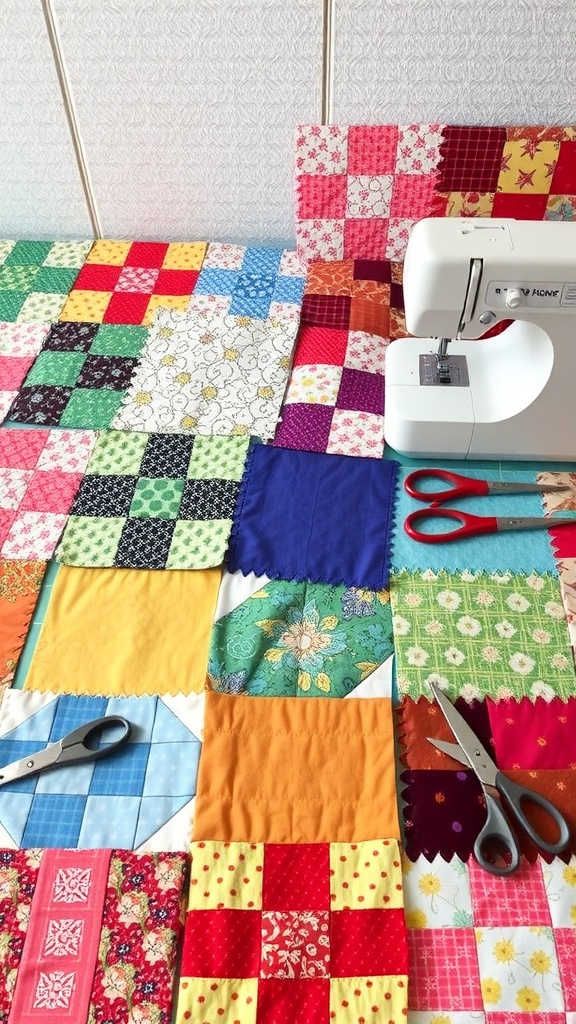
Creating simple quilt squares is a fantastic way for beginners to dive into sewing. The image shows a colorful array of quilt squares, each with its own unique pattern and fabric. This variety not only makes the project visually appealing but also allows for creativity in choosing colors and designs.
To start making your own quilt squares, gather some fabric scraps. You can use cotton or any fabric you have on hand. Cut the fabric into squares, typically measuring 5 inches by 5 inches. Feel free to mix and match patterns for a fun look.
Next, lay out your squares in a pattern that you like. This is where you can get creative! Once you’re happy with the arrangement, start sewing the squares together. Begin by sewing two squares along one edge, right sides together. Use a quarter-inch seam allowance for a neat finish.
After sewing two squares, press the seam open with an iron. Then, continue adding squares until you have a row. Repeat this process for additional rows. Once all rows are complete, sew them together to form the quilt top.
Finally, layer your quilt top with batting and a backing fabric. Pin everything in place and quilt it together by sewing through all layers. This can be done with simple straight lines or more intricate patterns. Once finished, trim any excess fabric and bind the edges to complete your quilt.
Easy Fabric Keychain

Making a fabric keychain is a fun and simple project for beginners. The image shows a colorful keychain made from vibrant fabric, featuring a playful design with fringes. This project is perfect for using up scrap fabric and adds a personal touch to your keys.
To create your own fabric keychain, start by gathering your materials. You will need a piece of fabric, scissors, a keyring, and a sewing machine or needle and thread. Choose a fabric that you love, as this will make your keychain unique.
First, cut a rectangle of fabric about 6 inches long and 2 inches wide. Fold the fabric in half lengthwise, right sides together, and sew along the long edge, leaving the ends open. Turn the fabric right side out, and you’ll have a tube.
Next, fold one end of the tube inward and tuck it into the other end. Sew across the open end to close it off. Attach the keyring by threading the other end of the tube through the ring, then fold it over and sew it down securely. For a fun touch, you can add fringes by cutting small strips at the bottom of the keychain.
Now you have a stylish keychain that’s easy to make and perfect for beginners. Enjoy showing off your creation or gifting it to a friend!
Basic Fabric Bunting
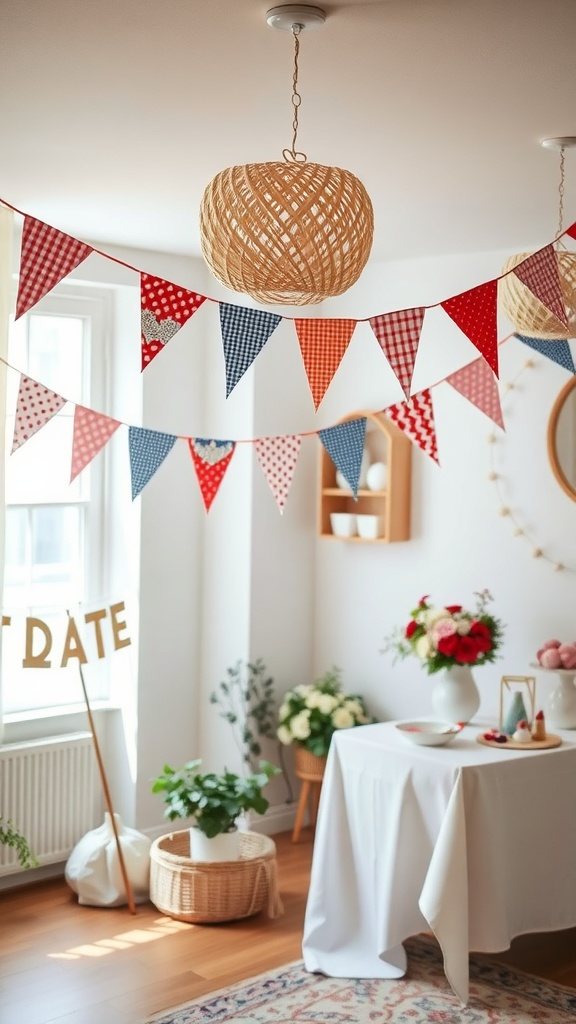
Fabric bunting is a fun and easy project that adds a festive touch to any space. The image shows a cheerful arrangement of colorful triangular flags hanging in a bright room. These flags are made from various patterned fabrics, creating a lively atmosphere.
Making your own bunting is a great beginner sewing project. You can customize it to match any theme or occasion. Whether it’s for a birthday party, a wedding, or just to brighten up your home, bunting is a simple way to make a statement.
To create your own fabric bunting, start by gathering your materials. You will need fabric in different colors and patterns, scissors, a sewing machine or needle and thread, and bias tape or ribbon for hanging.
Here are the steps to make your bunting:
Cut your fabric into triangles. Each triangle should be about 6 inches wide at the top and 8 inches long. You can use a template to ensure they are all the same size.
Next, fold the top edge of each triangle over the bias tape or ribbon. Pin it in place to keep it secure.
Sew along the top edge, making sure to catch the fabric in the stitches. This will attach the triangles to the tape.
Space the triangles out evenly on the tape. You can leave a few inches between each one for a relaxed look.
Once all the triangles are sewn on, trim any excess tape and hang your bunting where you like!
Enjoy your beautiful, handmade bunting. It’s a great way to practice sewing and add a personal touch to your decor!
Simple Baby Bib

Making a simple baby bib is a fun and practical sewing project for beginners. The bib in the image showcases a colorful design with cheerful patterns, perfect for little ones. It’s not just cute; it’s also functional, helping to keep babies clean during mealtime.
To create your own baby bib, you’ll need some basic materials. Start with a piece of fabric that is soft and easy to clean. You can choose a fun print like the one shown, or go for a solid color. You’ll also need bias tape for the edges and a snap or Velcro for the closure.
Here are the steps to make your bib:
Cut out the bib shape from your fabric. A simple pattern is a large oval with a smaller circle cut out for the neck.
Pin the bias tape around the edges of the bib, making sure to fold it over the fabric for a neat finish.
Sew the bias tape in place, securing it to the fabric.
Add the snap or Velcro to the neck area for easy fastening.
Finally, give it a good wash to make sure it’s ready for your little one!
This project is quick and satisfying, making it a great choice for anyone new to sewing. Plus, you can customize it to match your baby’s style!
Basic Table Runner

A table runner is a simple yet stylish way to dress up your dining table. The image shows a beautifully designed table runner laid across a wooden table, creating a warm and inviting atmosphere. This project is perfect for beginners who want to add a personal touch to their home decor.
To make your own table runner, you will need a few basic materials. Start with fabric of your choice, scissors, a sewing machine, and thread. You can choose a fabric that matches your dining room or one that adds a pop of color.
Here are the steps to create your table runner:
Measure the length and width of your table. A standard table runner is usually about 12 to 16 inches wide and can be as long as the table or slightly shorter.
Cut your fabric according to the measurements. Make sure to add an extra inch on each side for seam allowances.
Fold the edges of the fabric over about half an inch and press them down with an iron. This will help create a clean finish.
Sew along the folded edges to secure them. You can use a straight stitch for a simple look or a decorative stitch for added flair.
Once you finish sewing, give your table runner a final press with the iron to smooth out any wrinkles.
Place your new table runner on your dining table and enjoy the fresh look it brings to your space!
This project is not only easy but also allows for creativity. You can experiment with different fabrics, patterns, and even add embellishments like lace or embroidery. Happy sewing!
Simple Fabric Bookmark
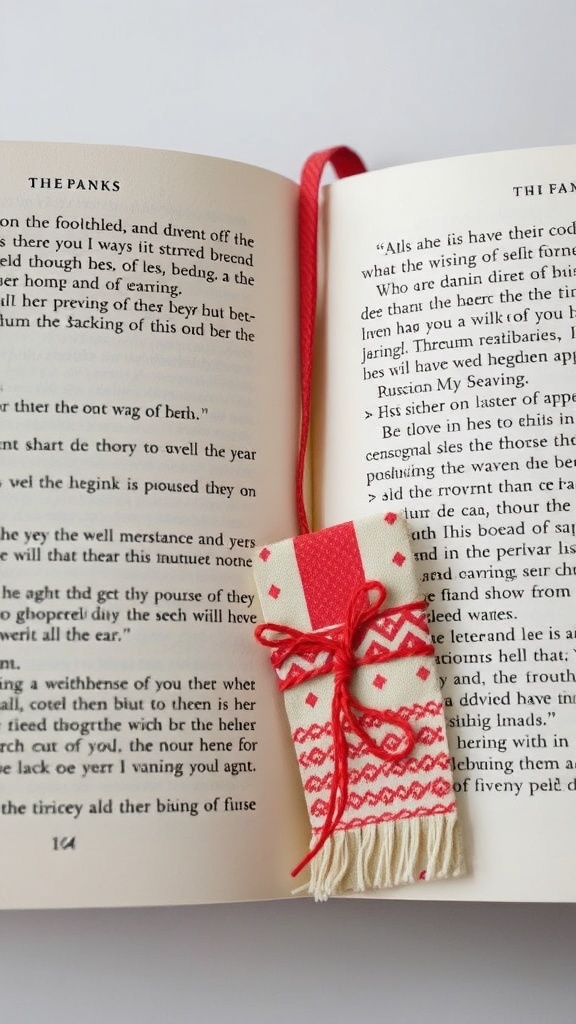
Creating a simple fabric bookmark is a fun and practical sewing project for beginners. This project is perfect for using up leftover fabric scraps and adds a personal touch to your reading experience.
The image shows a charming fabric bookmark nestled between the pages of a book. It features a lovely pattern with a red and white color scheme, complete with a cute fringe at the bottom. This bookmark not only keeps your place but also brightens up your reading time.
To make your own fabric bookmark, follow these easy steps:
Materials Needed:
- Two pieces of fabric (about 6 inches by 2 inches)
- Thread that matches your fabric
- Scissors
- Sewing machine or needle
- Fringe (optional)
Steps:
Cut your fabric pieces to the desired size. You can choose different patterns for each side to make it more interesting.
Place the two fabric pieces right sides together. Pin them in place to keep them from shifting while you sew.
Sew around the edges, leaving a small opening on one side for turning the fabric inside out.
Turn the bookmark right side out through the opening. Use a pencil or a turning tool to push out the corners for a neat finish.
If you want to add a fringe, sew it onto the bottom edge of the bookmark before closing the opening.
Finally, sew the opening closed by hand or machine, and your bookmark is ready to use!
This simple project is not only enjoyable but also makes for a thoughtful gift for friends and family who love to read. Happy sewing!
Basic Fabric Phone Case
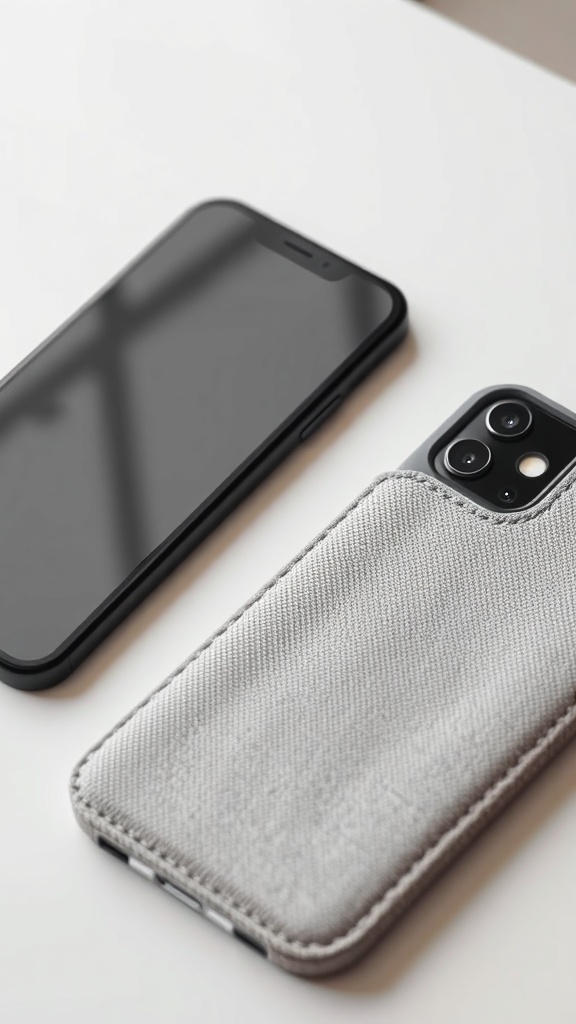
Making a fabric phone case is a fun and simple project for beginners. This project not only protects your phone but also adds a personal touch to your everyday items. You can choose any fabric that matches your style, making it a great way to express yourself.
To start, gather your materials. You will need fabric (cotton works well), scissors, a sewing machine or needle and thread, and a ruler. Measure your phone to determine the size of the case. Add a little extra for seam allowances.
Next, cut two pieces of fabric according to your measurements. Place them right sides together and pin them in place. Sew around the edges, leaving the top open. Turn the case inside out so the right side is facing out. This will give you a neat finish.
Finally, fold down the top edge and sew a hem to finish it off. You can add embellishments like buttons or patches for extra flair. Your new phone case is ready to use!
Simple Tea Towel

Making a simple tea towel is a great project for beginners. It’s practical and adds a personal touch to your kitchen. Plus, it’s a quick sew that can boost your confidence!
Start with a piece of cotton fabric. A standard size for a tea towel is about 18 by 28 inches. Cut your fabric to this size. If you want to add a bit of flair, consider using a patterned fabric or adding a decorative trim.
Next, it’s time to hem the edges. Fold over each edge about a quarter inch and press it with an iron. Then fold it over again to hide the raw edge and press it again. This will give your towel a clean finish.
Now, use a sewing machine to stitch along the folded edge. A straight stitch works perfectly for this. Make sure to backstitch at the beginning and end to secure your seams.
Once you’ve hemmed all four sides, your tea towel is ready to use! Hang it in your kitchen or give it as a thoughtful gift. You can even personalize it by adding an embroidered design or a fabric paint message.
Basic Pet Bandana
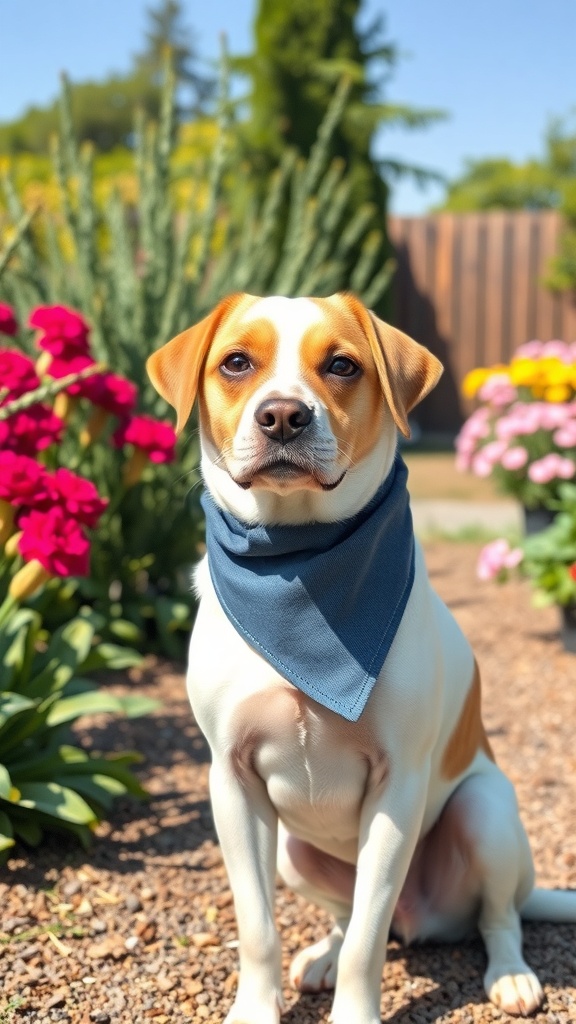
Making a pet bandana is a fun and simple sewing project that adds a stylish touch to your furry friend’s wardrobe. In the image, you can see a dog wearing a lovely blue bandana, sitting among colorful flowers. This bandana not only looks cute but is also easy to make.
To create your own pet bandana, start by gathering your materials. You will need a piece of fabric, scissors, a sewing machine or needle and thread, and some pins. Choose a fabric that reflects your pet’s personality or your favorite colors.
Next, measure your pet’s neck to determine how big to cut the fabric. A typical size is about 20 inches by 20 inches for medium-sized dogs. Cut the fabric into a triangle shape. To do this, fold the fabric in half diagonally and cut along the fold.
Once you have your triangle, it’s time to finish the edges. Fold the edges over about a quarter inch and pin them down. Sew along the edges to prevent fraying. If you want to add a personal touch, consider adding a small patch or embroidery.
Finally, let your pet try on the bandana. Make sure it fits comfortably around their neck. Now your pet is ready to strut their stuff in style!
Easy Fabric Wallet

Making a fabric wallet is a fun and simple project for beginners. This wallet is not only practical but also allows you to express your style. The image shows a compact wallet that can hold several cards, making it perfect for everyday use.
To start, gather your materials. You’ll need fabric, a sewing machine or needle and thread, scissors, and a ruler. Choose a fabric that you love; it could be cotton, denim, or any sturdy material.
Next, cut your fabric into two rectangles. A good size for a wallet is about 4 inches by 6 inches. You’ll need two pieces for the outer and inner layers. If you want pockets, cut smaller rectangles for those as well.
Now, place the right sides of the fabric together and sew around the edges, leaving a small opening to turn it inside out. After sewing, trim the corners to reduce bulk, then turn the wallet right side out through the opening.
Once it’s turned, tuck in the raw edges of the opening and sew it closed. If you added pockets, sew them in place now. Finally, topstitch around the edges for a polished look.
Your easy fabric wallet is now complete! This project is a great way to practice your sewing skills while creating something useful.
Simple Cloth Napkins

Making simple cloth napkins is a great project for beginners. They are practical, easy to sew, and add a touch of charm to any dining table. Plus, you can choose your favorite colors and patterns to match your home decor.
To get started, gather your materials. You will need fabric (cotton works well), scissors, a ruler, pins, and a sewing machine. Choose a fabric that is easy to handle and wash.
First, decide on the size of your napkins. A common size is 18 inches by 18 inches. Use the ruler to measure and mark the fabric. Cut out the squares with scissors.
Next, it’s time to finish the edges. Fold each edge of the napkin about a quarter inch and press it with an iron. This will help create a clean finish. Pin the folded edges in place.
Now, sew along the edges. A straight stitch works well for this. Make sure to backstitch at the beginning and end to secure your seams. If you want a decorative touch, consider using a zigzag stitch instead.
Once you’ve sewn all four edges, give your napkins a final press with the iron. This will help them look crisp and neat. And there you have it! Your very own cloth napkins, ready to use at your next meal.