Spring Break Kids Craft Ideas feel like tiny celebrations spread across a sunny kitchen table. I always end up with a scatter of glitter, a jar of mismatched buttons, and that warm, ridiculous pride watching a wobbly birdhouse become a weekend hero.
Table of Contents
These Spring Break Kids Craft Ideas are playful, low-pressure projects that invite curious hands and loud laughter.
They fit mornings when pajamas outnumber outfits, and afternoons that ask for something bright, colorful, and pleasantly messy.
Sunburst paper plate craft for sunny afternoons
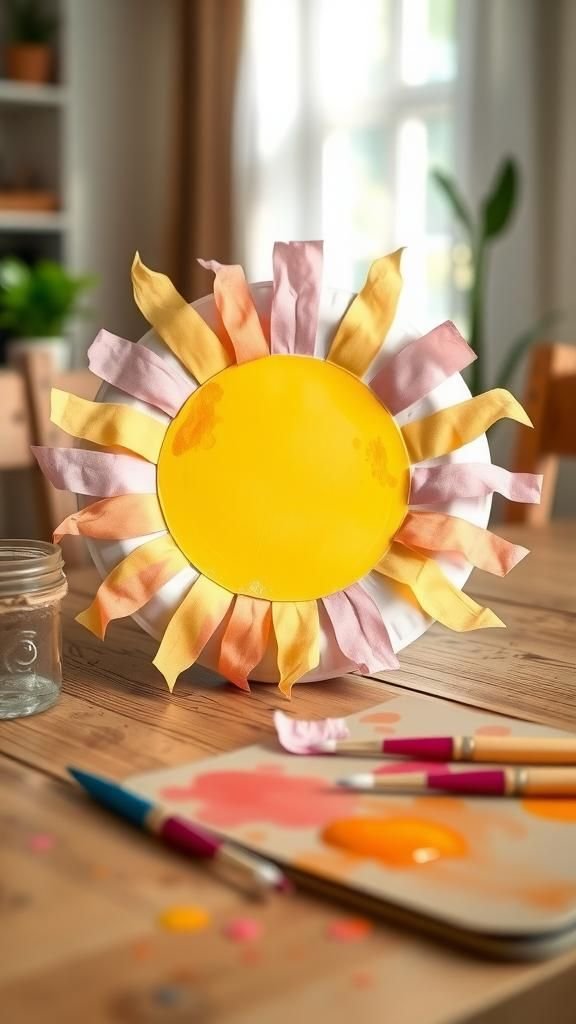
I made one of these when rain kept us inside and it turned the whole afternoon into a cozy studio. The paper plate really becomes a small stage, with a cheerful face or a burst of rays that catches the light.
The texture of crinkled tissue and the soft nap of tempera lend a homey charm. I remember the way the edges curled slightly and how proud the little creator was when their sun glowed on the fridge.
It felt simple and delightfully bright.
Steps
- Gather paper plates, yellow paints, brushes, tissue paper, and a stapler or tape.
- Paint the center of a plate yellow, then add facial details or patterns once dry.
- Cut strips of tissue paper and fasten them around the rim for rays.
- Optionally layer another plate behind for a sturdier base, then display on a wall.
- Let everything dry fully before hanging to avoid smudges.
Puffy tissue paper flowers that smell like spring
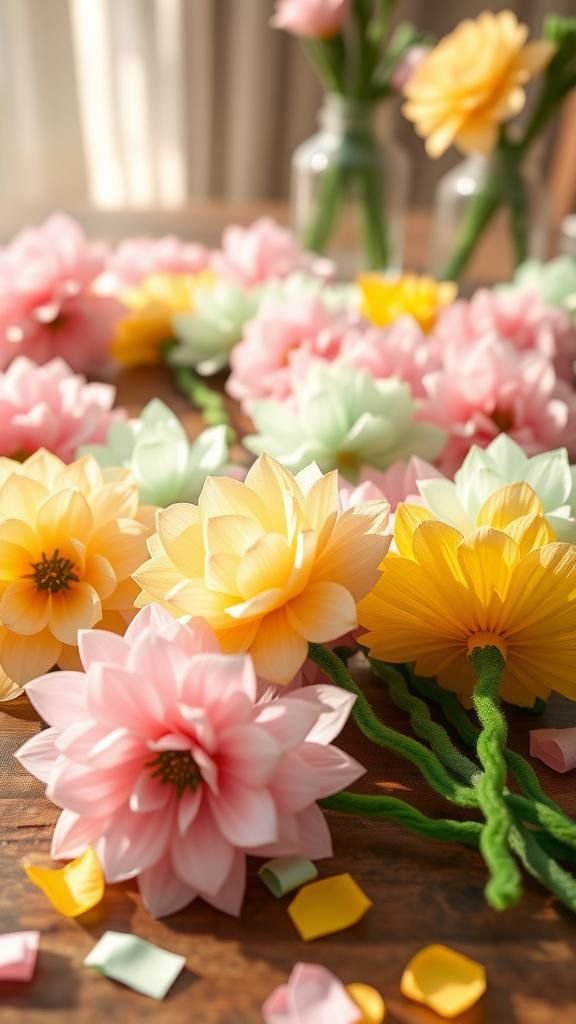
These flowers always make the kitchen smell faintly of glue and citrus and something like childhood. The crinkly tissue petals have a pleasing tactile spring, soft enough for tiny fingertips to pinch and shape.
I watched a child press colors together and then hold the bouquet up like a proud tiny florist. Bright greens and pinks created a little garden on our table, and the finished bouquet looked almost too cheery to tuck into a vase.
The whole project felt whimsical and gentle.
Steps
- Stack sheets of tissue paper in chosen colors and fold them accordion-style.
- Secure the center with a pipe cleaner or twist tie, then gently separate layers into petals.
- Wrap pipe cleaners as stems and add green paper leaves at the base.
- Arrange the flowers in a small jar or paper cone for a display.
- Refresh petals by gently fluffing to maintain volume.
Painted pebble garden critters with personality
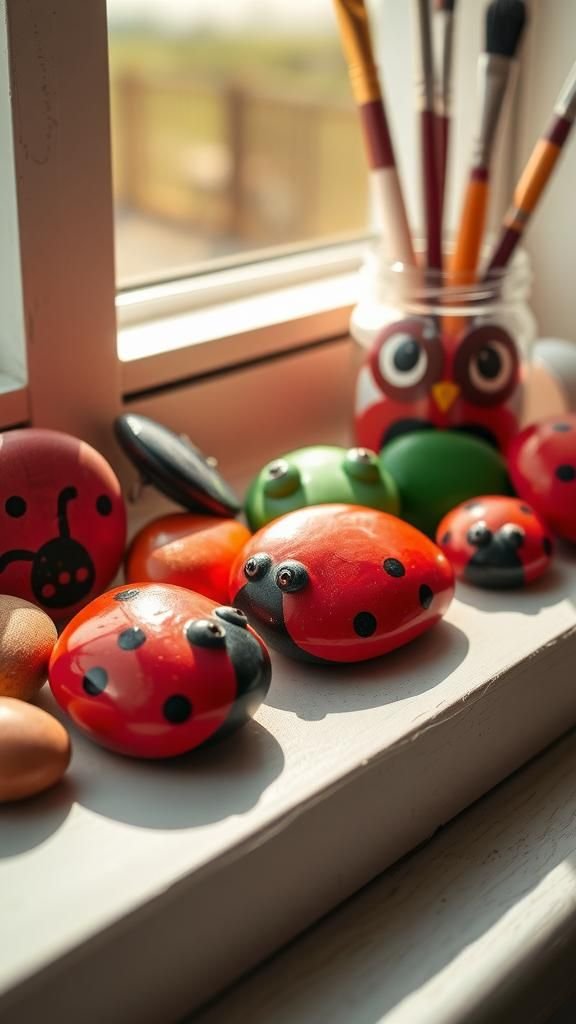
Collecting smooth pebbles became a spontaneous walk that turned into an afternoon of tiny personalities. Each stone felt cool and heavy in my hand while the paint gave it a new life as a ladybug, frog, or sleepy owl.
There was a satisfying rhythm to choosing a rock with the right shape and deciding whether it would need big googly eyes or a tiny striped shirt. The finished pebbles sat on a windowsill and made me smile every time I watered the herbs nearby.
Steps
- Gather smooth pebbles, acrylic paints, fine brushes, and a sealant for longevity.
- Clean and dry pebbles, then apply a base coat and allow it to dry.
- Add facial features and patterns with a small brush or marker.
- Once fully dry, apply a clear sealant to protect the designs.
- Arrange pebbles in a mini garden or line along a windowsill.
Popsicle stick bird feeder for backyard guests
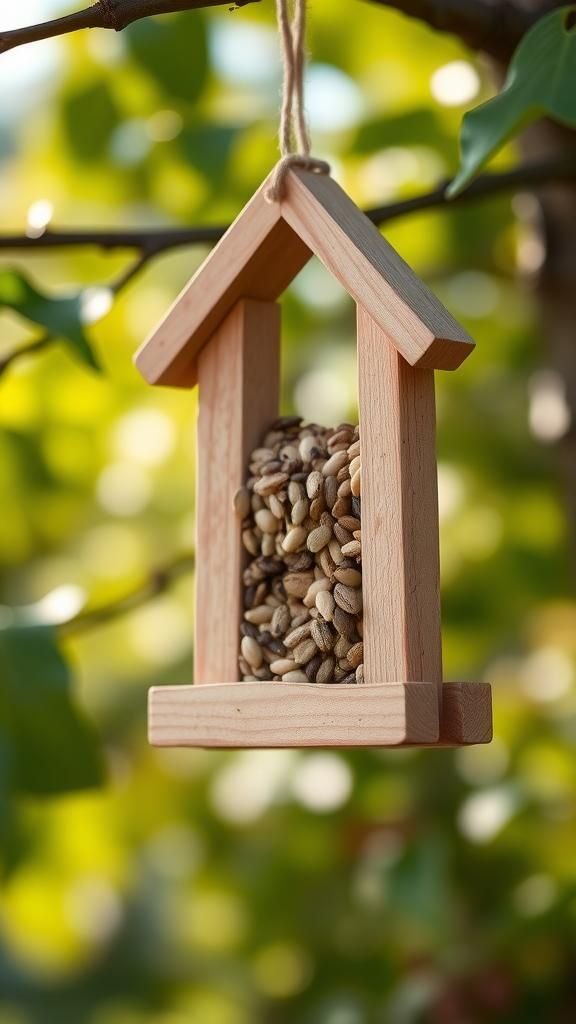
This little feeder became a neighborhood hit on our deck. The rough grain of wooden sticks and the tactile satisfaction of pressing seeds into place created a quiet afternoon of focus.
Watching the first chickadee land felt like a private encore; the gentle flutter of wings and soft pecks made the cold morning melt away. The feeder had a sweet, handmade charm that invited small rituals of refilling and watching.
It brightened the yard much more than I expected and encouraged slow mornings with hot tea.
Steps
- Collect popsicle sticks, a small shallow base, craft glue, and birdseed.
- Arrange sticks into a square or rectangle shape as a base, securing edges.
- Build up sides by layering sticks and fastening them firmly.
- Fill the feeder with birdseed and hang or place it in a sheltered spot.
- Refill as needed and enjoy watching backyard birds visit.
Egg carton caterpillar parade with googly eyes

Turning an egg carton into a parade of caterpillars felt like cartooning a mini zoo. The segmented shells create a natural body rhythm, and the addition of wobbly eyes and bright stripes gave each one a silly expression.
I remember a child whispering names to each caterpillar as they lined them up for a slow march across the table. The texture of cardboard and the sticky shine of embellishments made the scene delightfully messy.
It became a tabletop story that grew more imaginative every minute.
Steps
- Cut an egg carton into individual or grouped cups to form caterpillar bodies.
- Paint or color the cups in bright hues and add stripes or dots.
- Glue on googly eyes and tiny antennae made from pipe cleaners.
- Arrange the caterpillars in a line or attach them to a paper scene.
- Allow to dry thoroughly before playing or displaying.
Nature collage on cardboard for tiny explorers
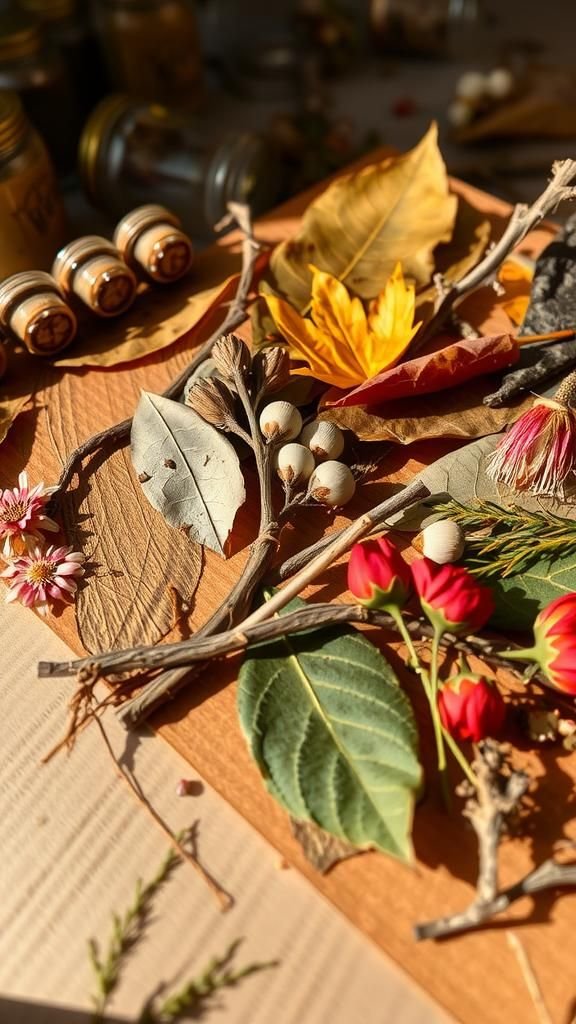
We took a short walk to gather leaves and petals that later turned into a collage with a wild, honest texture. The rough edges of leaves, dried grasses, and tiny blossoms created a layered landscape on a piece of cardboard.
I loved the silent concentration as each item found its place and the unexpected color palettes that emerged. The finished piece felt like a pressed fragment of a happy day outside, with some edges curling and a faint scent of grass that brought the walk back to life.
Steps
- Collect leaves, petals, small twigs, and a sturdy piece of cardboard.
- Lay out the natural pieces to explore composition and layering.
- Secure items to the cardboard using adhesive and allow drying.
- Optionally add colored paper or crayons for background accents.
- Display on a wall or shelf as a memory of the day.
Spring suncatcher with sticky contact paper charm
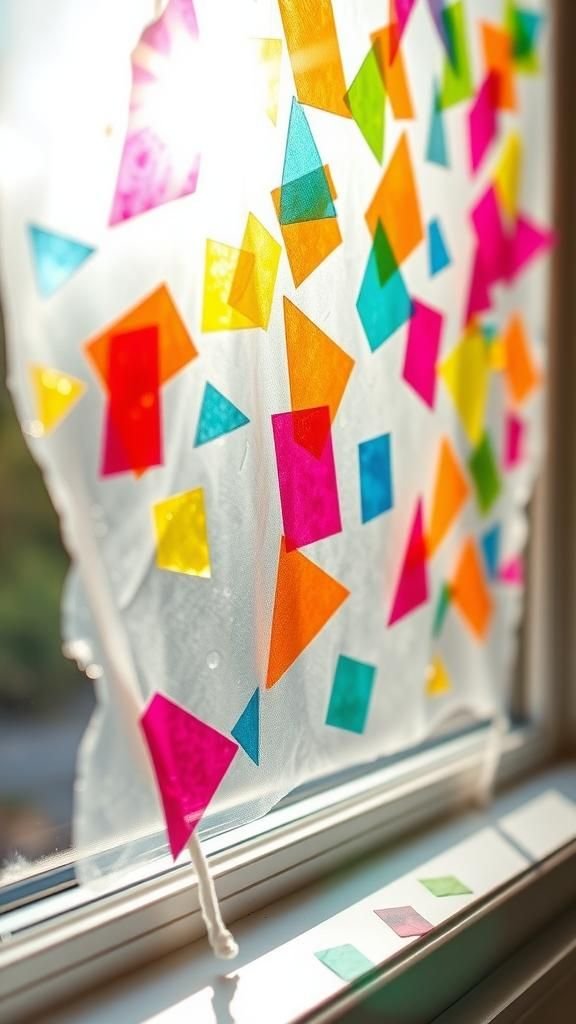
The way light filters through those colorful cellophane pieces always feels a little magical. Sticky contact paper becomes a transparent stage for translucent shapes, and when the finished suncatcher finds a window it throws playful colors across the room.
I remember a child peeking through their creation and gasping at the little rainbows on the curtain. The tactile pleasure of pressing tissue bits and sequins into place made the whole process quietly absorbing, and the results danced with daylight in a way that felt cheerful and gentle.
Steps
- Cut two pieces of clear contact paper and place them sticky side up on a flat surface.
- Arrange colorful tissue, cellophane scraps, and sequins onto one sticky sheet.
- Cover with the second contact paper piece to seal, smoothing out air bubbles.
- Trim into shapes and punch a hole for hanging.
- Hang in a sunny window to catch the light.
Seed starter decorated pots full of hope

There was a humble thrill in seeing a tiny green sprout push through soil in a pot that had been lovingly decorated. The small clay or recycled container felt like a promise, and the act of personalizing it gave the plant a storyteller’s background.
Crayon marks and little doodles made each pot a portrait of the child who made it. Watering became a gentle ritual that paired well with chatter about what might grow.
The fresh scent of soil and the soft green of seedlings made the whole project quietly hopeful.
Steps
- Choose small pots or recycled containers and decorate their exteriors with markers or waterproof paints.
- Fill pots with potting mix and create a shallow indent for seeds.
- Place seeds appropriate for starter pots and cover lightly with soil.
- Water gently and place in a sunny spot, monitoring moisture.
- Transplant or care for seedlings as they grow stronger.
Handprint baby chick keepsake for memory jars

Those tiny handprints squashed into soft clay felt like pressing a moment into time. The imprint held the delicate ridges of fingers, and when painted with sunny yellow it transformed into a cheeky chick that always made me smile.
It was the kind of keepsake that grandparents adored and kids loved showing off. The slight wobble of the clay edge and the fingerprint patterns added a personal touch that felt intimate and honest.
Each piece carried a trace of a small hand and a particular spring morning.
Steps
- Roll out air-dry clay to a flat, even thickness on a clean surface.
- Gently press a child’s hand into the clay to leave a clear impression.
- Allow the clay to dry fully, then paint the handprint area in chick-like colors.
- Add eyes and beak details with markers or paint after drying.
- Seal with a clear varnish if desired and tie with a ribbon for gifting.
Bubble wrap spring mural for joyful textures
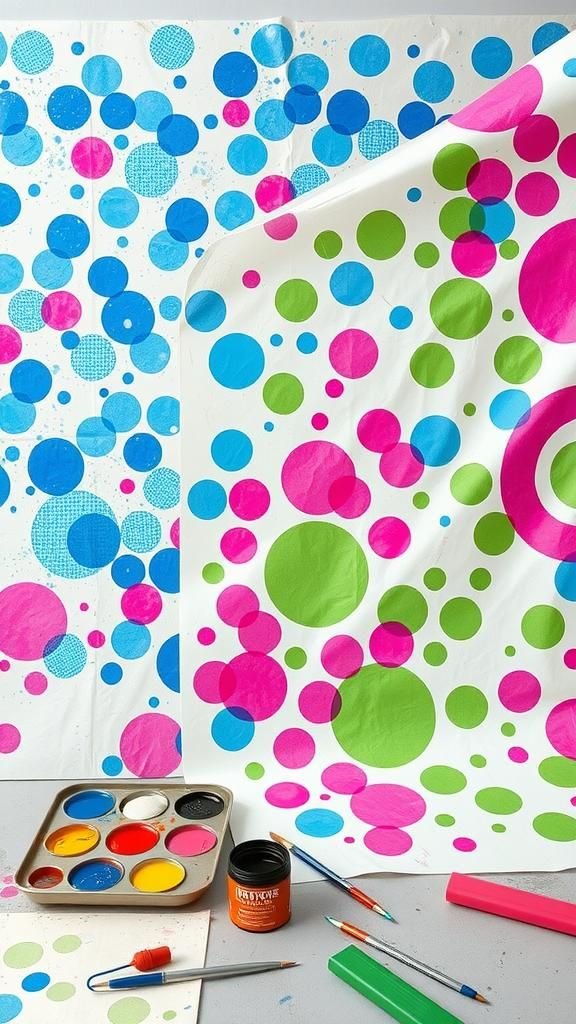
Bubble wrap transformed into a giant palette in one of our liveliest afternoons. Rolling paint over its bumpy surface and pressing onto paper created a playful dotted sky and whimsical grass.
The crunch underfoot and the glossy paint marks left a lively noise and bright impressions that felt theatrical. Children loved the unpredictability of each press, the way colors layered and sometimes surprised with unexpected blends.
The finished mural carried a tactile energy and a rowdy, celebratory look that turned a wall into a colorful memory.
Steps
- Lay a large sheet of paper or butcher paper on the floor and secure edges.
- Spread different paint colors onto plates and press bubble wrap into the paint.
- Press painted bubble wrap onto the paper to create patterned sections.
- Repeat with varied colors and overlaps for texture and depth.
- Let the mural dry fully before displaying on a wall.
Foam kite with a ribbon tail for windy days
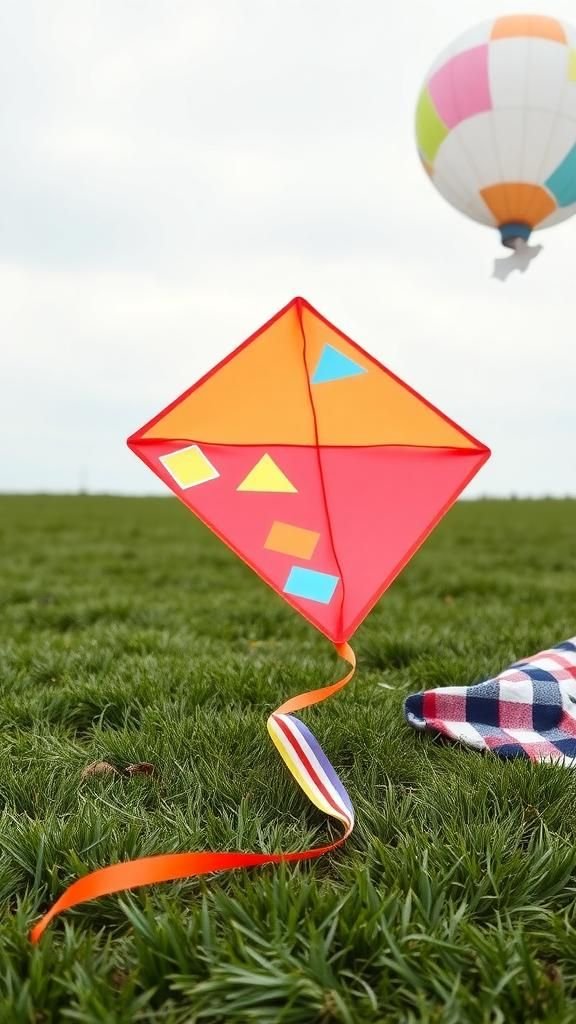
The soft give of craft foam made this kite light and bright in a way that felt immediately playable. Decorating the surface with bold shapes and stickers turned it into a tiny flying flag, and the long ribbon tail added flutter and a sense of motion even when the wind was shy.
Carrying a finished kite down the block felt like carrying a small celebration. The colors against a pale sky and the gentle tug at the string brought out that kid-euphoric grin that makes adults grin back.
Steps
- Cut a diamond shape from a sheet of craft foam and reinforce the edges if needed.
- Decorate the foam surface with markers, stickers, or adhesive shapes.
- Attach a lightweight dowel or skewer across the back for support.
- Tie a long ribbon tail to the bottom and add a string to the center.
- Test the kite on a breezy day and adjust balance as necessary.
Felt flower crowns for backyard dress-up play
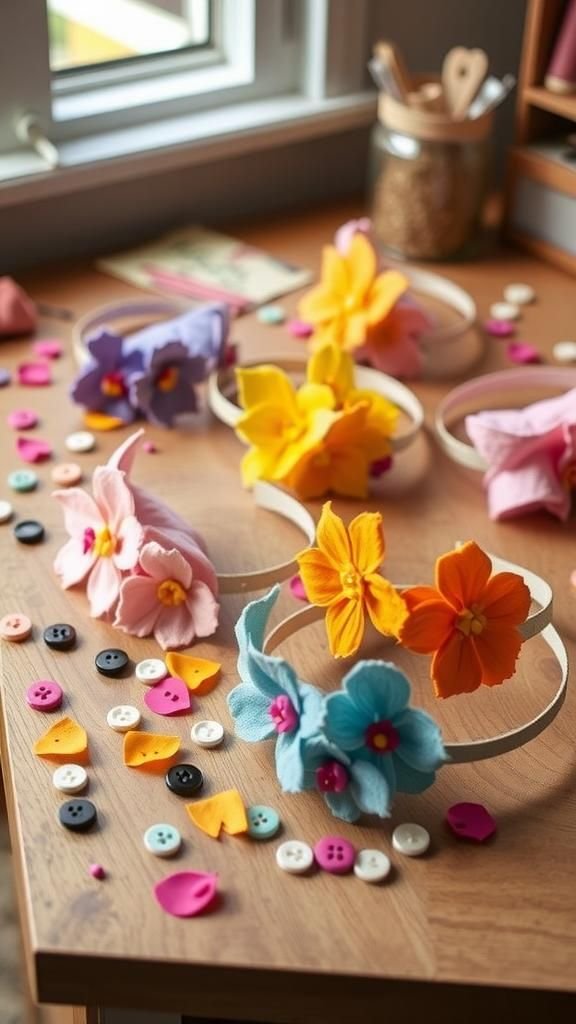
Making felt crowns turned our living room into a little atelier of petals and giggles. The soft texture of felt and the gentle bend of a headband made everything forgiving and easy to wear.
I remember the thoughtful pauses while choosing petal colors and the proud moment when a crown slipped into place for a twirl. The crowns became props for imaginative games that stretched through snack time and into late afternoon make-believe.
They smelled faintly of fabric and glue and carried an air of slightly regal fun.
Steps
- Measure head circumference and cut a felt strip to size for the crown base.
- Cut flower shapes and leaves from different colored felt pieces.
- Attach flowers to the felt strip using fabric glue or a needle and thread.
- Add elastic or overlap the ends to fit comfortably around the head.
- Embellish with buttons, beads, or sequins for extra charm.
Paper bag puppet theater for tiny dramatists
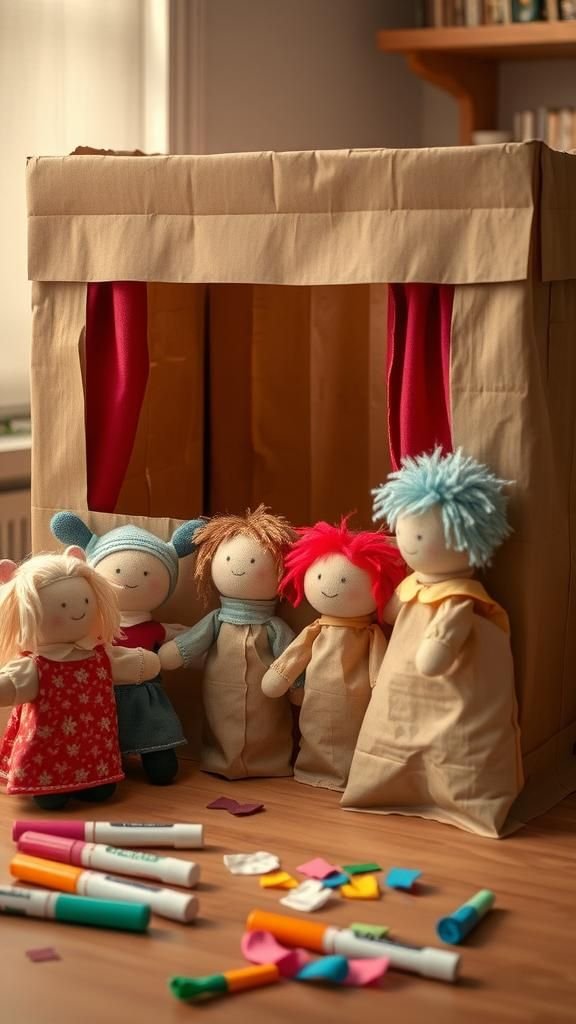
The rumple of a paper bag became a whole character with a few drawn eyes and a yarn hairdo. Puppetry turned quiet afternoons into improvised stories full of silly voices and grand declarations.
I loved the way simple materials teased surprising personalities out of kids, and how a row of hand-drawn characters could command more attention than a polished toy. The rustle of paper and the soft slap of a puppet on a cardboard stage added sound effects that made everyone grin.
It felt delightfully theatrical and approachable.
Steps
- Gather paper bags, markers, yarn, felt scraps, and glue for decoration.
- Draw faces and features on the bag front, adding yarn hair or felt clothing.
- Create a simple cardboard stage by cutting a window and decorating the frame.
- Put hands inside the bags to animate characters and perform short scenes.
- Store puppets in a decorated box for future performances.
Leaf rubbing botanical art for curious fingers

Rubbing crayon over a leaf always felt like a tiny revelation of hidden patterns. The veins appeared like a secret map and the paper soaked up each ridge with delicate shading.
I remember watching a child tilt the paper and celebrate when a perfect silhouette emerged. The activity carried a quiet, contemplative rhythm and a surprising elegance, turning ordinary fallen leaves into delicate imprints.
Leaving a trail of leaf rubbings across the table made the day feel assembled from small discoveries and subtle, leafy textures.
Steps
- Collect flat leaves with interesting vein patterns and place them under a sheet of paper.
- Hold the paper steady and rub a crayon or pastel sideways to reveal the leaf texture.
- Experiment with layering multiple leaves for a collage effect.
- Trim and mount the best rubbings on colored paper for display.
- Label each rubbing with the leaf type or location as a simple memory.
Painted pebble story stones for quiet play
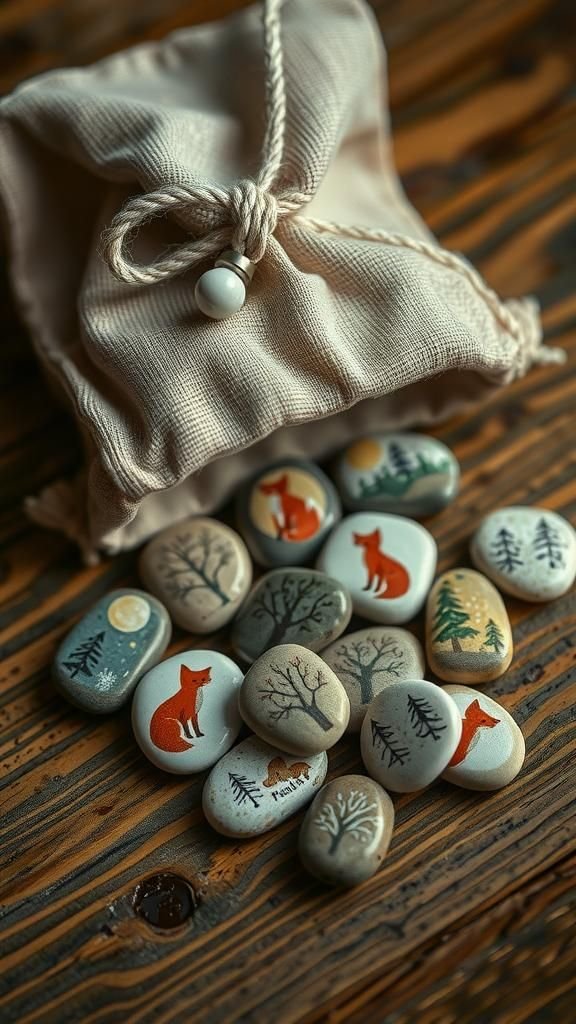
Each painted pebble became a tiny prop in bedtime improvisations. A fox, a moon, a tree; the set carried a pocket of stories that could be shuffled into endless combinations.
The smooth cold of stone moved easily between palms and the little illustrations invited hush and sharing. I liked how even the most tentative doodles seemed to gain character, and how a handful of stones could pause a restless evening into a calm, imaginative ritual.
They felt like portable prompts for small, soft adventures.
Steps
- Choose flat pebbles and clean their surfaces thoroughly before decorating.
- Paint simple icons or characters on each stone with acrylics or markers.
- Allow paint to dry and apply a clear sealant for durability.
- Store stones in a small pouch for storytelling sessions.
- Encourage mixing stones to build new tales during quiet time.
Origami tulips in a jar for paper gardens
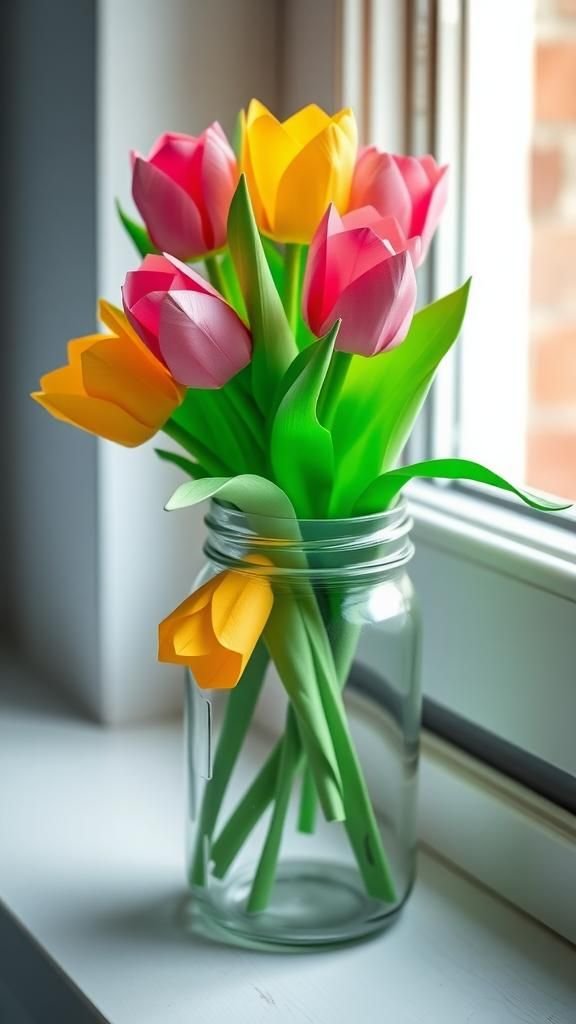
Folding paper into a tulip felt unexpectedly meditative and satisfying. The crisp edges and bright colors created a bouquet that lasted far longer than real blooms and had a charming paper stiffness that pleased the fingers.
Placing the stems in a jam jar gave the whole assembly a casual, homemade elegance. I enjoyed the soft shuffle of paper as each bloom found its place and the playful symmetry when petals opened just so.
It was a quiet project that rewarded gentle focus with an instant, cheerful arrangement.
Steps
- Select square sheets of colored paper for tulip petals and green paper for stems.
- Fold petals into classic tulip shapes using simple origami techniques.
- Attach petals to paper or wooden stems with a small dab of adhesive.
- Arrange tulips in a jar or small vase, trimming stems to fit.
- Display on a windowsill as a long-lasting paper bouquet.
Washable watercolor egg designs for spring tables

Using washable paints on papier-mâché eggs felt like a delicate ritual with low stakes. The translucent washes pooled and shimmered, creating soft gradients and marbled swirls that surprised even the littlest painters.
I loved how colors bled gently into one another and how each egg gained a personality as it dried. The scent of damp paper and the quiet concentration around the table made the moment feel slow and gentle.
The finished eggs sat in a basket like small, painted planets that brightened the room.
Steps
- Prepare papier-mâché or plastic eggs and set them on a drying rack.
- Apply watercolor washes in layers, letting each layer dry for soft blending.
- Add details with a fine brush or washable markers once base layers are dry.
- Seal with a clear washable coat if desired for longevity.
- Arrange the eggs in a decorative basket for display.
Wind chime from shells and beads for porch music
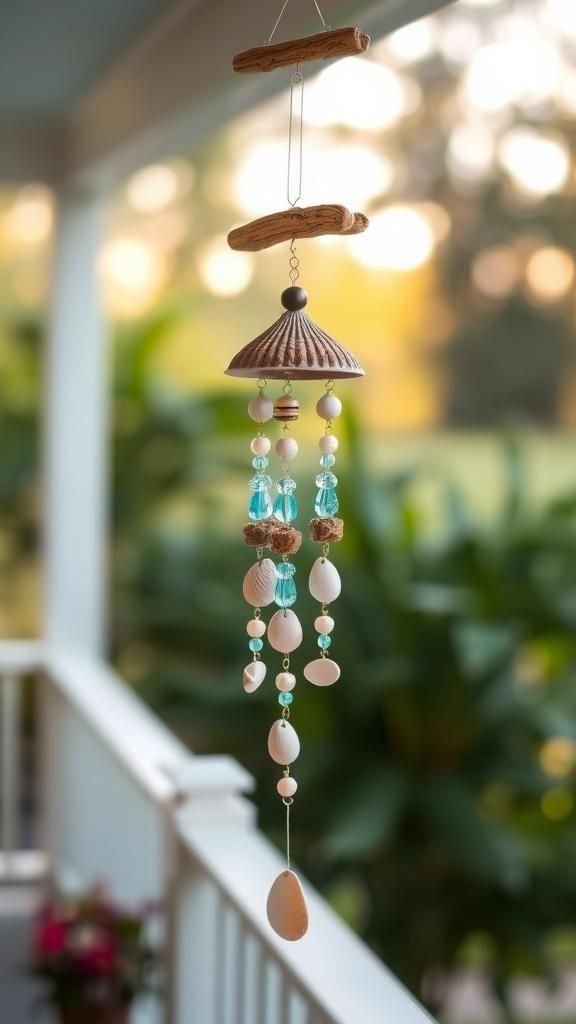
The gentle clink of shells and beads suggested a seaside afternoon even when we were miles from the ocean. I loved the soft contrast between the brittle edges of shells and the smooth glass beads; together they made a little chorus that changed with every breeze.
The stringing produced a quiet, focused energy and the finished chime created a steady, calming rhythm that felt soothing during slow mornings. It brought a tactile seaside memory to the porch, light and breezy in both sound and look.
Steps
- Gather shells, beads, small driftwood pieces, and sturdy cord or fishing line.
- Drill tiny holes in shells if needed and arrange bead-shell patterns on the cord.
- Tie secure knots between each element and attach multiple strands to a wooden ring.
- Hang the finished chime in a sheltered outdoor spot.
- Adjust strand lengths to balance sound and movement.
Sock puppet neighborhood friends for imaginative play

Old socks took on new lives as quirky neighbors with button eyes and stitched smiles. Each puppet developed a backstory as small hands animated mouths and invented accents.
The fabric textures and mismatched buttons gave each character an endearing roughness, like beloved stuffed animals gone theatrical. It was a pleasure to watch shy kids find confidence through a puppet’s voice and to see group stories sprout up around a cardboard set.
The puppets smelled faintly of laundry and adventure, and they traveled easily from room to room.
Steps
- Choose clean socks and gather buttons, felt scraps, yarn, and glue or thread.
- Create facial features by sewing or gluing on buttons and felt shapes.
- Add hair from yarn and small clothing details from fabric scraps.
- Put a hand inside and practice movements to create distinct voices.
- Store puppets in a little theatre box for impromptu shows.
Marbled Easter-style paper sheets for creative cards

Drifting colors across a shallow tray of marbling solution created swirls that felt accidental and elegant. The moment a sheet touched the surface and lifted away, a unique pattern emerged like a small, abstract painting.
I loved how no two sheets matched and how the colors sometimes pooled into surprising veins. The finished paper made lovely cards or framed pieces, and there was a pleasingly messy cleanup that felt like the proud end of an artistic experiment.
It rewarded patience with visual richness and a little bit of chaos.
Steps
- Prepare a shallow tray with marbling medium and choose liquid paints or inks.
- Drip colors onto the surface and swirl gently with a stick to create patterns.
- Lay a sheet of absorbent paper on the surface to pick up the design.
- Lift the paper carefully and rinse the tray for the next print.
- Allow paper to dry flat before trimming for cards or art projects.
Spring scavenger hunt craft map for outdoor fun
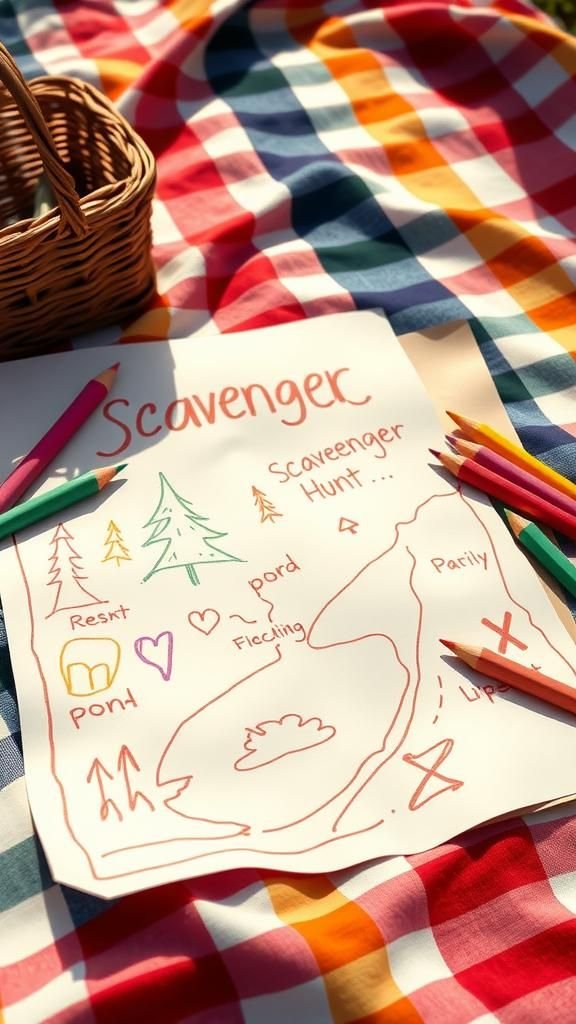
Drawing a map together turned a simple walk into a themed adventure. The act of sketching landmarks and little symbols felt collaborative and a bit mysterious.
I enjoyed the focus as kids conferred over where to hide a painted pebble or a paper flower, and the walk that followed felt like a treasure walk with gentle triumphs at each find. The map bore the mark of hurried scribbles and proud labels, and folding it into a pocket made the outing feel like a miniature expedition worth repeating.
Steps
- Fold a sheet of paper and sketch a simple map of the backyard or nearby park.
- Mark clues or icons where small craft items are hidden or waiting.
- Decorate the map with symbols and a playful legend for clarity.
- Hand the map to participants and let them explore to find each marker.
- Celebrate finds with small prizes or a shared snack at the final spot.