I remember the first time I pinned a tiny Polaroid and a ticket stub to a corkboard and felt a strange lift in my day. Making a vision board has felt less like a checklist and more like a quiet ritual, something that brings color and texture to the corner of a room.
Table of Contents
These Vision Board Craft Ideas are snapshots of different moods and moments I’ve tried over the years.
Each idea felt like a small experiment in what makes intentions feel tangible and friendly.
Worn map travel collage with layered textures and ephemera

I fell for the scent of old paper while making this travel collage, the faint must of a decades-old map mixing with glossy postcard inks. The surface is a collage of creased routes, ticket stubs with rough edges, and a scattering of tiny stamps that catch light differently.
It sits warm against my fingertips and invites a slow smile when I pass by. There’s comfort in torn edges and the soft scrape of cardstock, like a pocket of future trips reduced to something you can touch.
Steps
- Gather a faded map, postcards, ticket stubs, and small paper souvenirs.
- Arrange the pieces on a sturdy backing until the composition feels pleasing.
- Secure corners with archival mounting corners or double-sided tape.
- Add tiny stamps and labels for depth and tactile variety.
Minimalist monochrome board with clean lines and negative space
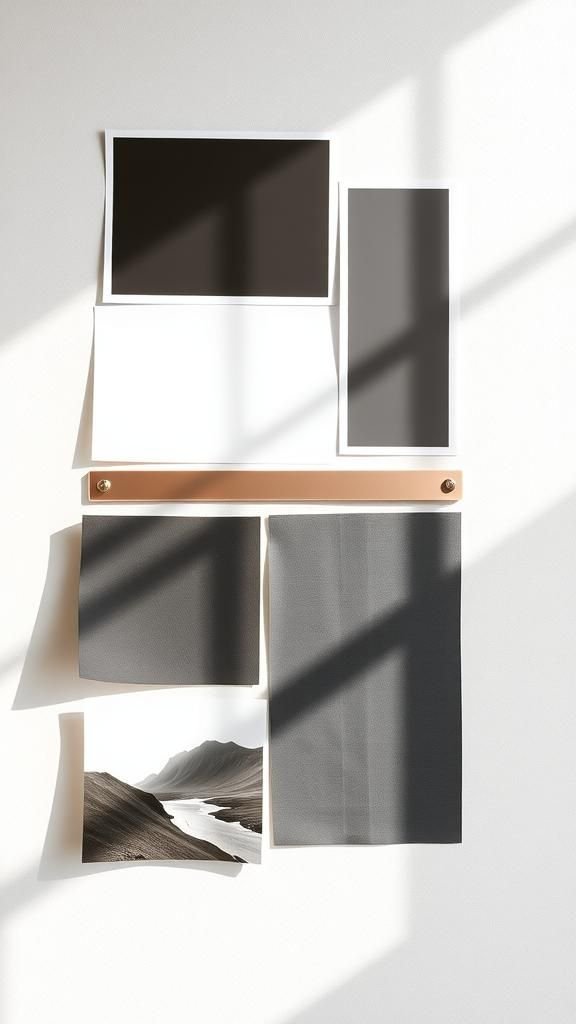
There’s a calm that comes from a monochrome board, where crisp black and white photographs sit alongside matte paper swatches and a single metallic accent. The emptiness around each piece feels intentional, like deliberate breathing room.
I noticed how light plays differently on matte versus glossy surfaces, and how a thin strip of metallic catches attention without shouting. The tactile contrast between thick rag paper and smooth photo stock adds subtle interest, turning minimalism into something quietly tactile and very personal.
Steps
- Select photos and paper swatches within a single color family.
- Lay out pieces on a neutral backing leaving generous negative space.
- Mount each element with clean archival corners or photo-safe adhesive.
- Add one small metallic or textured accent for contrast.
Photo grid timeline capturing years and small victories

I enjoy tracing a quiet narrative through a photo grid, where each square holds a memory that feels like a marker on a map. The rhythm of repeating shapes calms the eye, while varying textures and tones keep the surface lively.
I ran my fingers along the edges of Polaroids and printed snaps, noticing the glossy shine and tiny fingerprint smudges from past handling. It feels less like a list and more like a gentle archive, a sequence that hums with the ordinary joys that build up over time.
Steps
- Choose a set of photos representing moments across time.
- Arrange them into a grid layout on a firm backing.
- Mount photos evenly using photo corners for a tidy edge.
- Label a few images with small captions for context.
Vision jar filled with slips of intention and tiny trinkets
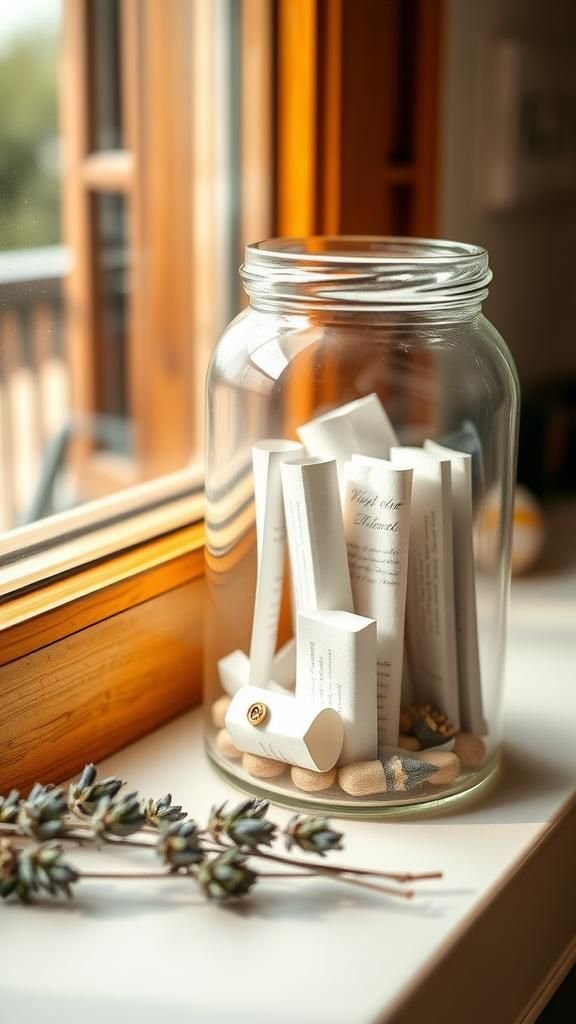
This idea lives on my windowsill: a clear jar layered with handwritten slips, tiny charms, and a single dried lavender sprig that releases gentle scent when the lid is nudged. The jar refracts morning light into tiny sparkles, and reading a slip feels like pulling a small, sealed thought into the day.
There’s an intimate hush to turning the glass in hand, watching paper edges flutter. It’s tactile and private, a little ritual that made intentions feel more like friendly notes rather than distant goals.
Steps
- Collect a clear jar and a stack of small paper slips or tags.
- Write short intentions, fold them, and add into the jar with charms.
- Layer in natural elements like dried flowers for scent and texture.
- Place the jar on a sunny ledge where light plays through it.
Nature-pressed board with leaves, petals, and earthy tones

A pressed-nature board feels like bringing the outside in, paper leaves flattened into a quiet tapestry against raw linen. The brittle lace of a fern frond, the velvet of a dried petal, and the faint scent that lingers make it a slow, sensory patchwork.
I noticed the delicate crackle when I brushed past and the way sunlight veins through translucent parts. There’s a small serenity in seeing seasons preserved in paper-thin form, a reminder of time marked in texture and color.
Steps
- Select pressed leaves, petals, and small botanical elements that are dry.
- Arrange them on a neutral linen or heavy paper backing for harmony.
- Mount elements with archival photo corners or clear photo mounting squares.
- Seal the edges with a glass frame to preserve and display safely.
Night-sky board with constellation stickers and fairy lights

This board feels like a small planet on my bedroom wall, dark indigo paper dotted with metallic stars and tiny constellation decals that shimmer when lights catch them. A thin string of warm fairy lights threads around the edge, casting halos and soft reflections on glossy star stickers.
Touching it at night offers a brief, private pause; the light is gentle and the metallic flecks seem to breathe. It’s a reminder of quiet expanses, a compact night sky that invites slow, lingering thoughts.
Steps
- Choose a deep indigo or black backing and metallic star decals.
- Position constellation stickers to form meaningful patterns across the surface.
- Drape a string of warm fairy lights around the board perimeter for glow.
- Mount the board securely on a wall at bedside height.
Mood wheel board showing an emotional compass and color swatches

I made a circular mood board once and found it oddly centering, like a personal compass. Segments held colors that felt like feelings, textured fabrics that matched a mood, and clipped words that gave shape to fleeting impulses.
Running a hand across felt swatches revealed small contrasts: linen cool against velvety suede. The wheel’s radial rhythm creates a soothing choreography, nudging attention toward balance and the textures that steady the day.
It’s playful and quietly honest, a tactile way of naming emotional weather.
Steps
- Cut a circle backing and divide it into segments representing different moods.
- Place color swatches, fabric samples, and clipped words into each segment.
- Layer small textured items for tactile contrast within segments.
- Mount the finished wheel where it can be rotated or referenced.
Fabric and textile patchwork for a tactile vision board

This patchwork started from an old scarf and a handful of interesting fabric samples found at a market. The surface is quilt-like, each square offering a different weave, sheen, or weight.
I loved the tiny resist between smooth silk and coarse linen under my palm, and the faint scent of linen oil that reminded me of afternoons in a sunlit workshop. It reads like a tactile collage, inviting slow stroking and quiet reflection rather than quick glances, becoming a cozy corner of intention.
Steps
- Collect fabric scraps that feel meaningful in texture and color.
- Arrange them into a patchwork layout on a firm backing for balance.
- Secure edges of each piece with fabric-safe mounting corners or hidden stitches.
- Frame or finish the backing for a clean display edge.
Culinary dreams board with recipe clippings and spice sachets

This board smells faintly of cinnamon and citrus from the small spice sachets pinned in a corner. Recipe clippings with glossy food photography mingle with handwritten notes about flavors to try and a clipped café menu with a coffee stain that felt charming.
Handling it brought out the tactile contrast between glossy magazine images and crinkled paper recipe cards, and the sachets add weight and scent that make culinary intentions feel delightfully immediate and warm.
Steps
- Gather recipe clippings, cafe mementos, and small sealed spice sachets.
- Arrange them with attention to color and scent balance on a cork backing.
- Pin or mount each element securely, leaving space for future additions.
- Hang where the spice sachets can release subtle aroma into the air.
Tiny Polaroid-chain mobile for rotating daily focus
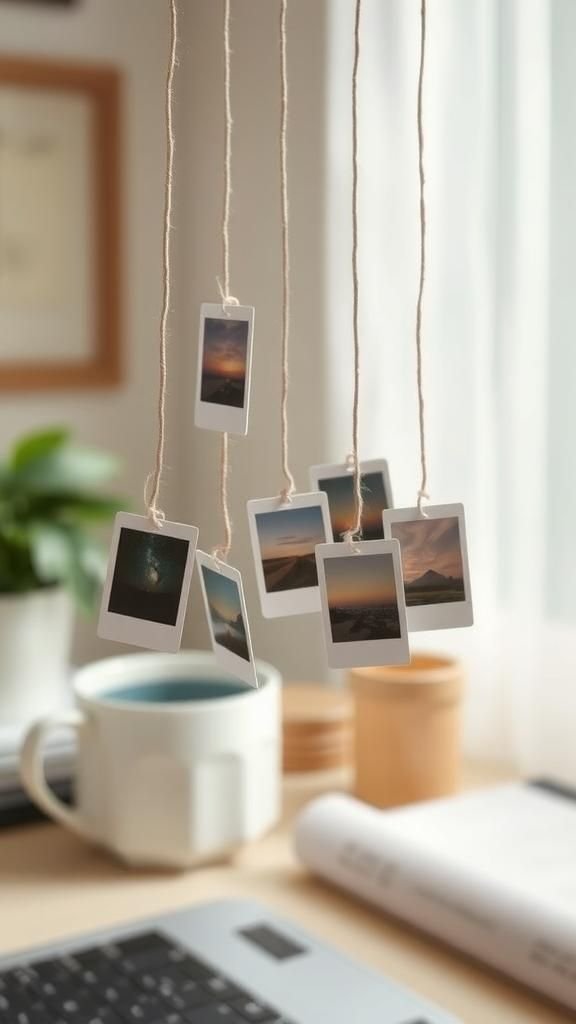
A mobile of tiny Polaroids swings beside my desk, catching a draft and turning images into moving reminders. Each snapshot hangs from a thin cotton thread, producing a gentle rustle and shifting catchlights as the air moves.
Watching the small images rotate becomes a soft ritual, a way to change focus without heavy decision. It feels playful and light, like carrying a pocket of intentions that move through space, catching light differently with each tilt and offering a new angle on a familiar image.
Steps
- Select a series of small photos or Polaroids to represent focal themes.
- Punch tiny holes in top edges and thread through thin cotton or twine.
- Tie threads at varied lengths to a central ring or stick to form a mobile.
- Hang the mobile where it can turn gently in passing breezes.
Bucket-list map dotted with pins and hand-drawn routes
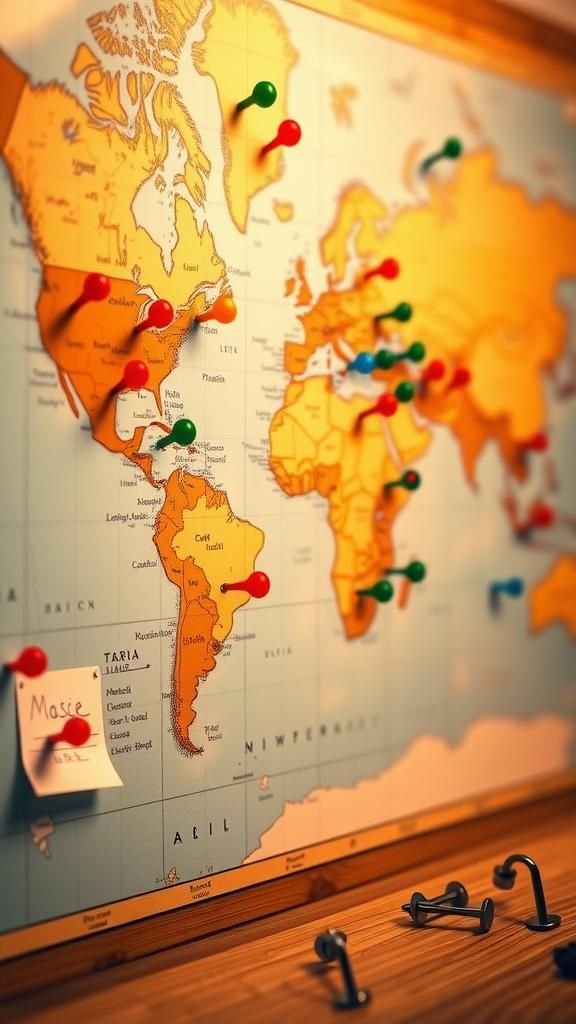
This board feels like a playful promise, a map peppered with colorful pins and tiny notes that mark places I hope to wander. Hand-drawn routes loop in whimsical curves, and a thin pencil line shows planned detours.
The pins sit like little beacons with cool metal heads that catch light, and I enjoy the tactile click when placing or nudging one. It reads like a conversation between curiosity and memory, paper and metal creating a portable sense of what might lie ahead.
Steps
- Choose a world or regional map as the backing surface.
- Mark dream locations with colorful pins and small handwritten tags.
- Draw light route lines between pinned spots to suggest possible journeys.
- Add a small legend or key to explain personal symbols.
Vision board calendar with monthly focal points and photos

Turning intentions into monthly touchpoints helped make the big feel manageable. Each month has a small vignette: a photo that captures the mood, a clipped phrase that fits the season, and a tiny material swatch that feels right.
Flipping from one month to the next carries a tactile sense of time, like changing a page in a slow, deliberate book. The calendar arrangement turned the board into a living object, a rhythm that felt friendly rather than bossy, and invited gentle check-ins rather than long lists.
Steps
- Create a twelve-segment backing, one for each upcoming month.
- Place a photo, a short phrase, and a small material sample in each segment.
- Add lightweight embellishments to mark seasonal changes or priorities.
- Display the calendar where monthly segments are easy to glance at.
Affirmation card cluster that lives by the bedside

A small cluster of affirmation cards on my nightstand became a gentle way to start mornings. Each card feels like a soft handshake: thick card stock, rounded corners, calming fonts, and a small watercolor wash behind the words.
I liked picking one by feel before getting out of bed, the texture of linen-surfaced paper under thumb. They felt like tiny companions that could be swapped without fuss, offering a little lift without fanfare when a morning felt heavy or slow.
Steps
- Prepare a set of short affirmation phrases on thick card stock.
- Trim cards to a comfortable hand-held size and round the corners if desired.
- Arrange the cards in a small holder or tied bundle for the bedside.
- Rotate or replace a card when a fresh phrase feels right.
Seasonal rotation board that shifts with the months

This board lives on a wall hook and changes gently with the seasons. Spring brings pressed buds and pastel clippings, while autumn introduces warm paper tones and a hint of spice scent.
The transition feels ritualistic and tactile: sliding off one panel to reveal the next is a small act that marks time. I liked how colors and textures change my mood subtly, as if my little corner were following the outdoor light without being literal about calendars or deadlines.
Steps
- Create multiple removable panels, each themed for a different season.
- Design each panel with color palettes, textures, and small seasonal mementos.
- Store panels neatly and swap them on a regular cadence to refresh the space.
- Hang the active panel on a dedicated wall hook or clip.
Minimal sticky-note cascade for micro-goals and reminders
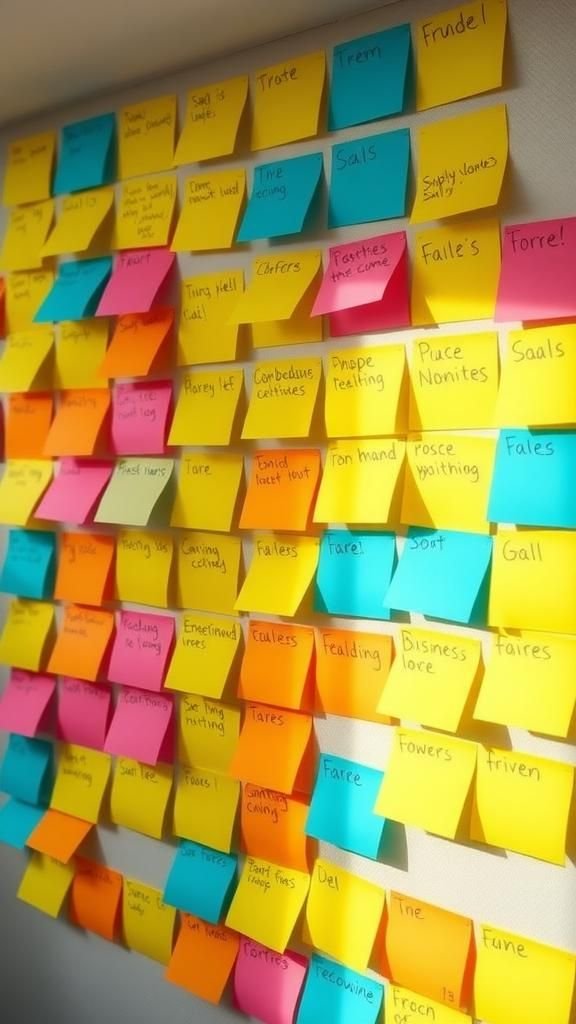
Sticky notes in a cascading grid turned into a playful way to jot micro-goals that felt light and undoable. The little lift of a bright square and the soft adhesive peel make each note feel temporary in a comforting way.
Bright colors create a visual rhythm and the small handwriting adds a personal cadence. Tapping a corner to lift a note off felt less dramatic than crossing something off a heavy list, and the cascade quietly shifted as ideas moved through stages of attention.
Steps
- Choose a selection of colored sticky notes that feel energizing.
- Write single micro-goals or reminders on each note and arrange them in a grid.
- Layer notes to indicate priority or progress by their vertical position.
- Remove or replace notes as tasks shift or complete.
Collage of textures: metallics, matte, glossy contrasts

I loved assembling a board that was all about tactility and reflection, a patchwork where metallic foil sits beside deep matte paper and high-gloss photographs. Running a fingertip across the surface gives a small thrill as light jumps between finishes.
The metallic catches late afternoon sun and throws warm glints across adjacent matte areas, while glossy spots act as tiny mirrors. It reads as a study in contrast that keeps the eye moving and invites the hand to keep exploring different finishes.
Steps
- Collect samples of metallic foil, matte paper, and glossy photos or prints.
- Arrange pieces so contrasting finishes sit next to each other for interplay.
- Mount each element with clear photo corners or archival-safe adhesive squares.
- Step back and shift a few pieces until the visual rhythm feels balanced.
Dream home elevation board with material swatches and skylines

Putting together an elevation board felt like building a tiny house of imagination, with material swatches for flooring, fabric samples for upholstery, and a cutout skyline for context. The tactile delight was in comparing cool tile to warm wood, and imagining footsteps crossing a floor that I could actually feel beneath my hand.
Little paint chips and sample textures gave the surface a lived-in sense, as though one could almost hear the echo of rooms and smell fresh coffee in a proposed kitchen.
Steps
- Collect small material swatches for flooring, fabrics, and finishes.
- Arrange a simple skyline or sketch to anchor the concept visually.
- Place swatches against the sketch to test color and texture harmony.
- Mount samples securely and label any favorites for easy reference.
Career ladder board layered with role snapshots and goals

This board became a quiet professional map, dotted with snapshots of roles I admired, short notes about skills to build, and a few printed mission statements that felt honest. The collage had the cool paper of resumes, the glossy sheen of headshots, and the tactile heft of a folded business card tucked into a corner.
It felt pragmatic without being clinical, a visual encouragement that could be glanced at between emails and meetings without needing to be overthought.
Steps
- Collect role images, short skill reminders, and small professional mementos.
- Layer items on a backing to suggest progression or thematic groups.
- Highlight a few focal images with subtle frames or contrasting paper.
- Place the board where it can be seen during routine work breaks.
Vision glass window: transparent sheets layered like stained glass
Transparent acetate or vellum sheets stacked with images and color washes created a luminous window effect on my wall. Light passing through the layers softened tones and created new hues where color washes overlapped.
The edges had a clean gloss and tiny refractions that made small rainbows in certain angles. It felt like crafting with light itself, a fragile, airy surface that changes mood through the day and rewards a pause to watch the colors shift as sun moves across the room.
Steps
- Select transparent sheets such as acetate or vellum in complementary tones.
- Print or mount images and color washes onto individual transparent layers.
- Stack layers on a clear frame or between two glass panes for depth.
- Place the assembled window where daylight can stream through.
Soundboard with lyric clippings, concert tickets, and textures

This board felt like a small orchestra of memories, where a favorite lyric clipping sat next to a frayed concert ticket and a tiny swatch of an old tour tee. The surface was a collage of different paper weights and a hint of stage-sweat scent trapped in a folded program.
Tactile contrasts and the occasional metallic guitar pick tucked into a corner made it feel lively and immediate. Passing fingers over it could pull up a chord progression in memory, an embodied echo of nights that mattered.
Steps
- Collect lyric clippings, concert memorabilia, and small tactile elements.
- Arrange them to create rhythmic visual groupings across the board.
- Secure delicate pieces with photo corners and heavier items with firmer mounts.
- Add a small pocket for rotating mementos like picks or ticket stubs.
Digital hybrid board printed and pinned to a cork wall

I enjoyed blending a digital collage with tactile display, editing images on a laptop and printing them into a patchwork that felt both crisp and human. The prints sat alongside handwritten notes and tiny natural keepsakes, and the contrast between smooth ink and the rough cork made the board feel handcrafted despite its digital start.
There was satisfaction in seeing pixels become paper, and in the small ritual of pinning a digital vision into real-world space where light and touch could alter its presence.
Steps
- Design a digital collage and print selected elements on quality paper.
- Mix printed pieces with handwritten notes and small tangible mementos.
- Pin the combination onto a cork backing with attention to spacing.
- Step back and tweak placements for visual balance.