I have a soft spot for quiet winter afternoons spent with a stack of paper and a mug nearby. Folding, snipping, and watching flat sheets become starry lace is one of those calming rituals that feels cozy and endless.
Table of Contents
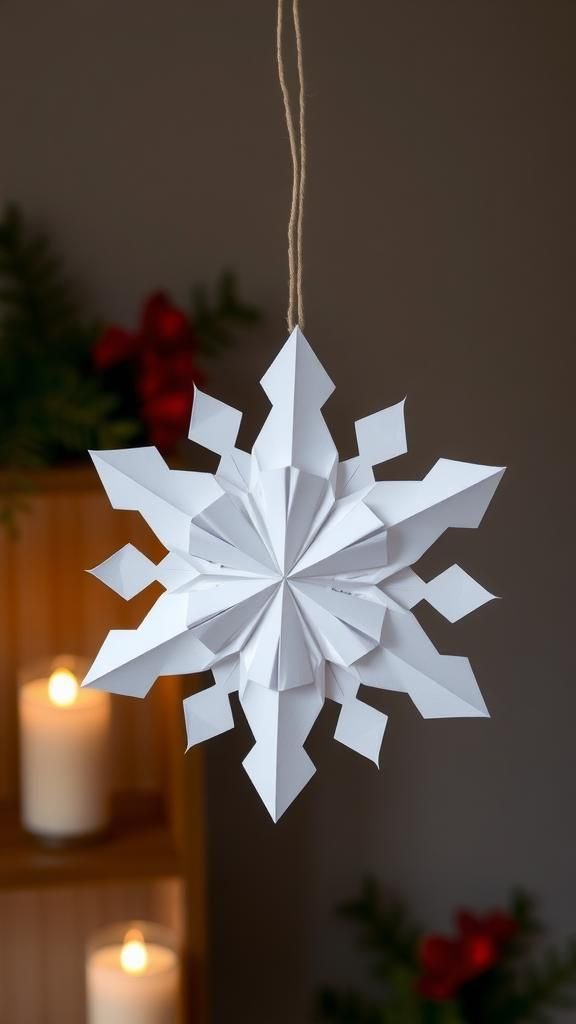
Winter Snowflake Paper Crafts often bring back the scent of paper and the faint crunch of tiny offcuts on the table.
Over the years I collected small tricks and happy accidents that shaped my favorite designs. Working on Winter Snowflake Paper Crafts became a way to share tiny handmade moments across windows, mantels, and tree branches, each piece carrying a little room-light and memory.
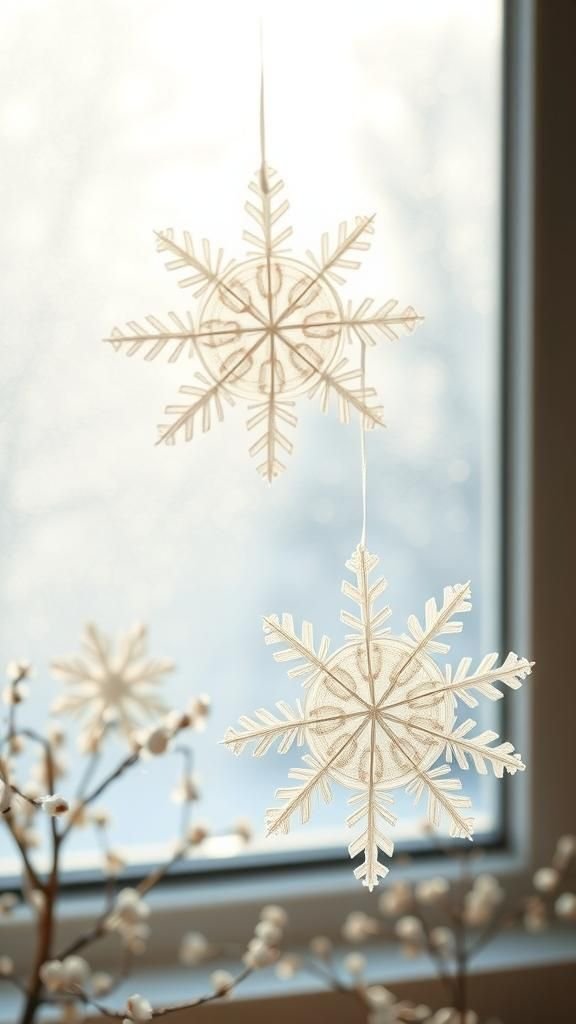
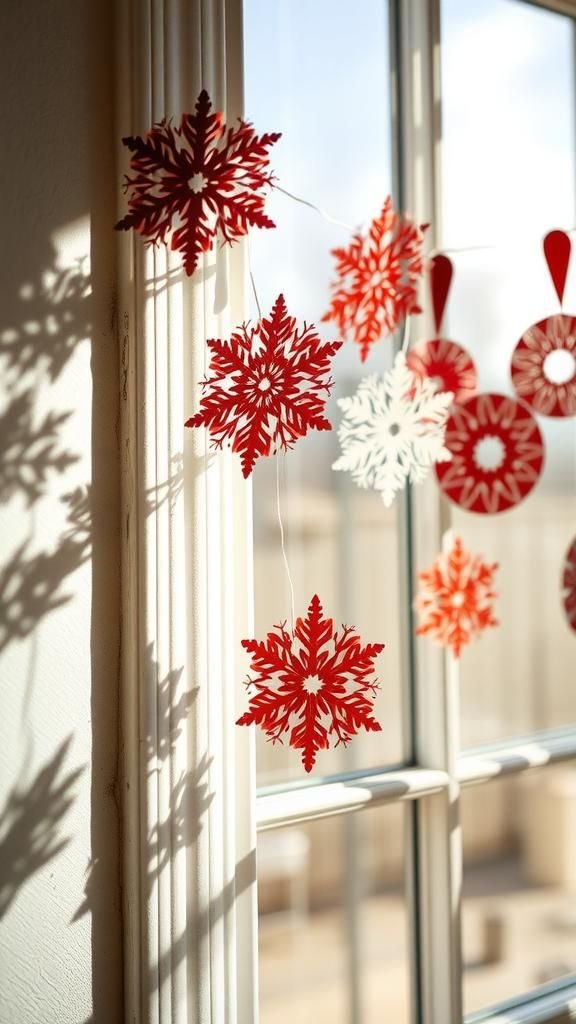
Classic folded snowflake with scalloped edges

I remember making this one at the kitchen table while the radio hummed and the window steamed a little. The paper felt smooth and almost silky under fingertips, and the rhythmic folding gave a calm steadiness that I liked.
After a few small snips the silhouette invited daylit shadows across the tabletop. The scalloped edges lent a soft, vintage look that caught the light in delicate ways.
There was a tiny satisfying rustle when the cutouts fell away, and the finished piece read like a small paper moon.
Steps
- Fold a square paper diagonally to form a triangle, then fold repeatedly to create a narrow cone-shaped wedge.
- Outline a scalloped edge along the wide end, leaving room for interior patterns.
- Make small interior cuts along the folded layers to form lace-like shapes, keeping some paper intact for structure.
- Unfold gently to reveal the full symmetrical snowflake and flatten under a heavy book if needed.
Intricate lace-style snowflake from thin paper
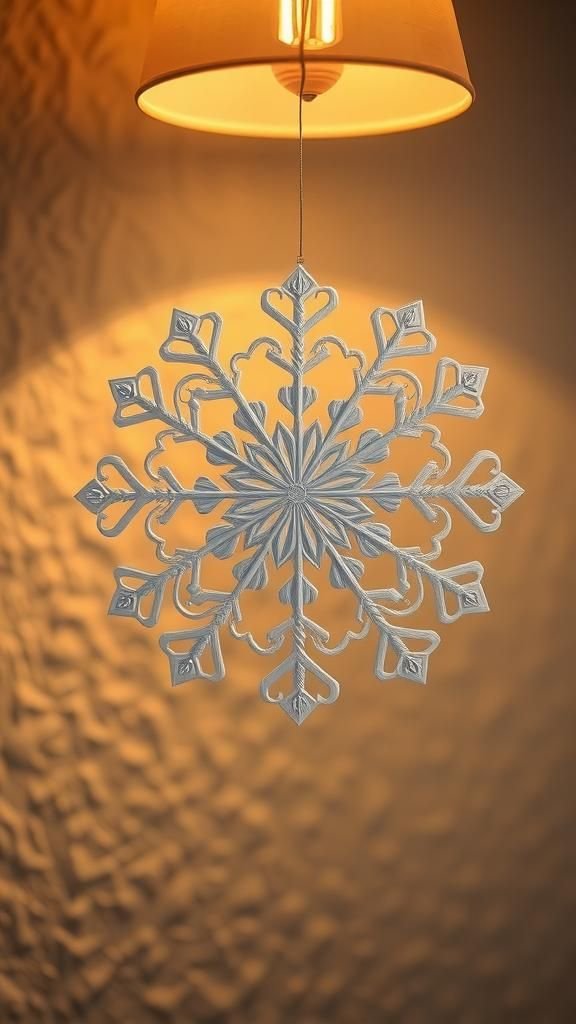
This lace-style snowflake always felt like a miniature curtain of frost. Thin paper made each tiny cut sing with fragility, and the finished piece had a whisper-light quality when lifted.
I remember peering through its negative spaces against a lamp, the filigree throwing tiny starbursts on the wall. The pattern read like delicate embroidery, with narrow bridges and airy spokes.
Handling it required gentle attention, and the moment it was pinned to a branch it seemed to catch a little hush of winter in the room.
Steps
- Trim a thin sheet into a precise square and fold it into a compact triangular wedge.
- Sketch an intricate lace pattern along the folded edges to guide the cuts without removing too much support.
- Make careful, small incisions in the folded layers to create delicate filigree, maintaining connecting bridges for strength.
- Unfold slowly to preserve the lacework and press flat between sheets of paper for display.
Layered cardstock snowflake with shadow play
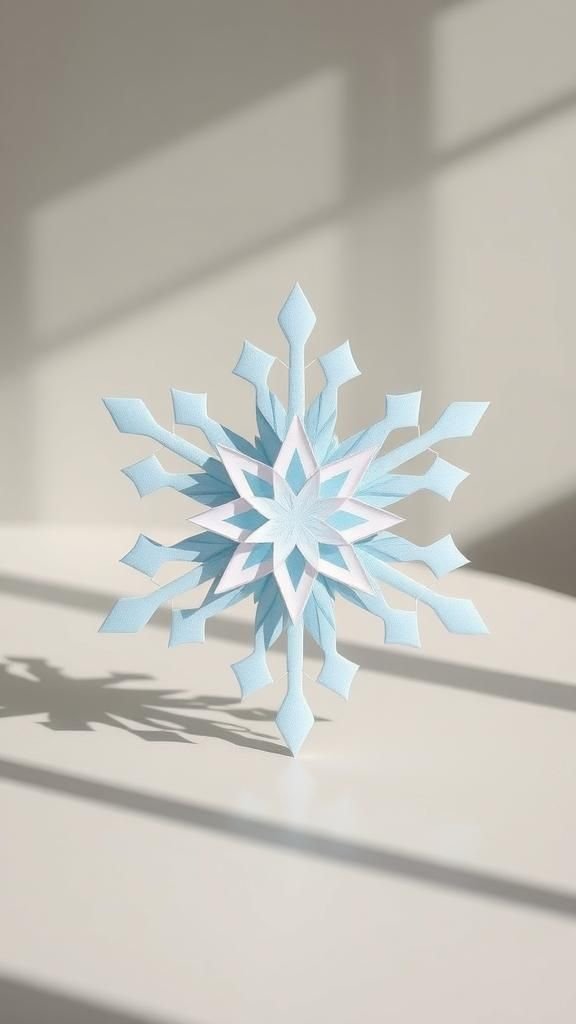
This layered snowflake always reminded me of frosted glass windows on slow mornings. Heavier cardstock created a reassuring weight and allowed each tier to sit slightly apart, which made mid-morning light spill through in tonal layers.
I liked how the shadows grew deeper toward the center, giving a sculptural feeling usually reserved for small objects. Colors could be muted gray-blues or crisp white, and the thicker edges provided a tactile rim that felt good between fingers.
The overall effect was like a tiny paper sculpture that loved being turned slowly.
Steps
- Cut several identical snowflake shapes from sturdy cardstock in descending sizes to form layers.
- Score gentle folds near the center of each layer to create slight elevation without breaking the paper.
- Stack the layers with small spacers between them to allow light and shadow to form.
- Secure the center through all layers with a small brad or a neat knot of thread for hanging.
Origami star-snowflake hybrid for festive hanging
There was an evening when a folded star met a snowflake pattern and something unexpectedly charming appeared. The origami folds gave a crisp angularity while the snowflake details softened the silhouette.
I remember the clean creases and the tiny paper peaks that caught candlelight, making the piece look jewel-like. The hybrid felt lively, like geometry meeting winter poetry.
Hung in a small cluster it created a playful rhythm as each piece turned slightly in the draft from the open oven.
Steps
- Begin with square paper and perform base origami folds to create a star-like polygon.
- Introduce small, symmetrical cuts along selected points of the folded star to form snowflake motifs.
- Unfold carefully until the hybrid shape emerges with star points interlaced with snowflake openings.
- Reinforce the center with a dab of adhesive or a tiny stitched knot, and add a loop for hanging.
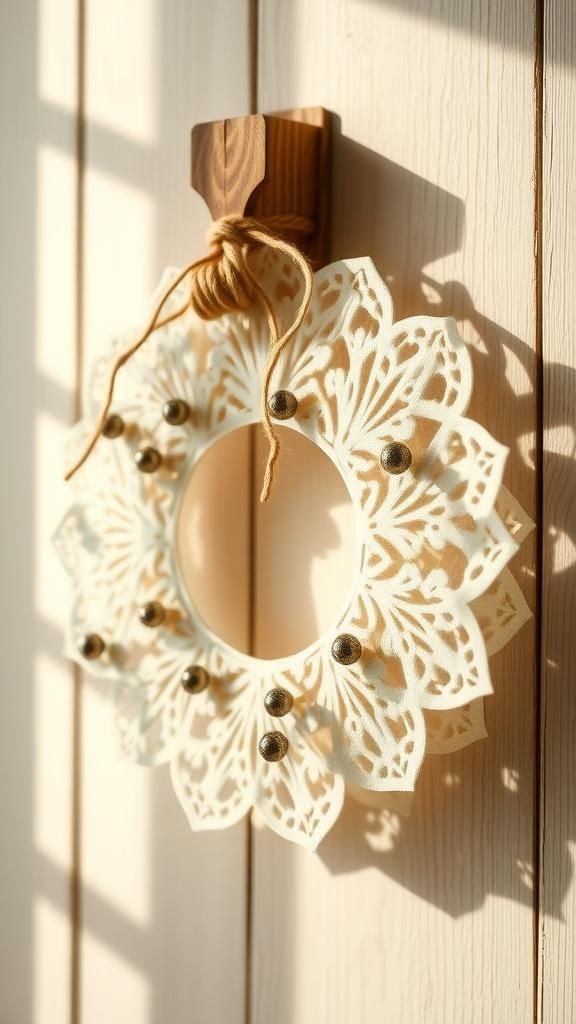
Doily-inspired delicate paper snowflake ornament charm

Paper doilies always felt like tiny heirlooms, and turning one into a snowflake brought a soft romance to the table. The circular lace pattern translated into petal-like arms that looked like frozen blooms.
I kept a stack of old doilies and loved how the soft paper absorbed a faint tea stain, lending warmth to the white. The finished ornaments had a handmade bookish quality and made the room feel gently furnished with memories.
When light brushed them, faint shadows danced like whispers across the mantel.
Steps
- Gather paper doilies and trim any scalloped outer edges to refine the snowflake shape.
- Layer doilies or overlap small segments to build complexity and visual depth.
- Pin or stitch a tiny loop through the center to create a secure hanging point.
- Optionally dust with a light shimmer or press between pages for a flatter display.
Coffee filter snowflakes with soft translucence
Coffee filters brought a playful surprise with their soft translucence and papery feel. They took dye in cloudlike washes, so each snowflake carried a watercolor halo around its edges.
I liked pressing the filters slightly to make the paper feel almost like fabric, and the result fluttered lightly in a breeze. When layered, the filters created a gauzy effect that read almost like frozen fog.
They were the kind of craft that felt forgiving in the hands, with each irregularity adding to the charm of the finished cluster.
Steps
- Flatten a round coffee filter and fold it into quarters or narrower wedges for symmetry.
- Snip decorative shapes along the folded edge to create lace-like patterns while keeping structural bridges.
- Unfold gently to reveal the translucent snowflake and let air dry if any dye was applied.
- Group multiple filters for a layered, ethereal display and secure centers for hanging.
Quilling snowflake with curled paper filigree
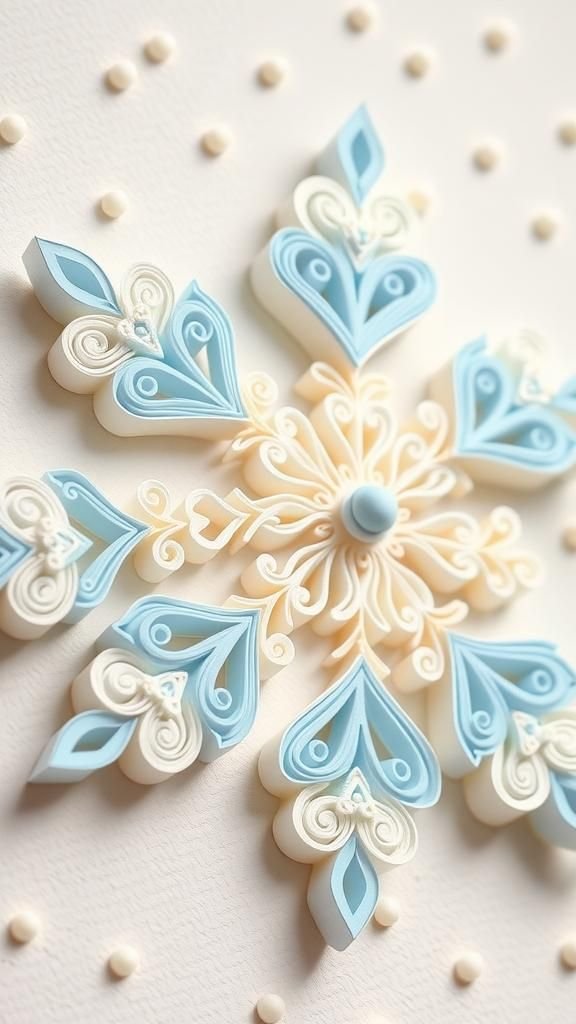
Quilling always felt like slow conversation with paper, each rolled strip a tiny voice. The snowflake made from quilled coils had a filigree sweetness, with spirals catching the eye like frozen whorls.
I remember the tactile pleasure of the little coils and the tiny shadows they cast on the base paper. The overall pattern read like ornate metalwork translated into paper, and it felt oddly grand against a simple card or framed in a small hoop.
The design invited close inspection and quiet appreciation.
Steps
- Prepare narrow paper strips and roll them into coils of varying tightness to form quilling elements.
- Arrange the coils into a symmetrical snowflake layout on a sturdy backing piece.
- Secure each quilled element with tiny adhesive points to maintain position and shape.
- Allow the piece to dry fully before framing or adding a hanging loop.
Stained-glass tissue snowflake for window glow
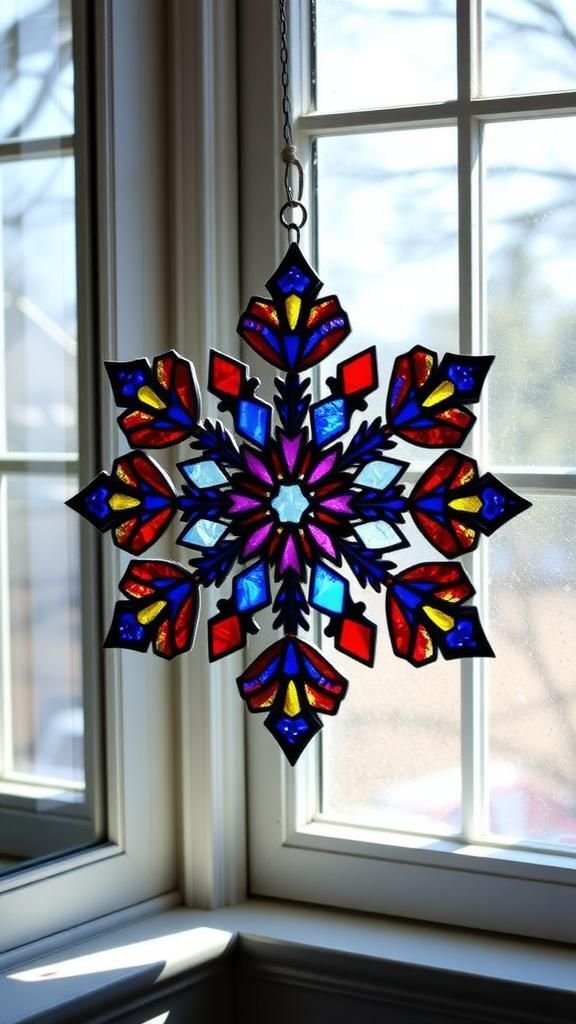
Tissue paper brought a gem-like quality to snowflakes when layered like stained glass. I enjoyed the way colors pooled and overlapped, creating little gradients that felt like captured twilight.
The edges had a feathered softness and the whole piece welcomed backlighting, turning ordinary panes into luminous panels. Hanging several at different heights created a gentle chorus of color, and the thin paper fluttered when a draft moved through.
The experience felt painterly, as if painting with translucent paper instead of brush and pigment.
Steps
- Cut a snowflake silhouette from a lightweight paper frame or cardstock ring.
- Tear small pieces of colored tissue paper and adhere them within the frame to build translucent panels.
- Smooth overlaps and ensure even coverage for a balanced color effect.
- Hang the finished piece in a sunlit window to enjoy the stained-glass glow.
3D geometric paper snowflake centerpiece sculpture
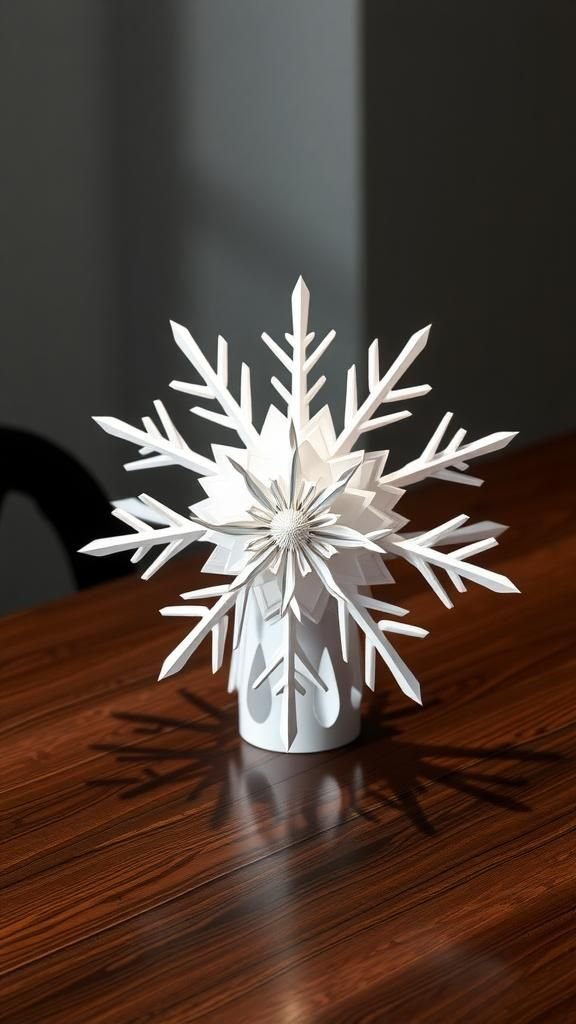
Constructing a three-dimensional geometric snowflake felt like building a tiny paper planet. The facets caught light differently as the piece rotated, and the interplay of planes gave it an architectural air.
I remember arranging one on a coffee table and watching guests tilt their heads to examine the angles. The folds and joins had a satisfying crispness under fingers, and the sculpture felt sturdy despite its paper nature.
Placed on a low tray with a few pine sprigs it read like a small winter altar rather than a simple ornament.
Steps
- Cut multiple geometric modules from matching-weight paper, ensuring uniformity for precise assembly.
- Score and fold each module along defined lines to create tabbed edges for joining.
- Interlock modules by inserting tabs into corresponding slots to form a three-dimensional structure.
- Reinforce critical joins with a minimal adhesive touch and balance the piece as a tabletop centerpiece.
Recycled magazine snowflake with colorful strips
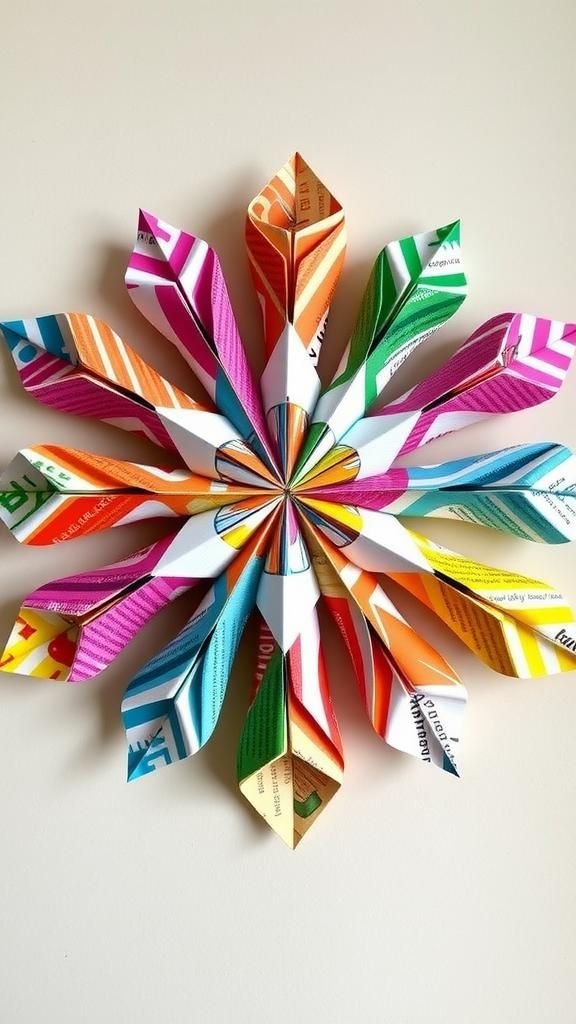
Old magazine pages seemed to become new in this playful snowflake. Bright swaths of color and glossy sheens transformed the motif into something lively and slightly cheeky.
I liked how each arm told a tiny visual story, with glossy type peeking through and small bursts of color aligning like confetti. The paper had a pleasant plastic-tinted feel and the edges showed off layered hues.
This craft always felt resourceful and cheery, and hanging a handful together produced a graphic cluster that made any room look hand-curated and expressive.
Steps
- Select magazine pages with appealing colors and cut them into uniform strips.
- Weave or fold the strips into symmetrical arms, aligning colorful patterns to create visual interest.
- Secure intersections with small adhesive tabs or tidy staples hidden beneath layers.
- Trim outer edges to refine the snowflake silhouette and prepare a hanging loop if desired.
Paper punch circle snowflake mosaic garland
Punching circles from different papers felt almost meditative, and arranging them into a mosaic garland turned the process into a ritual of small, bright tokens. The holes had neat round faces that caught light and built soft, rhythmic patterns.
I remember the tactile satisfaction of the punch and how the stack of dots grew into a strand that draped like beads. Hanging across a window or mantel the garland moved gently and produced an approachable, playful mood.
Each circle brought its own texture, from matte cardstock to glossy magazine bits.
Steps
- Punch matching-size circles from a variety of papers to create cohesive color groupings.
- Lay the circles in repeating patterns and secure them edge-to-edge on a thin thread or narrow ribbon.
- Maintain consistent spacing to achieve a rhythmic mosaic flow along the garland.
- Hang the garland across a window or mantel where it can flutter gently in drafts.
Watercolor-dyed paper snowflake with soft hues
Wet paper and pigment have a companionable relationship, and when soft watercolors pooled on sheets they created lovely, clouded snowflakes. I liked the way pigments bled at edges, arriving at pools of concentrated color that faded outward.
The finished snowflakes felt painterly, with subtle gradients that read like tiny skies. Handling them after drying had a fragile satisfaction, and grouping several together made a small landscape of pale blues and blushes.
They brought a gentle, handmade softness to cold windows where the colors warmed the glass.
Steps
- Apply diluted watercolor washes to heavyweight paper and allow them to dry flat to preserve color gradients.
- Cut the painted sheet into squares and fold into symmetrical wedges for snowflake designs.
- Trim decorative shapes along the folded edges to reveal watercolor patterns when opened.
- Flatten the completed snowflakes under a weight to ensure smooth display surfaces.
Accordion-folded dimensional snowflake mobiles for ceilings

The accordion-folded mobiles had a playful kinetic quality that I always admired. Each pleat created a rhythmic repetition that came alive when air nudged the piece.
The folds caught light in alternating bright and shadowed bands, and the structure felt architectural and lively. When hung in a group they formed a suspended winter meadow that rotated and sang with the room’s quiet breaths.
The tactile crunch of the folds under thumb felt reassuring during the making, and the final mobiles had a cheerful floating presence above head height.
Steps
- Cut long strips of paper and fold them back and forth to create even accordion pleats.
- Form symmetrical arms by joining pleated strips at central points to produce star-like profiles.
- Secure joins with small staples or adhesive reinforcements, ensuring balance for suspension.
- Attach thin threads to each mobile and suspend from the ceiling at varied heights for movement.
Paper doily and beaded rustic snowflake wreath
Combining doilies with beads and twine created a warm, rustic wreath that always looked like a thrifted find. The soft, lacy circles contrasted with rough-textured twine and tiny metallic beads, producing a pleasing mix of delicacy and earthiness.
I liked the little clinks the beads made when the wreath was handled. Draped over a kitchen peg or door, it brought a handmade hospitality that felt welcoming against winter light.
The layered textures read like a home that had been quietly tended through slow, thoughtful afternoons.
Steps
- Arrange several paper doilies in a circular formation to create the wreath base.
- Secure the doilies together with twine, wrapping neatly around overlapped edges for a rustic look.
- Thread small beads onto thin wire or thread and weave them through the wreath for accents.
- Create a hanging loop from twine and tuck in a few natural sprigs for an extra touch.
Metallic foil paper snowflake with crisp reflections
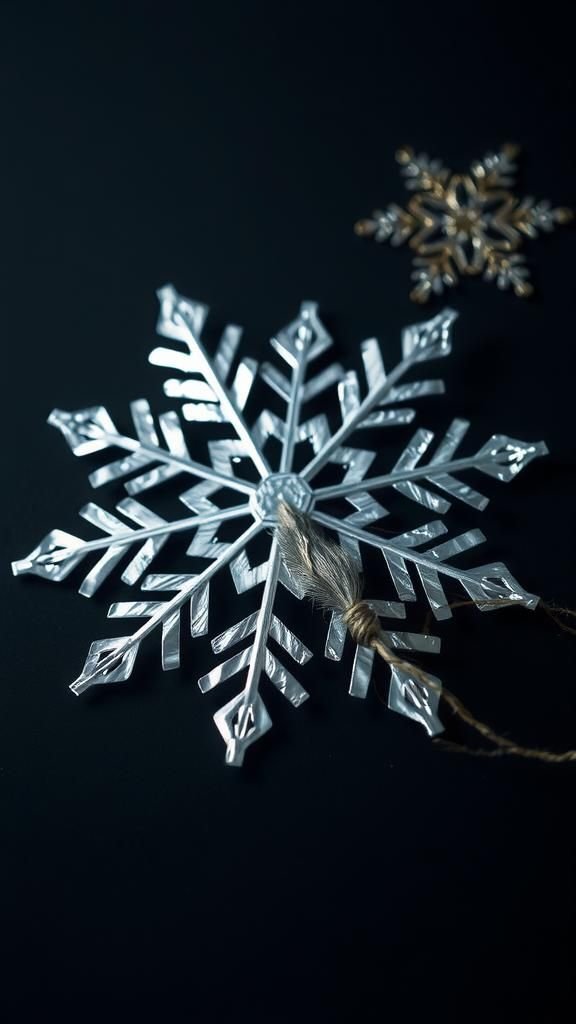
Metallic paper brought an unexpected sharpness to snowflakes, reflecting light like tiny mirrors. The reflective surfaces emitted a cool, silvery sheen that felt festive without being flashy.
I liked how the crisp edges threw pinprick highlights across nearby surfaces, turning the surrounding space into a little constellation. Handling the foil produced a faint metallic whisper and left subtle creases that made each piece unique.
Clustered above a dining table the snowflakes introduced a bright, slightly modern glimmer that contrasted nicely with softer holiday textures.
Steps
- Choose metallic foil paper with a sturdy backing to maintain crisp folds and edges.
- Fold the paper into a compact wedge, ensuring tight creases for precise symmetry.
- Cut angular and geometric motifs along the folded layers to accentuate reflective facets.
- Unfold carefully and press flat under a weight if necessary to showcase the shimmering surface.
Pop-up card snowflake surprise inside element
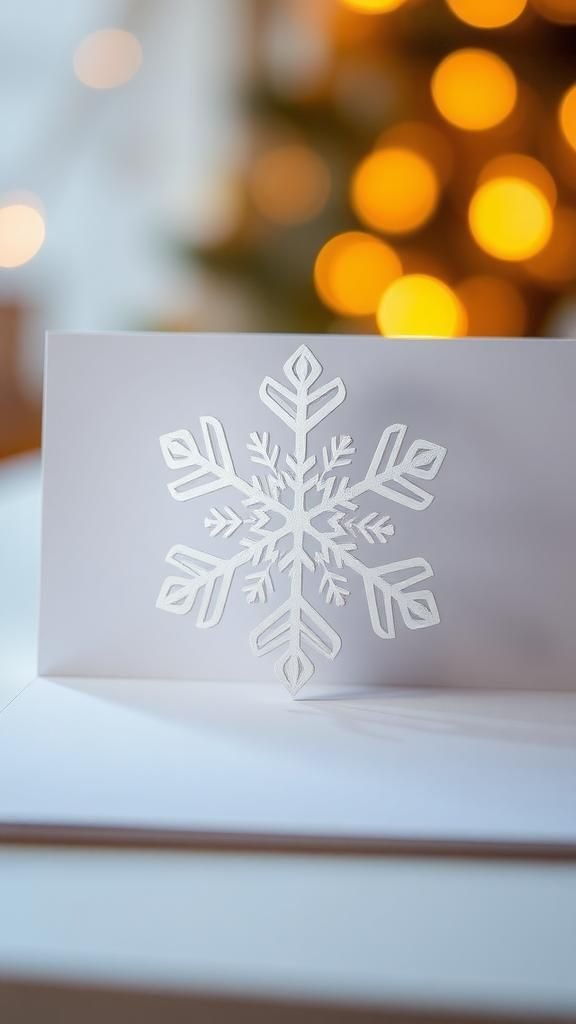
Opening one of these cards always felt like unrolling a small theatrical moment. The pop-up snowflake bloomed with a gentle mechanical flourish, giving paper a moment of playfulness.
I remember the tiny gasp it prompted the first time I opened one in a quiet kitchen. The internal supports had a neat engaging geometry that contrasted with the flat greeting face, and the shadow the snowflake cast inside the card added a layered sense of depth.
It felt intimate, like a small stage where winter performed a modest act of charm.
Steps
- Design the card layout and plan the pop-up mechanism by marking fold lines and tab positions on the base.
- Cut the snowflake shape and create supporting tabs that fold inward to form the pop-up structure.
- Score and fold the support tabs precisely to allow smooth opening and closing.
- Attach the snowflake to the tabs and test the card, adjusting folds for a clean pop-up action.
Layered vellum snowflake lantern with warm glow
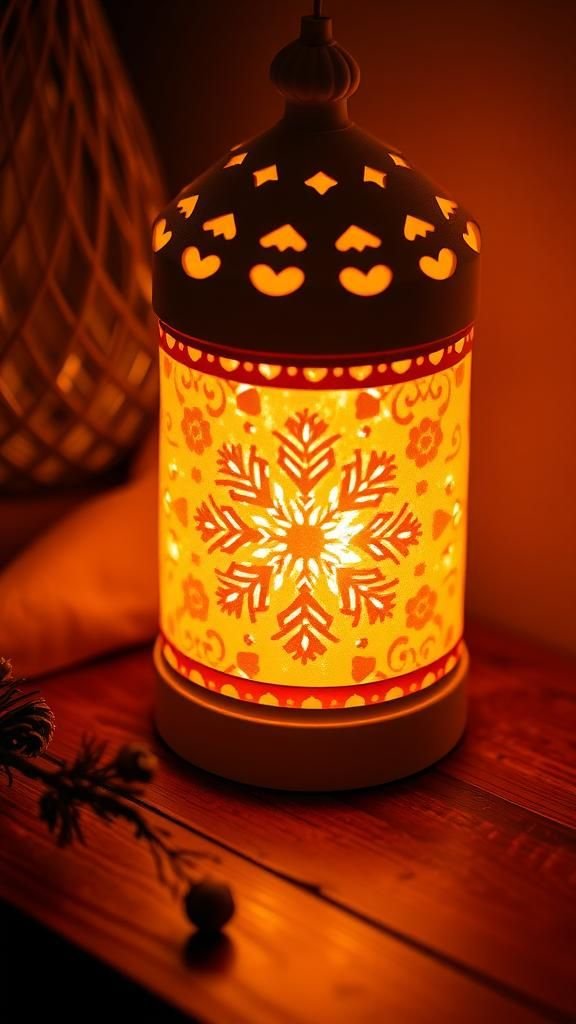
Vellum has this calm, glowing quality that made these little lanterns feel like pocket warmth. Layers built up a soft opacity that diffused light into a gentle halo.
I remember setting one on a side table and watching the light skim the vellum’s surface, creating a cozy circle of amber. The edges had a soft translucence that felt comforting and the assembled lanterns cast subtle patterned light.
When several were arranged, they turned a dim corner into a small, inviting nook that felt hospitable against the cold night.
Steps
- Cut snowflake patterns into several vellum sheets, varying the scale for layered depth.
- Stack the vellum sheets aligned and secure at the center while allowing outer edges to float.
- Form the stack into a cylinder or lantern shape and secure the seam discreetly.
- Place a battery-powered tea light inside to enjoy the warm, diffused glow safely.
Snowflake shadow-box paper silhouette miniature
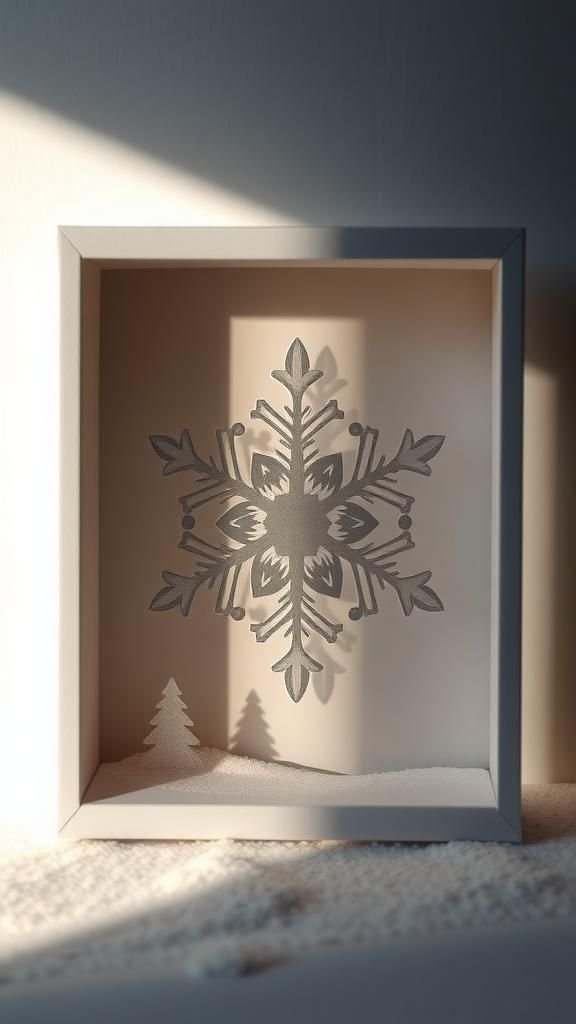
This shadow-box felt like capturing a small window into winter. The silhouette snowflake sat inside a shallow box, and the layered background provided a sense of distance and tiny sky.
I liked watching how a single directional light turned the scene cinematic, with the snowflake’s edges creating crisp, miniature landscapes. The box had a quiet museum quality and invited a slow, contemplative look.
Placing it on a shelf among books made the little scene feel like a private relic, a micro-moment of cold brilliance preserved in paper.
Steps
- Create a shallow box frame from sturdy cardstock to serve as the shadow-box.
- Cut a detailed snowflake silhouette and mount it slightly forward of the back panel for depth.
- Paint or paper the back panel with a soft gradient to simulate sky or distant light.
- Close the box and display on a shelf where angled light can cast defined shadows inside.
Seeded-paper snowflake that flakes away naturally

Seeded paper has this earthy promise, and when formed into a snowflake it felt like a delicate pact with the outdoors. The paper carried tiny flecks that hinted at future blooms, and its rougher texture felt grounding in a season of shine.
I liked how the snowflakes could be pressed into soil afterward and imagined small green shoots greeting spring. There was a gentle poetry to that lifecycle, and the paper itself smelled faintly of pulp and earth when wet.
Each piece felt both fragile and full of potential.
Steps
- Make or buy seeded paper, and press it flat to prepare for cutting into snowflake shapes.
- Fold seeded paper into symmetrical wedges and make strategic cuts to preserve structural integrity.
- Let the cut snowflakes air dry fully to retain shape and seed viability.
- Plant or press the used snowflakes into soil when ready, following seed care guidance for best results.
Embossed paper snowflake with raised textures
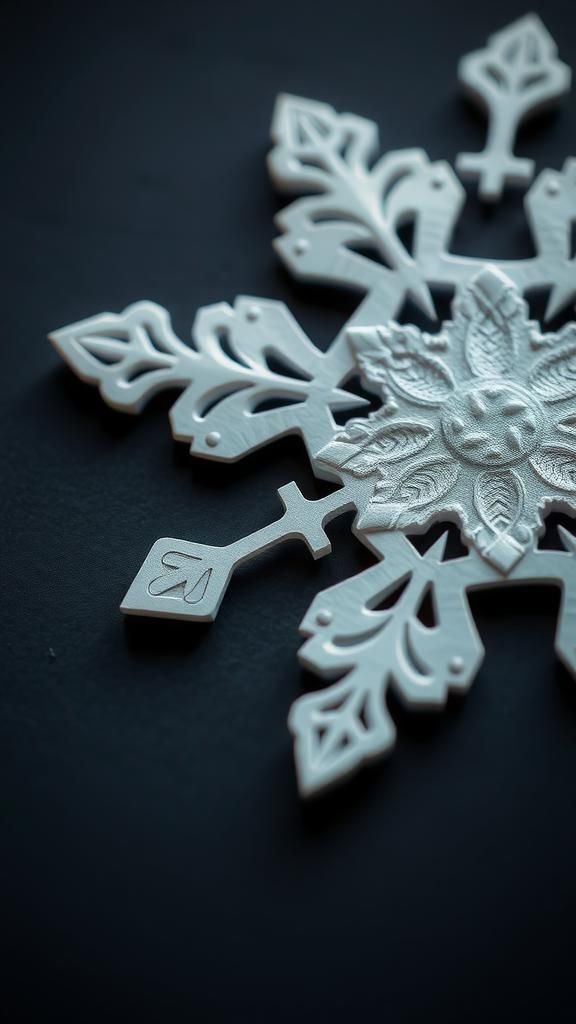
Embossing added a tactile elegance to snowflakes, converting flat paper into something sculpted. The raised veins and ribs reflected light differently, producing tiny highlights that made the pattern sing.
I liked tracing the relief with a fingertip and feeling the subtle ridges under skin. The technique gave a handcrafted polish without overt flash, and the finished pieces looked a touch architectural.
Placed against a dark background the relief stood out like frosted tracery, and the embossed snowflakes felt like small relief prints that encouraged lingering attention.
Steps
- Choose a heavyweight paper suitable for embossing to hold raised impressions.
- Place the snowflake design onto an embossing mat and gently run an embossing stylus along the pattern to raise the surface.
- Refine the raised areas by deepening certain lines for contrast and texture.
- Mount the embossed snowflake on a contrasting backing to emphasize the relief.
Tiny origami snowflake confetti for tablescapes
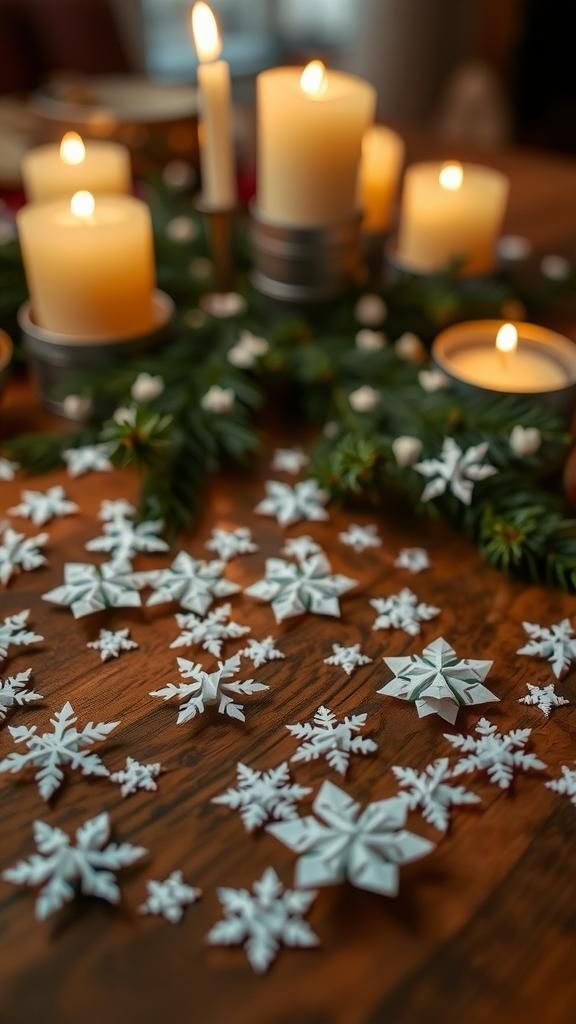
Folding tiny origami snowflakes became a quiet evening pastime that rewarded patience with charming table details. Each small fold yielded a miniature star that looked fragile and precise.
I remember scattering them among pine cones and candles to make the table feel intentionally arranged. They provided playful scale contrast against larger decorations, and their crisp paper edges caught little snapshots of light.
Making a batch felt like compiling a box of tiny, one-off treasures that lent a thoughtful, handcrafted note to holiday meals and seasonal gatherings.
Steps
- Start with small square paper and perform miniature origami folds to form compact snowflake shapes.
- Ensure crisp creases for clean edges and repeat to create a collection of matching confetti pieces.
- Scatter the tiny origami snowflakes across the tablescape for decorative interest and scale contrast.
- Collect and store extras in a small box for reuse at future gatherings.