I’ve always found a sense of peace in sewing, especially when working with DIY quilt patterns. The rhythmic stitching, the mixing of fabrics, and the slow, careful piecing together of a quilt became a comforting weekend ritual for me. Over time, I collected countless DIY quilt patterns, from traditional block designs to modern minimalist layouts.
Table of Contents
One day, while rummaging through my fabric stash, I realized that half the joy was not just in the sewing—but in discovering fresh and unique DIY quilt patterns that sparked inspiration.
Whether you’re just beginning or already obsessed like I am, having a solid list of DIY quilt patterns can transform your creative journey. From scrap-friendly designs to intricate heirloom-worthy layouts, these DIY quilt patterns open up a world of sewing possibilities.
I’ve stitched through most of these DIY quilt patterns myself and trust me, once you find your rhythm, quilting becomes less of a task and more of an obsession. Let’s get you started with the most addictive and satisfying DIY quilt patterns you’ll ever try.
Flower Garden Quilt
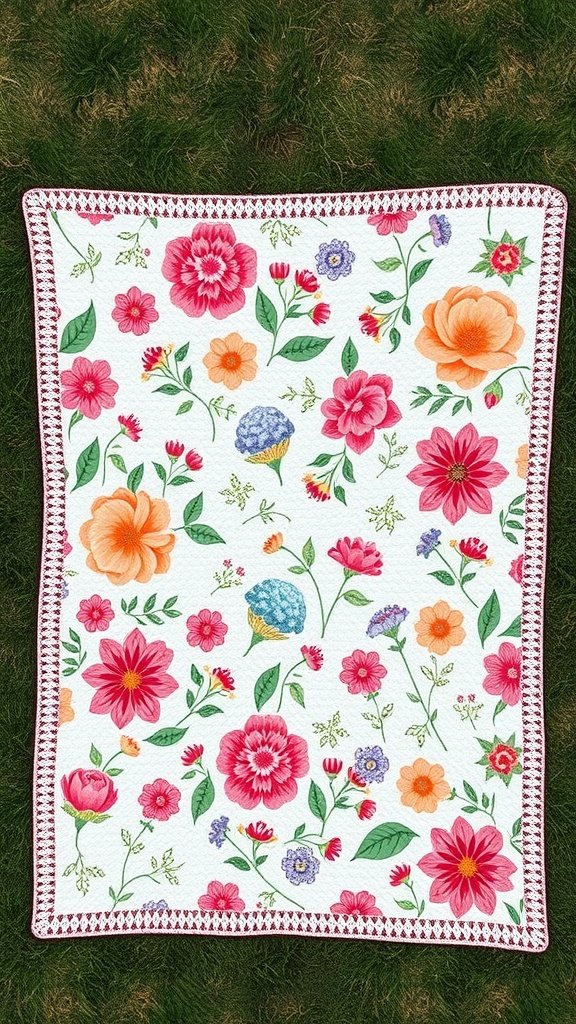
The Flower Garden Quilt is a delightful project that brings the beauty of nature indoors. This quilt features a vibrant array of flowers in various colors, creating a cheerful and inviting design. The white background allows the floral patterns to pop, making it a stunning centerpiece for any room.
To create your own Flower Garden Quilt, start by gathering your materials. You will need fabric in different floral prints, a solid white fabric for the background, batting, and backing fabric. Don’t forget your sewing machine and quilting tools!
Begin by cutting your floral fabrics into squares or rectangles. Arrange them on the white fabric to form a pleasing layout. Once you’re satisfied with the arrangement, sew the pieces together, ensuring to leave seam allowances. After piecing the top, layer it with batting and backing fabric.
Next, quilt the layers together. You can do this by hand or with a sewing machine. Choose a simple stitch pattern that complements the flowers. Finally, trim the edges and add a binding to finish the quilt. This project not only brightens your space but also makes for a heartfelt gift!
Chevron Quilt
The Chevron Quilt is a fun and stylish addition to any home. Its zigzag pattern creates a lively visual effect that can brighten up your space. The combination of soft colors like pink, gray, and yellow makes it versatile for various decors.
Making a Chevron Quilt is a great DIY project. Start by choosing your fabric. You’ll need several different colors to create the chevron effect. Cut your fabric into triangles, ensuring they are all the same size for a uniform look.
Next, arrange the triangles in a chevron pattern on the floor or a large table. This step allows you to play around with the colors and layout before sewing. Once satisfied, start sewing the triangles together in rows. Press the seams open for a neat finish.
After completing the rows, sew them together to form the quilt top. Don’t forget to add batting and a backing fabric to give your quilt that cozy feel. Finally, quilt through all layers to secure them together. You can use simple straight lines or a more intricate design, depending on your skill level.
Finish by trimming any excess fabric and binding the edges for a polished look. Your Chevron Quilt will not only keep you warm but also serve as a beautiful piece of art in your home.
Modern Geometric Quilt

The modern geometric quilt is a stunning blend of shapes and colors. This quilt features bold triangles and rectangles, creating a dynamic visual effect. The colors range from deep navy and bright red to soft beige and cool teal, making it a versatile piece for any room.
To create a quilt like this, start by selecting your fabric. Choose a mix of solid colors and patterns that complement each other. Next, cut your fabric into geometric shapes. You can use a rotary cutter for precision.
Once your pieces are ready, arrange them on a flat surface. Play around with the layout until you find a design you love. After that, sew the pieces together, row by row. Press the seams flat to keep everything neat.
After assembling the top, layer it with batting and backing fabric. Baste the layers together to prevent shifting. Finally, quilt through all layers to add texture and secure everything in place. You can finish with a binding around the edges for a polished look.
Scrappy Quilt from Leftover Fabrics
Creating a scrappy quilt is a fun way to use leftover fabrics. This quilt showcases a mix of colorful squares, each telling its own story. The vibrant patterns and hues make it a cheerful addition to any space.
To start your own scrappy quilt, gather all your leftover fabric pieces. Aim for a variety of colors and patterns to keep it interesting. Cut these fabrics into squares, typically around 5 inches by 5 inches, but feel free to adjust based on your preference.
Next, lay out your squares on a flat surface. Play around with the arrangement until you find a layout you love. Once you’re happy, start sewing the squares together in rows. Use a quarter-inch seam allowance for a neat finish.
After sewing the rows, join them together to form the quilt top. Press the seams open for a clean look. Now, it’s time to add the batting and backing. Lay the backing fabric right side down, place the batting on top, and finally, add the quilt top right side up.
Pin all layers together to prevent shifting while quilting. You can either quilt by hand or use a sewing machine. Simple straight lines or a fun free-motion design can add character to your quilt.
Once quilted, trim any excess batting and backing. Finally, bind the edges with a coordinating fabric to finish it off. Your scrappy quilt is now ready to be enjoyed!
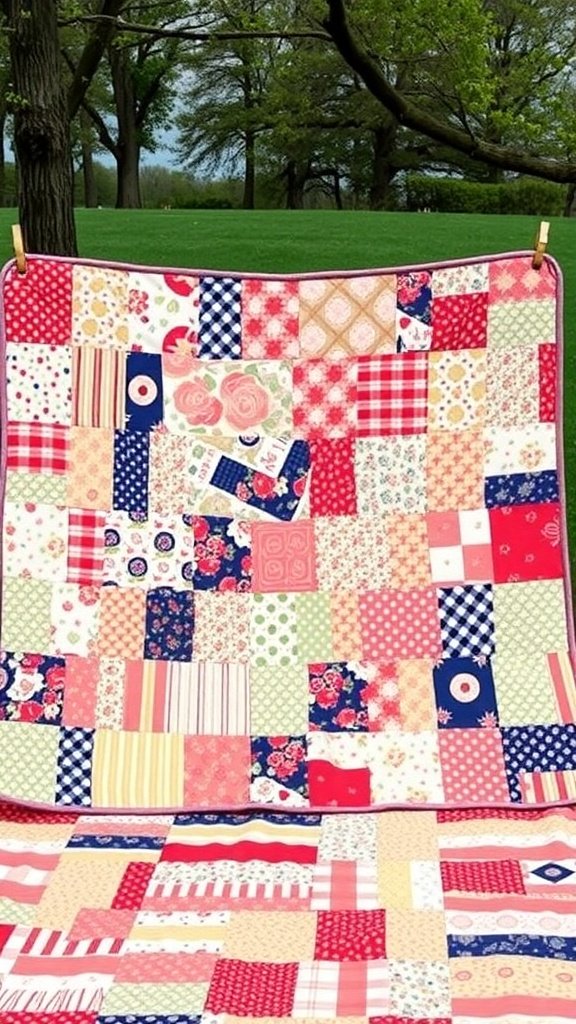
Classic Patchwork Quilt
The classic patchwork quilt is a timeless piece that brings warmth and charm to any space. This quilt features a delightful mix of colorful squares, each telling its own story through unique patterns and fabrics. The vibrant reds, blues, yellows, and greens create a cheerful visual that can brighten up a room.
Creating a patchwork quilt is a fun and rewarding project. To start, gather a variety of fabric scraps in different colors and patterns. Aim for squares that are at least 5 inches by 5 inches. You can use old clothes, leftover fabric from other projects, or even buy new fabric to match your theme.
Next, cut your fabric into squares. Lay them out on a flat surface to arrange them in a way that pleases your eye. Once you’re happy with the layout, start sewing the squares together in rows. Use a quarter-inch seam allowance for a neat finish.
After sewing the rows, join them together to form the quilt top. Press the seams flat with an iron for a crisp look. Then, layer the quilt top with batting and a backing fabric. Pin or baste these layers together to keep them from shifting while you sew.
Finally, quilt through all layers to secure them. You can do this by hand or with a sewing machine. Once finished, trim any excess batting and backing, and bind the edges to complete your quilt. This classic patchwork quilt will not only keep you warm but also serve as a beautiful piece of art in your home.
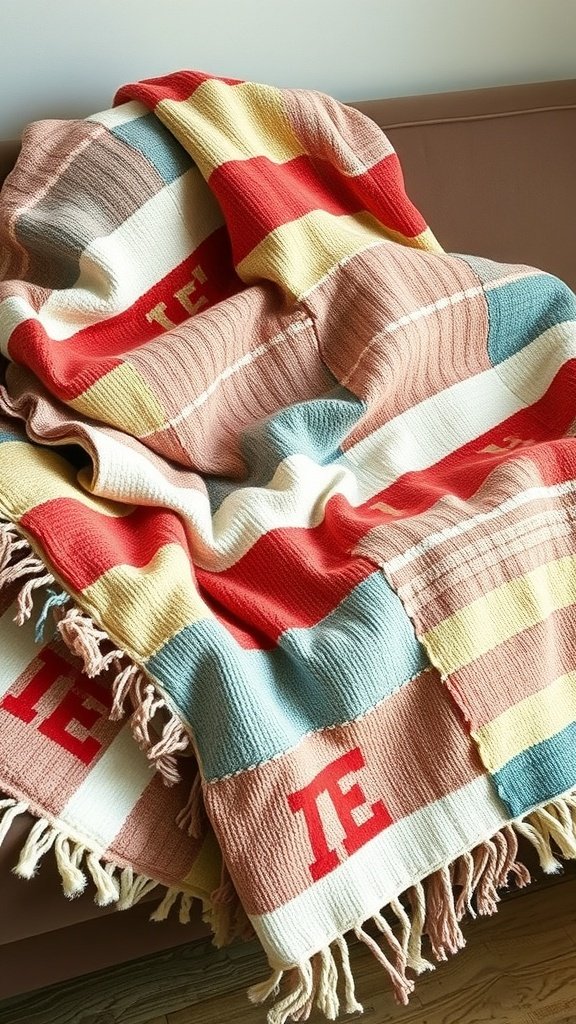
Simple Striped Quilt

The Simple Striped Quilt is a fantastic project for both beginners and experienced quilters. This quilt features bold, colorful stripes that create a cheerful and modern look. The vibrant colors, ranging from bright oranges to deep blues, make it a standout piece that can brighten up any space.
To start your own Simple Striped Quilt, gather your materials. You will need a variety of fabric strips in different colors, batting, and backing fabric. Make sure to choose fabrics that complement each other for a cohesive design.
Next, cut your fabric into strips. A good size to aim for is 2.5 inches wide. Lay out the strips in the order you want them to appear on the quilt. This step allows you to play with the arrangement until you find the perfect combination.
Once you’re happy with the layout, start sewing the strips together. Use a quarter-inch seam allowance to keep everything aligned. After sewing the strips, press the seams open to reduce bulk. This will help your quilt lay flat.
After completing the top, it’s time to layer your quilt. Place the backing fabric down first, followed by the batting, and then the quilt top. Pin or baste the layers together to keep them from shifting while you quilt.
Now, you can quilt as desired. Simple straight lines or a free-motion design can add texture to your quilt. Once finished, trim any excess batting and backing fabric, then bind the edges to complete your quilt.
Hang your Simple Striped Quilt outside to show off your hard work, just like in the image! It’s a perfect way to enjoy the beauty of your creation while adding a splash of color to your outdoor space.
Log Cabin Quilt
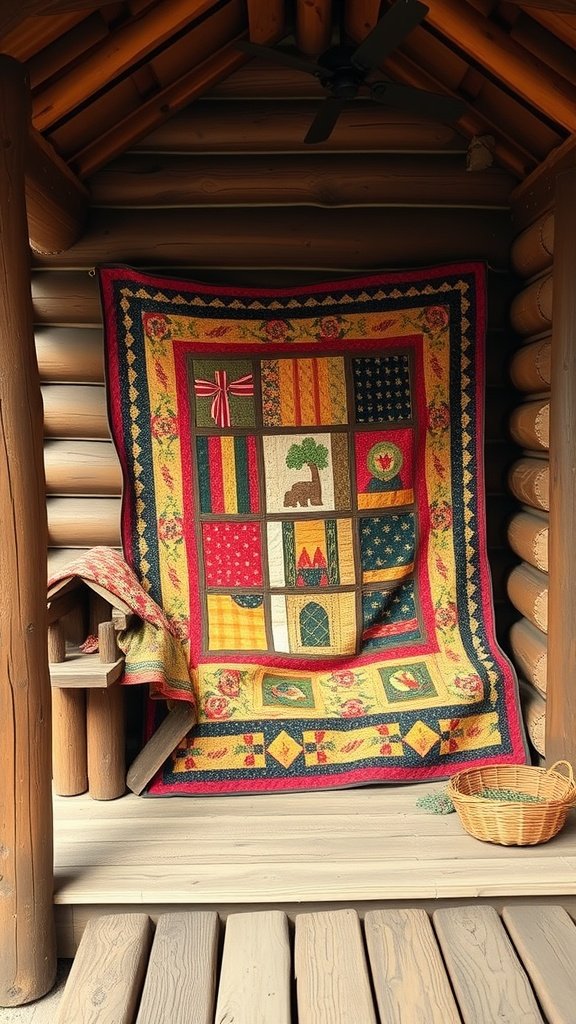
The Log Cabin Quilt is a classic design that brings warmth and charm to any space. This quilt features a patchwork of colorful fabrics arranged in a unique pattern, showcasing various shapes and symbols. The vibrant colors and intricate details make it a standout piece, perfect for cozying up on chilly nights.
Creating a Log Cabin Quilt can be a fun project for both beginners and experienced quilters. Start by gathering your materials, including fabric in different colors and patterns, batting, and backing fabric. You’ll also need a rotary cutter, mat, and sewing machine.
Begin by cutting your fabric into strips. The traditional Log Cabin pattern uses strips of varying widths, usually 1.5 to 2 inches. Arrange the strips in a way that creates a square or rectangle, starting from the center and working your way outwards. This method gives the quilt its distinctive layered look.
Once you have your layout, sew the strips together, pressing the seams as you go. After all the strips are sewn, trim the quilt top to your desired size. Then, layer the quilt top with batting and backing fabric. Pin or baste the layers together to keep them from shifting while you sew.
Finally, quilt through all layers to secure them. You can choose simple straight lines or more intricate designs, depending on your skill level. Once finished, bind the edges to give it a polished look. Your Log Cabin Quilt will not only be a beautiful addition to your home but also a cherished keepsake that tells a story.
Starry Night Quilt

The Starry Night Quilt is a stunning piece that captures the beauty of the night sky. With its deep blue fabric and bright yellow stars, it brings a touch of the cosmos into your home. This quilt is perfect for those who love the stars and want to add a celestial theme to their decor.
Creating your own Starry Night Quilt can be a fun and rewarding project. Start by gathering your materials. You’ll need blue fabric for the background, yellow fabric for the stars, batting, and backing fabric. Don’t forget your sewing machine and quilting supplies!
Next, cut out star shapes from the yellow fabric. You can use a template or freehand it for a more unique look. Arrange the stars on the blue fabric to find the perfect layout. Once you’re happy with the design, pin the stars in place.
Now, it’s time to sew! Start by attaching each star to the blue fabric. After all stars are secured, layer the quilt with batting and backing fabric. Pin everything together to prevent shifting while you quilt.
Finally, quilt the layers together. You can do this by hand or with a sewing machine. Once finished, trim any excess fabric and bind the edges for a polished look. Your Starry Night Quilt is now ready to shine!
Baby Quilt with Animal Prints
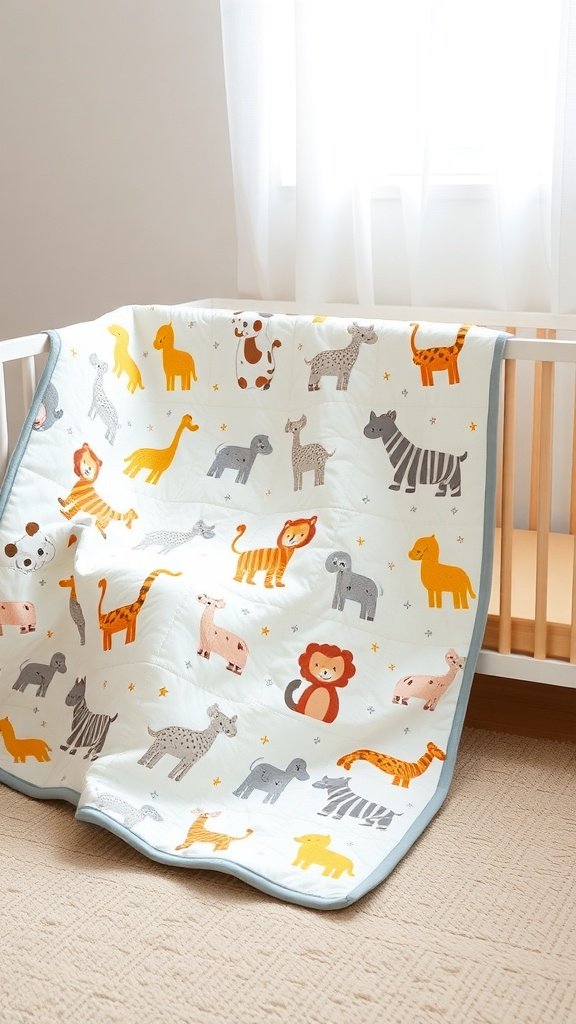
This adorable baby quilt features a delightful array of animal prints that are sure to bring joy to any nursery. The quilt showcases playful designs of lions, giraffes, zebras, and more, all in soft, soothing colors. It’s perfect for keeping your little one cozy during nap time or playtime.
The quilt’s light fabric and cheerful patterns create a warm and inviting atmosphere. It not only serves a practical purpose but also adds a charming touch to the room. The quilt is designed to be both functional and fun, making it a great addition to any baby’s space.
Creating a similar quilt can be a rewarding DIY project. Start by gathering your materials: fabric with animal prints, batting, and backing fabric. Cut the fabric into squares or rectangles, and arrange them in a pattern you like. Sew the pieces together, add the batting and backing, and quilt it all together. Finish with a binding around the edges for a polished look. This project allows you to customize colors and patterns to match your nursery theme!
Appliqué Quilt

Appliqué quilts are a delightful way to add personality to your quilting projects. The image showcases a vibrant quilt featuring beautiful floral designs and colorful birds. Each element is carefully stitched onto the quilt, creating a lively scene that draws the eye.
To create your own appliqué quilt, start by selecting a theme. You might choose flowers, animals, or even abstract shapes. Next, gather your materials, including fabric, a sewing machine, and thread. Cut out your shapes from fabric and use a fusible webbing to adhere them to your quilt top.
Once your pieces are in place, it’s time to sew. Use a straight stitch or a zigzag stitch around the edges of each appliqué piece to secure them. This adds a decorative touch and ensures they stay in place. Finally, layer your quilt with batting and backing fabric, then quilt as desired.
Don’t forget to bind the edges to finish your quilt. With a bit of creativity and patience, you can create a stunning appliqué quilt that showcases your unique style!
Seasonal Themed Quilt

Seasonal themed quilts bring a cozy touch to any home. This quilt features a delightful mix of leaves and snowflakes, perfect for celebrating the changing seasons. The vibrant colors and intricate designs make it a standout piece.
To create a similar quilt, start by selecting a seasonal theme. Gather fabric in colors that reflect your chosen season. For autumn, think reds, oranges, and browns. For winter, consider whites, blues, and silvers.
Next, sketch out your design. You can use templates for leaves and snowflakes, or create your own patterns. Cut your fabric pieces carefully, ensuring they fit together well.
Once your pieces are ready, sew them together in blocks. Arrange the blocks in a way that balances colors and shapes. After assembling the top, layer it with batting and a backing fabric.
Quilt the layers together by sewing through all three. You can do this by hand or with a sewing machine. Finally, bind the edges to give it a polished look. Enjoy your seasonal quilt as a warm throw or a decorative piece!
Hexagon Quilt
The hexagon quilt is a vibrant and playful design that brings a burst of color to any space. The image showcases a beautifully crafted quilt featuring a variety of hexagonal shapes in bold colors. Each hexagon is carefully pieced together, creating a stunning visual effect that can brighten up a room.
This quilt pattern is perfect for both beginners and experienced quilters. The hexagon shape allows for creativity in color selection and arrangement. You can mix and match fabrics to create a unique look that reflects your personal style.
To create your own hexagon quilt, start by gathering your materials. You will need fabric in various colors, a rotary cutter, a cutting mat, and a sewing machine. Cut your fabric into hexagon shapes, ensuring they are all the same size for a cohesive look.
Next, arrange your hexagons on a flat surface. Play around with the colors until you find a layout you love. Once you’re happy with the arrangement, start sewing the hexagons together in rows. Press the seams open for a neat finish.
After you’ve sewn all the rows, join them together to complete the quilt top. Then, layer your quilt top with batting and backing fabric. Quilt as desired, whether by hand or machine, and finish with binding around the edges. Your hexagon quilt will be a colorful masterpiece that you can cherish for years to come!
Bargello Quilt

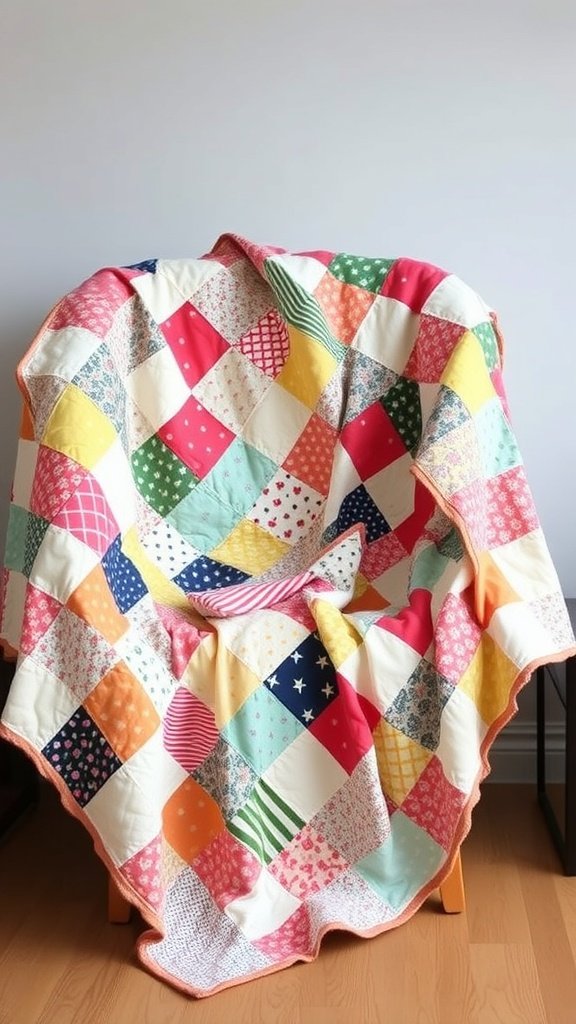
The Bargello quilt is a stunning piece that showcases a wave-like pattern, bringing warmth and color to any space. The image captures a beautifully crafted quilt draped over a cozy chair, featuring vibrant hues of red, orange, green, and purple. This design creates a sense of movement, making it visually appealing.
Creating a Bargello quilt can be a fun project for both beginners and seasoned quilters. The key is to use a series of fabric strips that are cut into various widths. These strips are then sewn together to form a pattern that resembles flowing waves.
To start your own Bargello quilt, gather your materials. You’ll need fabric in several colors, a rotary cutter, a cutting mat, and a sewing machine. Begin by cutting your fabric into strips, typically 2.5 inches wide. Arrange these strips in a way that pleases you, keeping in mind the color flow.
Next, sew the strips together to create a long panel. Once you have your panel, cut it into smaller pieces according to your desired pattern. The fun part is rearranging these pieces to form the iconic Bargello design. After you’re satisfied with the layout, sew the pieces back together.
Finally, layer your quilt with batting and backing fabric, then quilt it together. This step adds texture and holds everything in place. Once finished, you’ll have a beautiful Bargello quilt that not only keeps you warm but also serves as a vibrant piece of art in your home.
Tumbler Quilt
The tumbler quilt is a charming and versatile design that showcases a mix of fabrics in a fun, geometric pattern. This quilt features a variety of colors and prints, creating a lively and inviting look. The unique tumbler shape adds a playful twist, making it a favorite among quilters.
To create your own tumbler quilt, start by gathering your materials. You’ll need fabric in different colors and patterns, a tumbler template, batting, and backing fabric. Cut your fabric into tumbler shapes using the template. Aim for a mix of prints to keep the design interesting.
Next, lay out your tumbler pieces on a flat surface. Play around with the arrangement until you find a layout you love. Once you’re happy with the design, start sewing the pieces together in rows. Make sure to press your seams as you go for a neat finish.
After assembling the top, it’s time to layer your quilt. Place the backing fabric down first, followed by the batting, and finally the quilt top. Pin everything in place to prevent shifting while you sew. Then, quilt through all layers, either by hand or using a sewing machine.
Finally, trim any excess batting and backing, and bind the edges of your quilt. This step gives your tumbler quilt a polished look. Once finished, you’ll have a beautiful quilt that’s perfect for snuggling or displaying!
Quilted Table Runner
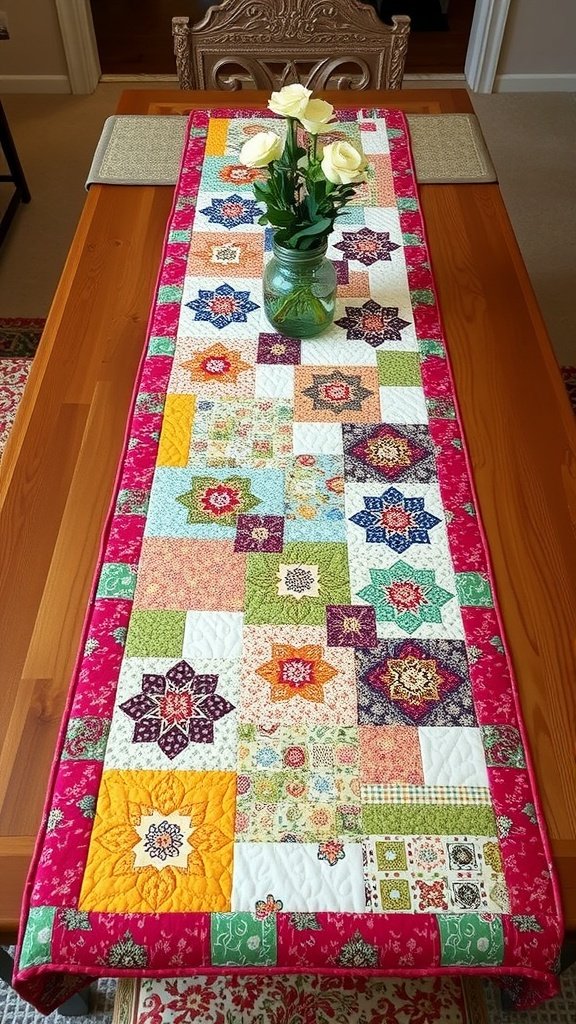
A quilted table runner can add a splash of color and warmth to any dining space. The image shows a vibrant table runner adorned with various patterns and colors, making it a perfect centerpiece for a table. The runner features intricate designs, including floral and geometric shapes, all stitched together beautifully.
Creating your own quilted table runner is a fun and rewarding project. Here’s how you can make one:
Materials Needed:
- Fabric in various colors and patterns
- Batting
- Backing fabric
- Thread
- Quilting ruler
- Rotary cutter
- Sewing machine
Steps to Create Your Quilted Table Runner:
- Choose Your Fabrics:Select a mix of fabrics that complement each other. Aim for a balance of colors and patterns.
- Cut the Fabric:Use a quilting ruler and rotary cutter to cut your fabric into squares or rectangles. Common sizes are 5” or 10” squares.
- Arrange the Pieces:Lay out your fabric pieces on a flat surface. Experiment with different arrangements until you find one you like.
- Sew the Top:Start sewing the pieces together in rows. Press the seams open as you go for a flat finish.
- Add Batting:Once the top is complete, layer it with batting and backing fabric. Make sure the backing is larger than the top.
- Quilt the Layers:Use your sewing machine to quilt through all layers. You can stitch in the ditch or create your own patterns.
- Trim and Bind:Trim any excess batting and backing. Then, create binding from your fabric and sew it around the edges of the runner.
- Final Touches:Give your table runner a good press, and it’s ready to use!
This quilted table runner not only serves a practical purpose but also showcases your creativity. It’s a great way to personalize your dining area and impress your guests!
Rag Quilt
A rag quilt is a cozy and charming project that brings warmth and personality to any space. The image shows a beautifully crafted quilt with a mix of colors and patterns, showcasing the unique style that rag quilts are known for. The frayed edges give it a relaxed and inviting look, making it perfect for snuggling up on chilly evenings.
Creating a rag quilt is a fun and straightforward process. Here’s how to make your own:
Materials Needed:
- Fabric squares (various colors and patterns)
- Batting (optional, for extra warmth)
- Thread
- Sewing machine
Steps to Make a Rag Quilt:
- Cut Fabric:Start by cutting your fabric into squares. A common size is 8×8 inches, but you can adjust based on your preference.
- Layer the Squares:For each block, layer two fabric squares with the right sides facing out. If you want extra warmth, add a layer of batting in between.
- Sew the Squares:Sew around the edges of each block, leaving a 1/4 inch seam allowance. Be sure to leave a small opening to turn the fabric right side out.
- Fray the Edges:After turning the squares right side out, clip the edges to create the rag effect. This will give your quilt its signature look.
- Assemble the Quilt:Lay out your blocks in a pattern you like. Sew them together, ensuring to keep the frayed edges exposed.
- Finish the Edges:Once your quilt is assembled, sew around the entire perimeter to secure everything in place.
With these simple steps, you can create a rag quilt that’s not just a blanket, but a piece of art that reflects your style. Enjoy the process and the cozy results!
Shadow Quilt

The Shadow Quilt is a beautiful blend of patterns and textures, creating a cozy and inviting atmosphere. In the image, you can see a quilt laid out, showcasing its unique patchwork design. The quilt features various fabric patterns, including stripes and intricate designs, which add depth and interest.
The sunlight casts a gentle shadow across the quilt, enhancing its visual appeal. This interplay of light and shadow highlights the quilt’s textures, making it even more inviting. The quilt’s neutral tones make it versatile for any room, whether draped over a bed or used as a decorative throw.
Creating your own Shadow Quilt can be a rewarding project. Start by selecting a variety of fabrics that complement each other. Cut them into squares or rectangles, and arrange them in a pattern that pleases your eye. Once you have your layout, sew the pieces together, adding batting and a backing fabric. Finally, quilt it to secure the layers and add texture. This DIY project not only results in a lovely quilt but also gives you a sense of accomplishment.
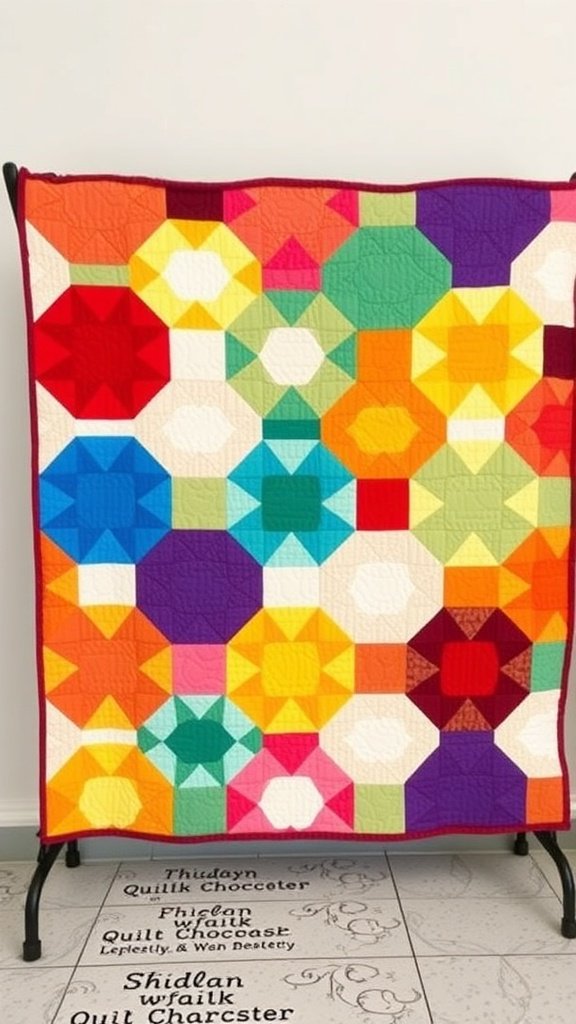
Kaleidoscope Quilt
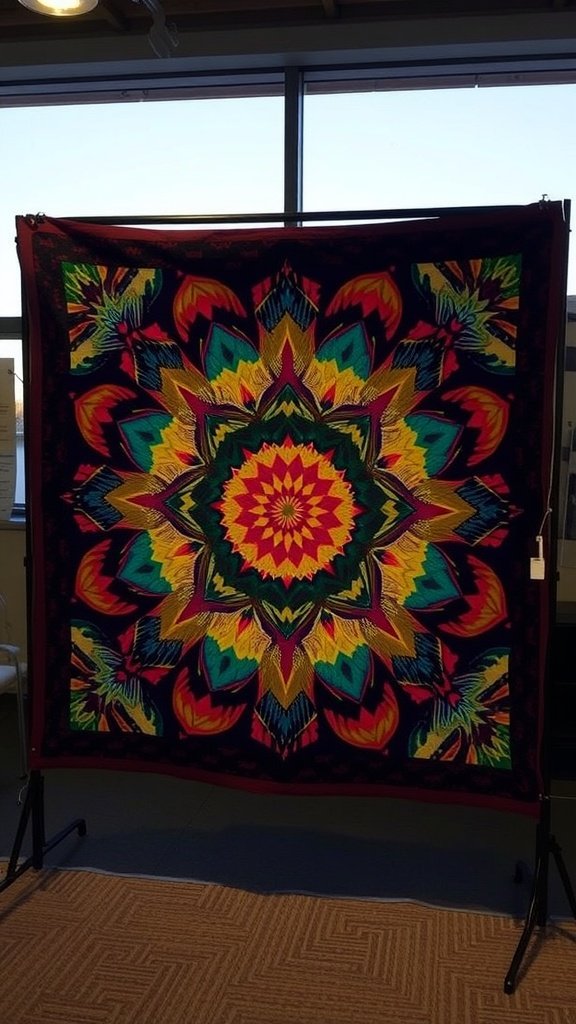
The Kaleidoscope Quilt is a stunning piece that showcases vibrant colors and intricate patterns. This quilt features a beautiful mandala design, radiating outwards with a mix of bold hues. The combination of reds, yellows, greens, and blues creates a lively visual that draws the eye in.
Making a Kaleidoscope Quilt can be a fun project for quilters of all skill levels. Start by selecting your fabric. Choose a variety of colors that complement each other. You’ll need a mix of light and dark fabrics to create depth in your design.
Next, cut your fabric into triangles. The size of the triangles will depend on how large you want your quilt blocks to be. After cutting, arrange the triangles in a circular pattern to form the kaleidoscope effect. Play around with the layout until you find a design that you love.
Once you’re happy with the arrangement, sew the triangles together to form blocks. Press the seams flat for a neat finish. Continue this process until all your blocks are complete. Then, sew the blocks together to create the quilt top.
For the backing, choose a solid fabric that complements your design. Layer the quilt top, batting, and backing, then quilt them together. You can hand quilt or use a sewing machine, depending on your preference.
Finally, bind the edges of the quilt to give it a finished look. Your Kaleidoscope Quilt will not only be a cozy addition to your home but also a vibrant piece of art that showcases your creativity!
Rail Fence Quilt
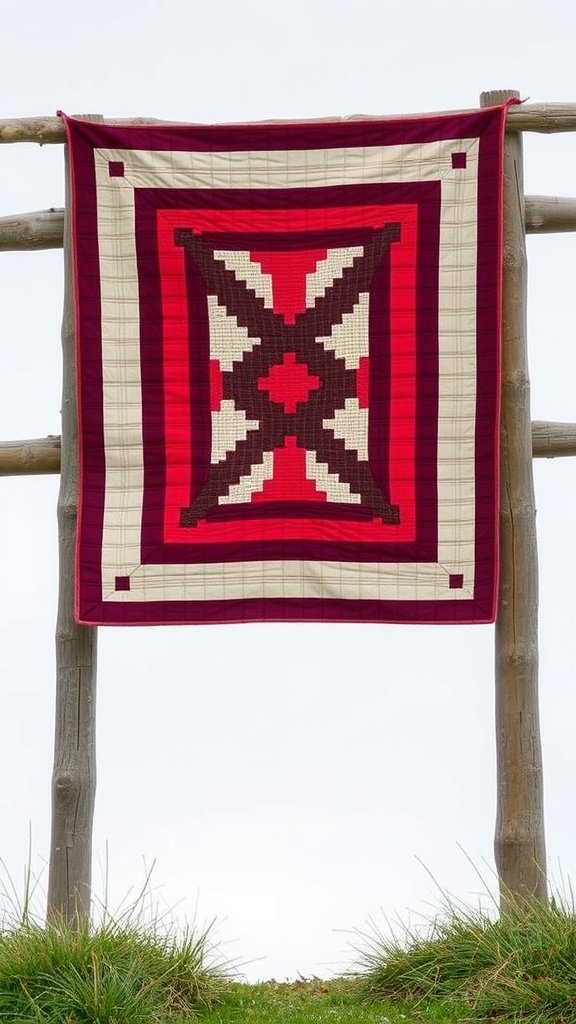
The Rail Fence Quilt is a classic pattern that brings a cozy feel to any space. This design features a series of diagonal lines that create a beautiful, layered effect. The quilt in the image showcases a striking combination of reds and creams, making it a standout piece.
To make your own Rail Fence Quilt, start by gathering your materials. You’ll need fabric in your chosen colors, a rotary cutter, a cutting mat, and a sewing machine. Cut your fabric into strips, typically 2.5 inches wide. The length can vary, but 40 inches is a good starting point.
Next, arrange the strips in a pattern that appeals to you. A common layout is to alternate colors in a zigzag pattern. Once you’re happy with the arrangement, sew the strips together in sets of three. Press the seams open for a neat finish.
After you have your sets, join them together to form the quilt top. Make sure to match the seams for a polished look. Once the top is complete, layer it with batting and a backing fabric. Pin everything in place to prevent shifting while you sew.
Finally, quilt through all layers, either by hand or using your sewing machine. Once done, trim any excess fabric and bind the edges to finish your quilt. The Rail Fence Quilt is not just a project; it’s a way to create something warm and inviting for your home.
Memory Quilt
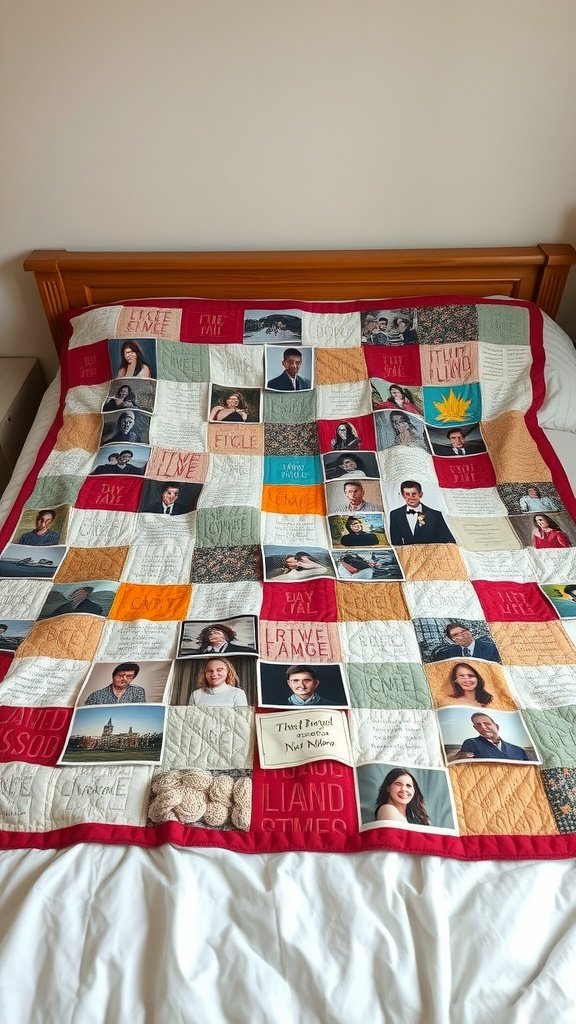
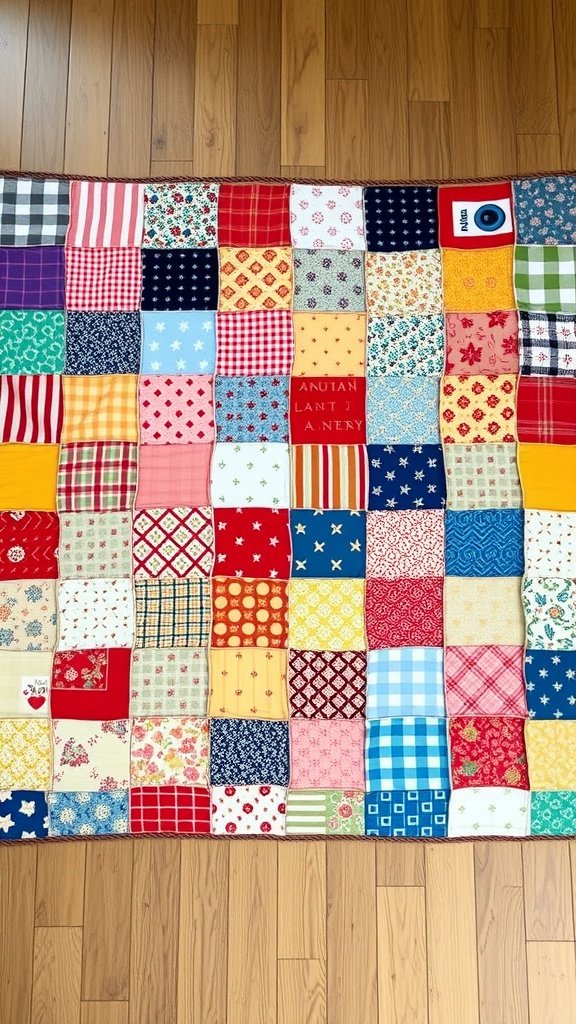
A memory quilt is a beautiful way to preserve cherished moments and memories. The quilt shown in the image features a patchwork of photos and text, each square telling a unique story. This quilt not only provides warmth but also serves as a visual diary of significant events and loved ones.
Creating a memory quilt can be a fun and meaningful project. Start by gathering photos and fabric squares that represent special memories. You can use images from family gatherings, vacations, or milestones. Choose fabrics that complement the colors in your photos for a cohesive look.
Next, lay out your squares on a flat surface to find a pleasing arrangement. Once you’re happy with the layout, start sewing the squares together. Use a sewing machine for speed, or hand stitch for a personal touch. After assembling the quilt top, add batting and a backing fabric. Finally, quilt the layers together to secure everything in place.
Don’t forget to personalize your quilt with handwritten notes or quotes. This adds an extra layer of sentimentality. Once finished, your memory quilt will be a treasured keepsake, perfect for snuggling under or displaying in your home.
Quilted Wall Hanging
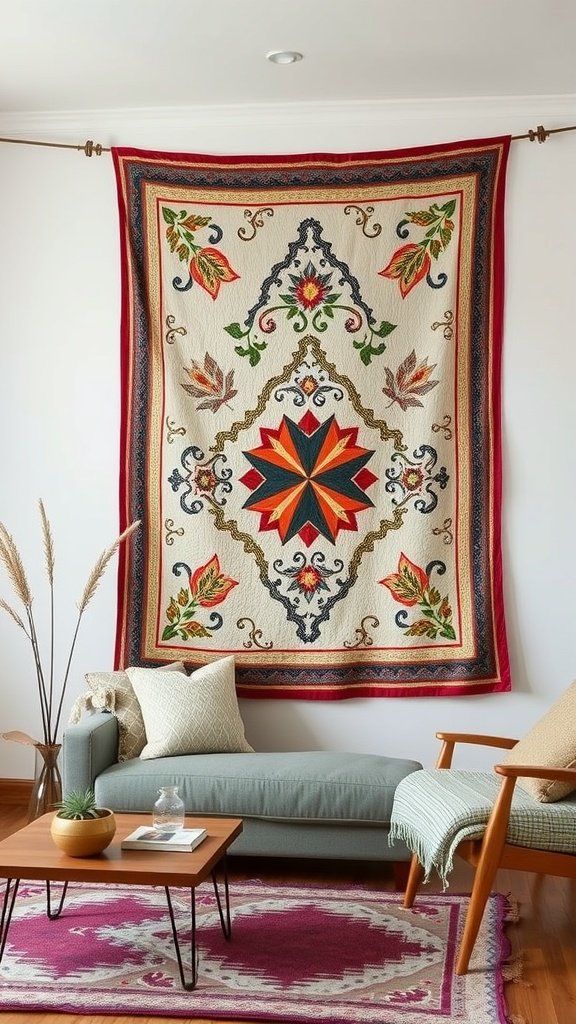
Quilted wall hangings are a fantastic way to add warmth and personality to your space. The image showcases a stunning quilted piece that features vibrant colors and intricate patterns. This type of artwork not only serves as decoration but also tells a story through its design.
Creating your own quilted wall hanging can be a fun and rewarding project. Start by selecting your fabric. Choose colors and patterns that resonate with your style. Next, sketch out a design that you’d like to bring to life. You can go for geometric shapes, floral patterns, or even abstract designs.
Once you have your materials ready, cut your fabric into the desired shapes. Lay them out on a flat surface to visualize the arrangement. After you’re satisfied with the layout, start sewing the pieces together. You can use a sewing machine or hand stitch for a more personal touch.
After assembling the quilt top, it’s time to add the backing. Choose a solid fabric that complements your design. Sandwich the quilt top, batting, and backing together, then quilt them by sewing through all layers. Finally, add a binding around the edges to give it a polished look.
Hang your finished quilt on a wall using a rod or clips. Enjoy the beauty and warmth it brings to your home!
Vintage Quilt Revival

The image showcases a stunning vintage quilt that beautifully blends various patterns and colors. This quilt features a rich palette of reds, golds, and greens, creating a warm and inviting look. Each square tells its own story, with intricate designs ranging from stars to floral motifs.
Vintage quilts like this one are more than just blankets; they are pieces of art that reflect history and craftsmanship. Many people are drawn to these quilts for their unique character and the nostalgia they evoke. They remind us of simpler times and the love that goes into handmade creations.
If you’re inspired to create your own vintage-style quilt, here are some steps to get started:
1. Gather Materials:Collect fabric scraps in various patterns and colors. Look for vintage fabrics or prints that resonate with you.
2. Choose a Pattern:Decide on a quilt pattern. You can opt for classic designs like the star pattern or create a patchwork layout.
3. Cut the Fabric:Cut your fabric into squares or shapes according to your chosen pattern. Make sure to measure accurately for a neat finish.
4. Assemble the Quilt Top:Lay out your pieces on a flat surface. Rearrange them until you’re happy with the design, then sew them together row by row.
5. Add Batting and Backing:Once the top is complete, layer it with batting and a backing fabric. This adds warmth and structure to your quilt.
6. Quilt It:Use a sewing machine or hand stitch to quilt through all layers. This secures everything in place and adds texture.
7. Bind the Edges:Finish your quilt by adding a binding around the edges. This gives it a polished look and prevents fraying.
Creating a vintage quilt can be a rewarding project. It’s a wonderful way to express creativity and keep the tradition of quilting alive.