 Elara Bennett
When I first started working on sewing projects for pets, my cat tore through my first attempt at a DIY pet bed. It was funny but also made me realized I had a lot to learn. From cozy pet pillows to adorable bandanas, sewing projects for pets became not just a hobby, it turned into something more relaxing.
There’s something sweet about making something by hand for the animals you love. These sewing projects for pets, which are simple yet useful, have helped me bond with my pets even more.
Sewing projects for pets like pet clothes, toy bones, and carrier covers is great for anyone who loves to sew. You don’t needs fancy tools, but you do need some patience, and basic sewing skills, they help a lot. Whether you’re sewing for dogs or sewing for cats, the joy stays the same.
These sewing projects for pets is fun for beginners, and for advanced crafters too. Anyone who tries these pet sewing ideas will finds out how rewarding it feels to create for your furry friends.
DIY Pet Bandana

Making a DIY pet bandana is a fun and easy way to add some personality to your furry friend’s wardrobe. In the image, you can see a bright, cheerful bandana featuring a cute dog design, surrounded by supplies like scissors and thread. This project is perfect for both beginners and experienced sewers.
To get started, gather your materials. You’ll need a piece of fabric (about 20×20 inches), scissors, thread that matches your fabric, and of course, a sewing machine. If you don’t have a sewing machine, you can hand sew it too—just be prepared for a bit more work!
First, I like to start by cutting the fabric into a triangle shape. Fold the fabric in half diagonally and cut along the fold. This gives you a nice bandana shape. I go for fun patterns that match my pet’s personality. Once cut, it’s time to hem the edges to prevent fraying. Fold the edges over about a quarter inch and sew them down.
Next, I like to add a little flair. You can add embellishments like fabric paint or even some fun patches if you’re feeling creative. After that, it’s time to try it on your pet! I love seeing how my dog reacts to his new look. It’s a great bonding experience and makes for some cute photos.
And there you have it! A simple and stylish bandana that will make your pet the talk of the town. It’s an enjoyable project that I always look forward to, and I think you will too.
Cozy Cat Bed

Creating a cozy cat bed is one of the most satisfying sewing projects I’ve tackled for my furry friends. The image showcases a delightful cat curled up in a plush, round bed, perfectly designed for comfort. I love how a simple sewing project can bring so much joy to my pet.
This cat bed is not just about looks; it’s all about providing a warm, inviting space for your cat to snuggle up and relax. I’ve noticed that when my cat has her own special spot, she feels more secure and content in the home. Plus, making this bed was a fun and straightforward project that anyone can try.
This bed is made from soft fabric with a cushioned interior, creating a perfect place for your cat to take her daily naps. The round shape cradles her, making her feel safe and snug. Every time I see her snuggled up, it reminds me of how much pets appreciate our efforts to make their lives comfortable.
If you’re thinking about making one, here’s a simple step-by-step tutorial I followed:
- Gather Your Materials:You’ll need soft fabric (like fleece or cotton), stuffing or batting, thread, and a sewing machine.
- Cut the Fabric:Cut two large circles for the outer part of the bed and a smaller circle for the bottom. Cut a long strip of fabric for the sides, making it wide enough to provide cushioning.
- Sew the Sides:Attach the long strip to one of the large circles, gathering it slightly to create a plush look. Make sure the seam is sturdy, as this will be the bed’s main structure.
- Add Stuffing:Once the sides are attached, add your stuffing to the bed. You can adjust the amount to your liking—more stuffing means a firmer bed.
- Close It Up:Attach the second large circle to the top, enclosing the stuffing. Sew all around the edges and make sure everything is secure.
- Final Touches:Flip the bed inside out and give it a good fluff. You can add decorative elements, like a fun fabric pattern or a little pillow, to make it even more inviting.
After following these steps, you’ll have a cozy cat bed that your pet will love. I can’t help but smile every time I see my cat curled up, looking completely at ease in her new space!
Dog Bow Tie Collar

Let’s talk about something that adds a touch of charm to our furry friends: the dog bow tie collar! This little accessory can transform an ordinary dog into quite the dapper gentleman or chic lady. Just look at that pup in the picture—how can you resist those adorable ears and that stylish bow tie?
Making a bow tie collar is not just a fun project; it’s a chance to express your dog’s personality. Choose fabrics that match their character, whether it’s playful patterns or classic styles. Every detail will make a difference, and you can even repurpose materials you already have at home.
Pet Toy Bone
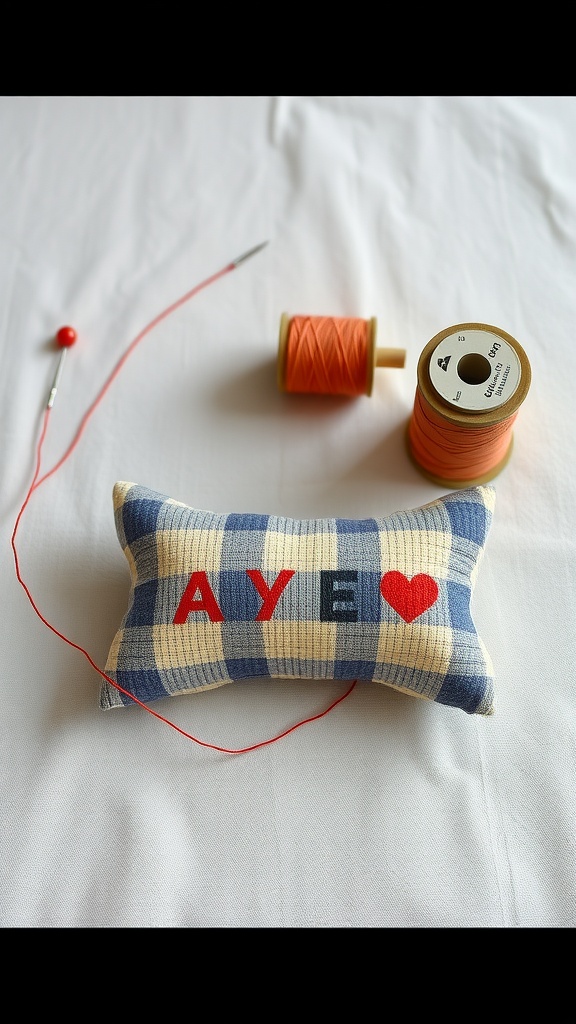
Making a pet toy bone is a fun and rewarding project. I love how this simple design can be customized to match your pet’s personality. The image shows a colorful, stitched bone shape with playful letters and a heart. It’s not just a toy; it’s a heartfelt creation for your furry friend.
Here’s how I made a similar bone toy:
Materials Needed:
- Fabric (your choice of pattern)
- Thread (matching or contrasting)
- Stuffing (polyester fiberfill works well)
- Scissors
- Needle
Instructions:
- Cut the Fabric:I started by cutting two identical bone shapes from the fabric. You can choose any fun pattern that suits your pet.
- Stitching:With the right sides facing each other, I stitched around the edges, leaving a small gap for turning and stuffing.
- Turn Inside Out:I turned the fabric right side out, revealing the fun design.
- Stuffing:I filled the bone with stuffing until it was nice and plump.
- Close the Gap:Finally, I stitched the opening closed, making sure it was secure.
Now my pet has a cozy toy that they can chew on and enjoy. It’s a perfect way to express love through creativity!
Reversible Dog Jacket

Creating a reversible dog jacket is a fun project that not only keeps your furry friend warm but also stylish. I recently made one, and it was a satisfying experience to see my dog strut around in something I crafted myself. The jacket has a vibrant red side with a cozy hood and a contrasting dark blue underside, making it versatile for different occasions.
To start, you’ll need some fabric in two colors, a sewing machine, scissors, and a bit of patience. This project allows you to express your creativity while ensuring your pet is comfortable during chilly days.
Here’s a simple tutorial to guide you through the making of this jacket:
- Measure your dog:Start by measuring your dog’s chest, neck, and the length of their back to get the right size.
- Cut your fabric:Cut out two pieces of fabric based on your measurements, one for each side of the jacket.
- Prepare the hood:Cut a piece of fabric for the hood and sew it together, adding a soft lining if desired.
- Sew the pieces:With right sides facing each other, sew the edges of the jacket, leaving an opening for turning it inside out.
- Turn and finish:Turn the jacket inside out, and sew the hem and elastic bands to create a snug fit.
- Add details:You can add buttons or patches for extra flair.
After finishing, I was excited to see how it looked on my dog. The jacket not only fit perfectly, but it also showcased the unique colors. This project is a great way to bond with your pet and show off your sewing skills!
Catnip Fish Toy

If you’re looking to make something special for your feline friend, a catnip fish toy is a fun and simple project. These little toys not only keep cats entertained but also provide them with the joy of interactive play. Plus, they’re colorful and adorable!
In the image, you can see a variety of brightly colored fish toys, all ready for some kitty fun. Each fish has its own unique pattern and color, making them visually appealing. It’s hard to resist grabbing one and tossing it to your cat to watch them pounce and play!
Now, let’s dive into how to make your own catnip fish toy. It’s a straightforward process, and you’ll likely have everything you need at home. Here’s how I make mine:
Dog Leash Holder Pouch
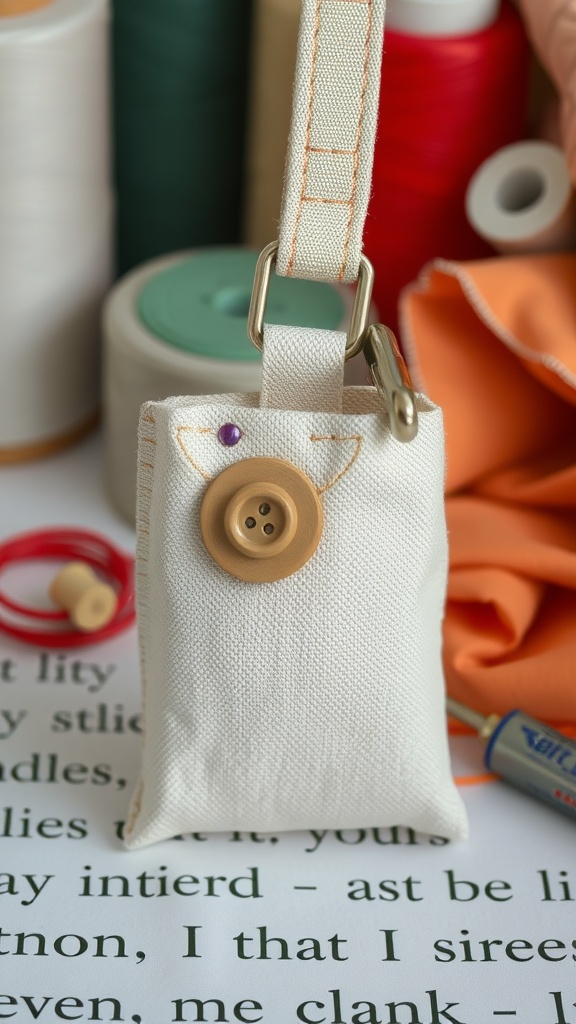
If you’re a pet owner like me, you know how important it is to keep everything organized, especially when heading out for a walk. This Dog Leash Holder Pouch is a cute and practical solution. It’s a small, stylish pouch that holds your dog’s leash and even some essentials like waste bags and treats. I love how it keeps everything in one place, making walks a breeze!
Creating this pouch is not only fun but also allows you to customize it to match your style. The pouch in the image is made from a sturdy fabric and features a lovely button detail that adds a touch of charm. I find that having a little extra personality in my dog accessories is just more enjoyable!
Here’s how you can make your own Dog Leash Holder Pouch:
- Materials Needed:A piece of sturdy fabric (like canvas), a button, a metal clip, thread, and a sewing machine.
- Step 1:Cut your fabric into a rectangle, about 8×10 inches. Fold it in half with the right sides together and sew the sides together, leaving the top open.
- Step 2:Turn the pouch right side out. This is where I get excited as it starts to take shape!
- Step 3:Add the button to the front of the pouch for decoration and functionality. This is where I like to get creative with colors!
- Step 4:Attach the metal clip to the top of the pouch using a sturdy stitch. This will hold your leash securely.
- Step 5:Fill your pouch with the leash, waste bags, and any other essentials you need for your dog walks.
And that’s it! I enjoy making these pouches, and they make my walks so much more organized. Plus, it’s always nice to show off a little handmade flair!
Pet Treat Bag

Let’s dive into making a pet treat bag that’s both practical and fun! This adorable bag, decorated with paw prints, is perfect for carrying your furry friend’s favorite snacks. I love using it during walks or trips to the park. It’s not just functional; it adds a cute touch to our outings!
To get started, gather your materials: a piece of fabric (like cotton), a drawstring, and a sewing machine. I choose a fabric with playful prints, as it makes the bag extra special.
Here’s how I make my pet treat bag:
- Cut the Fabric:Start by cutting a rectangle about 12 inches wide and 20 inches long. This size works well for holding plenty of treats!
- Fold and Sew:Fold the fabric in half, right sides together, and sew along the sides, leaving the top open. This creates a pouch.
- Create a Casing:Fold the top edge down about an inch and sew it, leaving a small opening to thread the drawstring through.
- Insert the Drawstring:Use a safety pin to help thread the drawstring through the casing. I find it handy to pull the ends to gather the fabric.
- Finish Off:Secure the ends of the drawstring and turn the bag right side out. You now have a lovely treat bag!
Whenever I pull this bag out, my pets know it’s treat time! It’s simple to make and brings a smile to my face while keeping everything organized.
Cat Hammock

Creating a cat hammock is a simple yet delightful project for pet lovers. I love watching my cat lounge in her cozy spot, swaying gently between two chairs. It’s a fantastic way to make use of space while giving my furry friend a unique place to relax.
When I first made this hammock, I was surprised at how easy it was. I used some durable fabric and a few basic tools. My cat quickly took to it, and now it’s her favorite napping spot. It adds a little charm to my living room, too!
Dog Seatbelt Harness

When it comes to road trips, keeping our furry friends safe is a top priority. That’s where the dog seatbelt harness comes in! This handy accessory not only secures your pup but also keeps them comfortable during the ride. In the photo, you can see the harness laid out, showcasing its practical design and various components, including straps and clips.
I’ve had my fair share of adventures with my dog, and I can tell you that a reliable harness makes all the difference. It’s easy to install and fits snugly, giving both me and my dog peace of mind whenever we hit the road. Plus, it’s quite stylish!
Pet Placemat

Creating a pet placemat is a fun and practical sewing project that every pet owner can appreciate. The image shows a simple yet stylish quilted placemat with a food bowl placed on it. This setup not only adds a touch of charm to your home but also keeps your floors clean during mealtime.
I remember the first time I made one of these placemats. My cat was always knocking her food around, making a mess everywhere. I decided it was time for a dedicated space for her meals, and a homemade placemat seemed like the perfect solution!
This project is easy to tackle, even if you’re new to sewing. You can customize the size and fabric to match your home decor. Let me walk you through the steps to create your own.
Cat Collar With Bell

Making a cat collar with a bell is a simple and fun project that adds a personal touch to your pet’s style. In the image, you can see a charming maroon collar, complete with a shiny bell that jingles softly as your cat moves. This not only looks cute but also helps keep track of your feline friend’s whereabouts.
When I first made a collar for my cat, I wanted something unique yet functional. The addition of a bell turned out to be a perfect choice. It’s both practical and adds a bit of flair to my cat’s outfit.
Here’s how you can create your own cat collar with a bell:
Materials You’ll Need:
- Fabric or webbing for the collar
- Adjustable buckle
- Bell
- Measuring tape
- Scissors
- Needle and thread (or a sewing machine)
Step-by-Step Tutorial:
- Measure Your Cat:Start by measuring around your cat’s neck. Add a couple of inches for comfort and adjustment.
- Cut the Fabric:Using your measurement, cut the fabric or webbing to the desired length. Keep it at least an inch wide for sturdiness.
- Attach the Buckle:Sew one end of the collar to the buckle. Make sure it’s secure, as this will hold the collar in place.
- Add the Bell:Sew the bell onto the collar, making sure it’s securely fastened but still able to jingle freely.
- Finish It Off:If using fabric, fold in the edges and sew them down for a clean finish. If you’re using webbing, just make sure all edges are neat.
- Try It On:Once everything is secure, gently put the collar on your cat and adjust it for a snug fit, ensuring it’s not too tight.
This project not only allows you to express your creativity but also ensures your cat is stylish and identifiable. I always feel a bit more at ease when my cat wears her collar, knowing that the bell helps keep her safe.
Soft Cone Collar

When our furry friends need a little extra care, a soft cone collar can make all the difference. Unlike the traditional hard plastic cones, these soft alternatives are comfy and less intimidating for pets. They allow them to move around freely while still preventing them from biting or licking their wounds. I’ve seen my dog appreciate this more than once!
Making a soft cone collar is a fun sewing project that you can easily customize to fit your pet’s personality. It’s not just practical; it can also be a stylish accessory. Plus, it’s a great way to show your love and care through something you made yourself.
Pet Carrier Liner
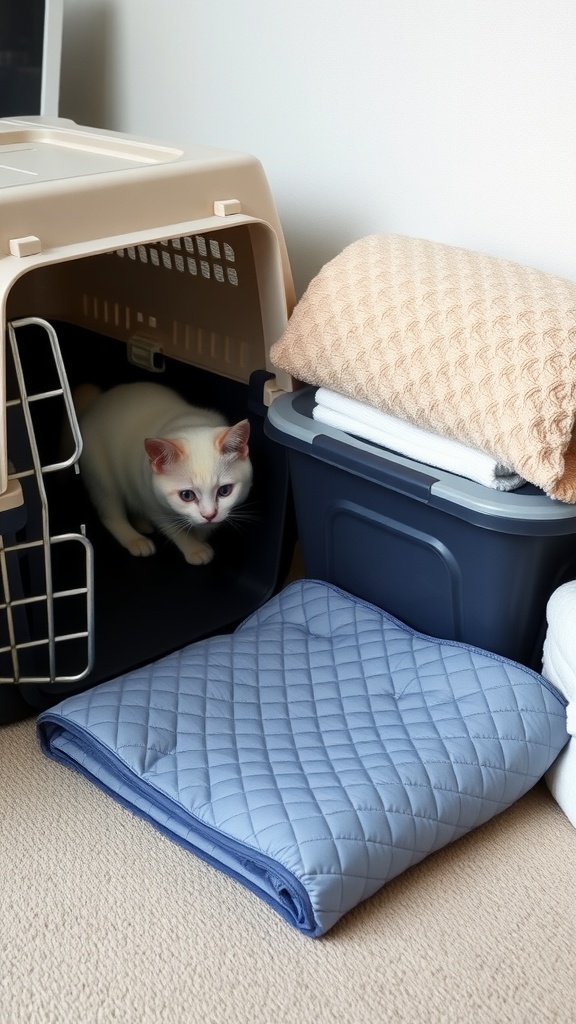
Creating a comfortable space for our furry friends is essential, especially when they’re traveling. In this section, I want to share how to make a cozy pet carrier liner. This simple sewing project adds a personal touch to your pet’s travel experience and keeps them comfortable during those trips.
In the image, you can see a neatly folded quilted liner, perfect for a pet carrier. The soft, inviting texture is ideal for pets who may feel a bit anxious when on the go. Plus, it’s easy to clean!
When I made my first liner, it transformed my cat’s travel experience. She is much more relaxed and content during car rides now! Let’s dive into how you can create your own.
Dog Paw Wipes Case

Creating a dog paw wipes case is not only practical but also fun! This little pouch is perfect for keeping your dog’s wipes handy while you’re on walks or out at the park. I’ve made several for my pets, and they make cleanup so much easier.
The fabric I used features adorable dog patterns, which makes it a cute accessory as well. Plus, it’s a nice conversation starter with fellow dog lovers! Whenever I pull it out, I get comments about how cute it is, and it’s also a great way to organize my pet supplies.
Here’s how you can make your own dog paw wipes case. It’s super simple, and you can customize it with your favorite fabric!
Reusable Puppy Pads

When I first thought about making reusable puppy pads, I wanted something practical but also cute. The image shows two charming pads designed with a lovely blue floral print. They look comfy and inviting, perfect for my little pup.
Making these pads is not only eco-friendly but also a great way to save money in the long run. Plus, I love knowing that I can customize them to match my home decor!
Cat Window Perch Cover
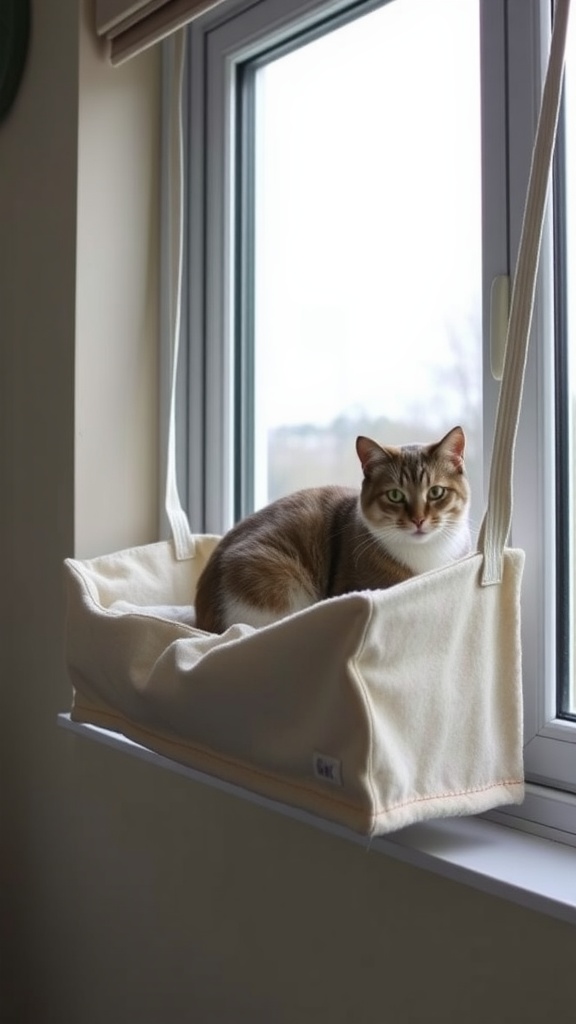
Creating a comfortable perch for your feline friend can be a fun and rewarding project. The image shows a cozy window perch where a cat is lounging, soaking in the sunlight. This perch not only provides a perfect spot for your cat to relax but also gives them a great view of the outside world.
To make a cat window perch cover, I found it helpful to start with some simple materials like fabric, straps, and basic sewing supplies. The fabric should be durable yet soft to ensure comfort for your cat. I chose a light color to brighten up the space, just like the one in the image.
Pet Sweater

Making a pet sweater can be a delightful experience, especially when you see your furry friend rocking a cozy outfit. The image shows a stylish sweater with a unique design, featuring a combination of grey and soft yellow colors. I love how the contrasting sleeves add a fun touch to the overall look.
When I decided to make a pet sweater for my dog, I wanted something comfortable yet fashionable. I found that using stretchy fabric allowed for easy movement, which is essential for any pet. Plus, having some playful colors makes it even more enjoyable!
Now, let’s dive into how you can create your own pet sweater at home. It’s quite simple and can be done with just a few materials.
Pet Scarf

Making a pet scarf is one of the simplest yet most enjoyable sewing projects I’ve tackled. Picture your furry friend strutting around in a cute scarf that not only keeps them warm but also adds a splash of style to their look.
In the image, you can see a charming dog toy draped in a soft blue scarf. It’s a sweet reminder of how a simple piece of fabric can transform an ordinary outing into something special. I love how easy it is to make these scarves, and they can be customized to match any pet’s personality!
Here’s how I made a pet scarf that’s perfect for any occasion:
Travel Water Bowl
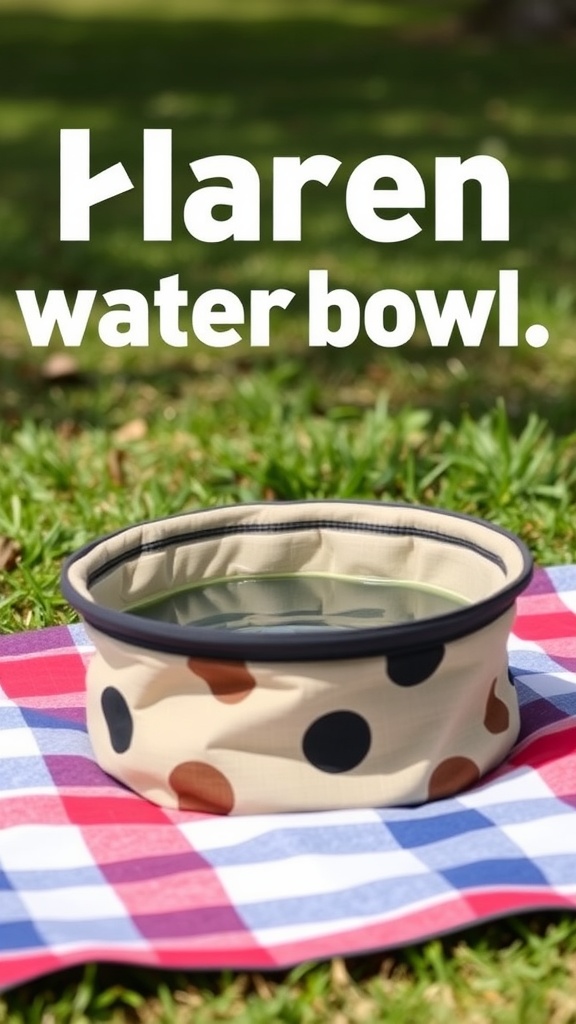
Every pet owner knows the importance of keeping our furry friends hydrated, especially when we’re on the go. I love taking road trips with my dog, and I always bring along a travel water bowl. It’s practical and super easy to pack. This particular bowl is collapsible, which saves space in my bag while being stylish with its polka dot design.
When we stop at parks or rest areas, I simply unfold it, fill it with water, and watch my pup happily drink. There’s something so satisfying about knowing my dog is comfortable, even when we’re away from home.
Making your own travel water bowl is not only fun but also allows you to customize it to your pet’s personality. Let me walk you through how to create one.
Pet Toy Basket

Creating a pet toy basket is a fun and practical sewing project for anyone who loves their furry friends. It’s a great way to keep your pet’s toys organized while adding a personal touch to your home. I remember when I decided to make one for my dog. His toys were scattered all over the place, and I wanted something cute and functional.
This basket features adorable paw prints that make it both stylish and pet-friendly. I chose a soft fabric that would appeal to my dog’s playful nature. Plus, having a dedicated spot for his toys has made it easier to tidy up.
So, let’s get started on how to make your very own pet toy basket!