Perler bead decor projects turn pixel art into joyful accents, and Perler bead decorations brighten shelves, walls, and tabletops with playful color. My first Perler bead decor attempt started as a tiny coaster during a stormy afternoon and grew into a small gallery that still makes me smile.
Table of Contents
These little beads carry big charm.
From translucent shine to matte retro tones, Perler bead decor projects invite color stories and quirky motifs into daily spaces. Perler bead decorations also make thoughtful gifts for game lovers, plant parents, and bookworms, sliding easily into modern, boho, or eclectic rooms without fuss.
Simple grids meet bold patterns and bring personality to corners that need a lift.
Bold Pixel Art Wall Mosaic Panel
![]()
A wall mosaic built from fused beads brings a gallery vibe with playful pixel detail. Bright primaries, muted earth tones, or monochrome gradients create a mood that suits a studio, hallway, or game nook.
Large panels read like retro posters while still feeling modern. A matte finish diffuses light, and translucent beads add occasional sparkle for depth.
The mosaic looks striking above a console or as a headboard alternative. Gift givers often choose favorite icons, initials, or city skylines.
Framing with slim wooden battens or floating on foam board adds polish without overwhelming the pixel texture.
Steps
- Sketch a pixel design and map panels to fit the space.
- Lay beads on multiple square boards to form larger sections.
- Fuse each section through ironing paper and allow to cool flat.
- Join sections on a backing board with strong adhesive tape.
- Mount securely on the wall with appropriate hanging hardware.
Retro Pixel Coasters With Cork Backs
![]()
These coasters bring arcade charm to coffee breaks while protecting tabletops with a gentle, grippy base. Checker patterns, citrus slices, or abstract mosaics give the set a mood, from playful to refined.
A mix of matte beads and pearlescent accents creates dimension as mugs rest on the tiny grid. Neutral palettes blend into Scandinavian spaces while saturated shades pop against dark wood.
A tidy stack tied with twine turns into a sweet housewarming or host gift. The low profile fits beverage trays, and a cork underside keeps things quiet during late-night movie sessions.
Steps
- Arrange circular or square coaster designs on bead boards.
- Fuse evenly through ironing paper and cool under weight for flatness.
- Cut cork to match and adhere to the back of each coaster.
- Wipe edges clean and bundle as a coordinated set.
Mini Pixel Fridge Magnet Gallery Set
![]()
Tiny motifs turn the fridge into a rotating gallery for notes and photos. Fruit slices, planets, tiny pets, and geometric shapes create a cheerful mix that sparks conversation.
Matte beads anchor color blocks while translucent accents echo glassy tiles. The magnets pair nicely with stainless appliances and file cabinets, adding a touch of personality without clutter.
A coordinated color story ties the collection together, whether pastel sorbet or bold neon. Packaged in a small tin, the set becomes a fun desk exchange or dorm-warming treat.
Arranged in rows, the pieces frame a grocery list with playful order.
Steps
- Fuse multiple small bead designs with clean edges.
- Affix flat magnet dots or strips to the backs.
- Let adhesive cure and arrange on a fridge or metal board.
Graphic Perler Bead Photo Frame Overlay
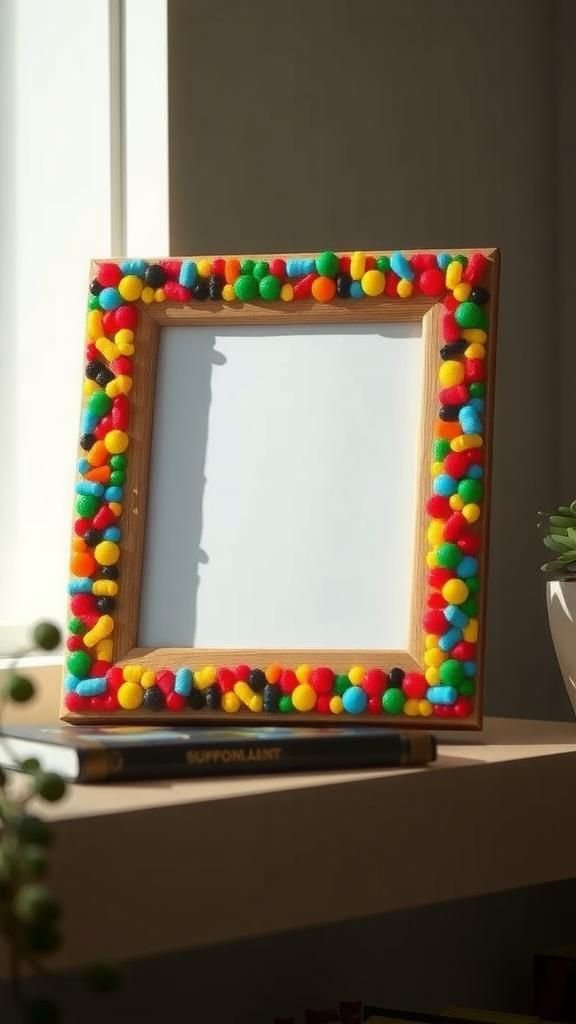
A beaded overlay adds a playful border to a simple frame, turning snapshots into little works of pixel art. Checker corners, confetti sprinkles, or a thin monochrome band balance fun with restraint.
The piece pairs well with matte black frames or natural wood, letting the beads introduce color without overpowering the photo. Pastels flatter newborn portraits, while bold brights amplify vacation memories.
A ribbon-tied frame with a favorite print makes a heartfelt gift for birthdays, graduations, or travel recaps. Displayed on shelves, the overlay echoes the look of retro stickers around treasured pictures.
Steps
- Measure the frame’s outer and inner openings.
- Create a rectangular bead border to those dimensions.
- Fuse, cool flat, and secure the overlay onto the frame face.
- Slip in a photo and stage on a shelf or mantel.
Plant Pot Charms For Mini Green Corners
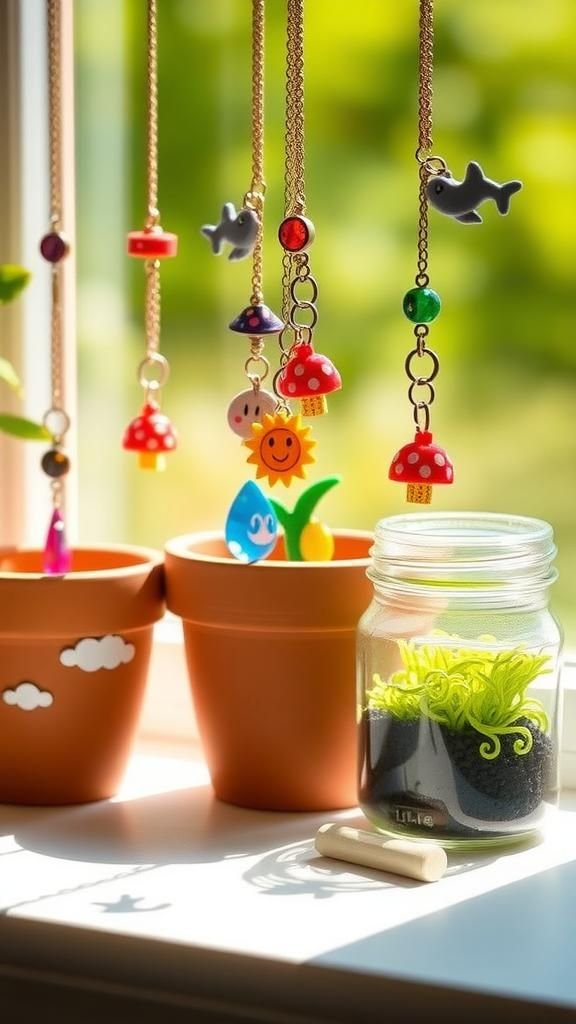
Small charms dangle from planter rims and trellises, adding whimsy to leafy corners. Little mushrooms, raindrops, suns, and name tags create a cheerful mix around succulents or herbs.
Translucent beads catch window light, and earthy tones blend with terracotta. A set of charms tied with twine suits a plant swap or thank‑you gift.
The charms can coordinate with pot colors or echo leaf tones for harmony. Tucked into a windowsill garden, they hint at a tiny world, bringing a smile during watering rounds and lending a playful accent to propagation jars and mini pots.
Steps
- Design small charms with a loop opening near the top.
- Fuse and cool flat to keep clean edges.
- Thread cord or wire through loops and knot around planter rims.
- Arrange charms at different heights for a lively cluster.
Personalized Nameplate Door Sign In Pixels
![]()
A nameplate made from fused beads brings personality to a bedroom door, studio entry, or classroom cubby. Lettering can lean blocky for a retro vibe or rounded for a softer feel, with shadow outlines that pop against the base color.
Accent icons, like stars or game hearts, frame the text. Neutral palettes fit shared spaces, while rainbow stripes feel cheerful in creative zones.
Presented with matching keychain, it becomes a thoughtful dorm or office welcome. Mounted on a wooden board or hung with ribbon, the piece adds friendly character without taking center stage.
Steps
- Lay out the base plate and letter tiles on bead boards.
- Fuse pieces, cool flat, and align letters on the base.
- Adhere letters and accents, then mount to a board or hang with ribbon.
Soft-Edged Trinket Tray With Pixel Gradient
![]()
A shallow tray formed from a fused bead sheet corrals rings, keys, or office bits with a touch of pixel charm. Gradients fade from dark to light, or confetti hues scatter across a neutral field.
The gentle walls feel smooth to the touch, and the grid texture catches light in subtle ways. Perfect on an entry table or vanity, the tray holds small valuables without visual noise.
Wrapped with a tiny velvet pouch, it becomes a sweet thank‑you or bridesmaid moment. The piece pairs nicely with brass bowls, marble slabs, or clear acrylic stands.
Steps
- Fuse a thick rectangular or square sheet with balanced coverage.
- Warm slightly and drape over a heat‑safe form to create shallow walls.
- Hold in place until cooled and fully set.
- Wipe clean and place on a dresser or entry console.
Slim Pixel Bookmark Tabs For Page Corners
![]()
These slim bookmark tabs slip over page corners to mark progress without bulk. Tiny arrows, hearts, and geometric chevrons bring a bit of flair to textbooks, cookbooks, and novels.
Pastel palettes suit calm reading nooks, while neon sets brighten study sessions. A matte finish keeps reflections low under lamp light.
A bundle tied with a ribbon lands well as a teacher appreciation gift or book club surprise. On a shelf, the colorful tabs peek from spines like confetti, adding a hint of delight to quiet evenings and Sunday morning coffee reads.
Steps
- Create thin right‑angle tab shapes with a small internal notch.
- Fuse lightly to retain flexibility and allow cooling under weight.
- Slide onto page corners and color‑code chapters or sections.
Cheerful Seasonal Garland For Mantels And Shelves
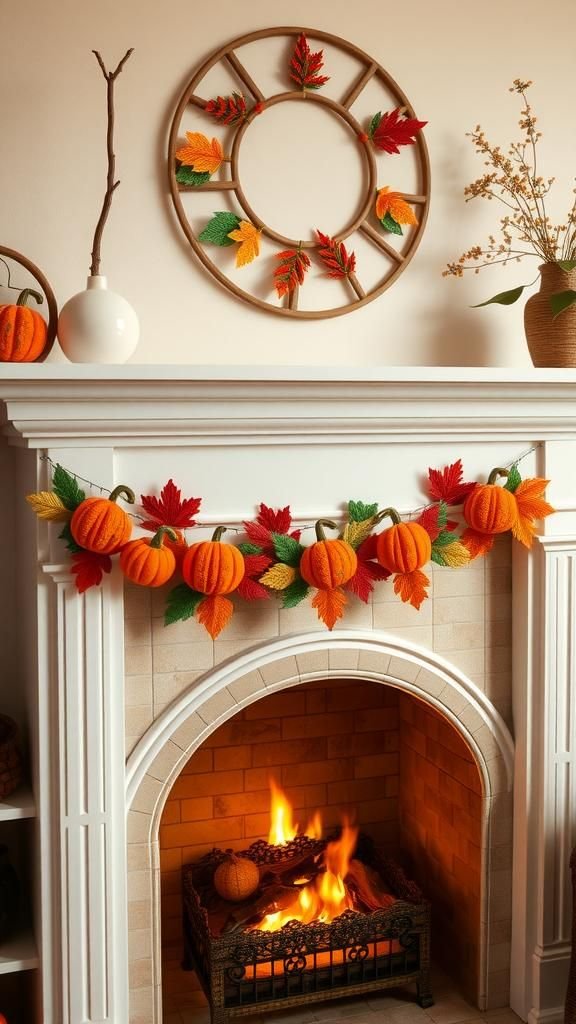
A string of bead motifs turns a mantel into a rotating celebration. Leaves, snowflakes, blossoms, or seashells mark the calendar with color and charm.
Pastel spring tones feel airy, autumn hues bring warmth, and winter whites shimmer with pearly beads. Hung across a bookcase, the garland frames plants and photo frames with a gentle arc.
A boxed set labeled by season makes a thoughtful gift for new homeowners. The pieces store flat between celebrations, ready to return as a familiar ritual that signals cozy gatherings and shared meals.
Steps
- Fuse themed shapes with small hanging holes near the edges.
- Thread twine through the holes, spacing motifs evenly.
- Tie loops at each end and drape across a mantel or shelf.
- Swap motifs as seasons change.
Entryway Key Holder Plaque With Hooks
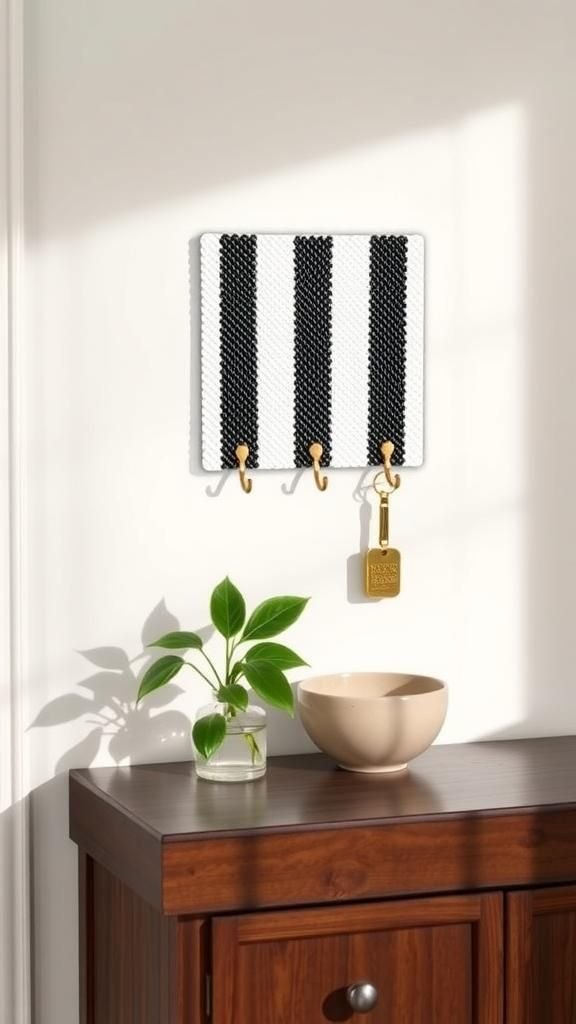
A beaded plaque paired with small hooks keeps keys within reach while adding playful style to an entry. Bold stripes, monochrome grids, or little house silhouettes anchor the look.
The palette can echo the front door color or tie in with a hallway runner. Placed above a console tray, the plaque tidies daily drop‑offs without a heavy presence.
Packaged with a small plant or a letter tray, it becomes a welcome gift for a new place. A satin ribbon or hidden mounting strips offer clean display options that keep the focus on the pixels.
Steps
- Fuse a sturdy rectangular plaque with a reinforced border.
- Pre‑drill tiny pilot points and twist in cup hooks along the bottom edge.
- Mount the plaque on the wall and hang keys from the hooks.
Light Switch Surround Frame With Pixels
![]()
A slim beaded surround turns a plain switch into a playful accent without blocking hardware. Crisp corners and a tapered inner window create a neat silhouette that hugs the existing cover.
Color stories range from calm stone tones to candy brights, and a subtle pearly bead adds a hint of shimmer. In a kid’s room, stars and moons charm bedtime routines; in a studio, checker corners feel graphic.
Packaged with a matching outlet surround, it makes a coordinated mini makeover. The design frames the switch like a picture while keeping the wall clean and tidy.
Steps
- Measure the switch cover and design a matching outer rectangle with inner window.
- Fuse carefully for a flat, true frame and let cool under weight.
- Mount around the cover with low‑profile adhesive strips, keeping clearance for toggles.
Color Pop Table Confetti For Parties
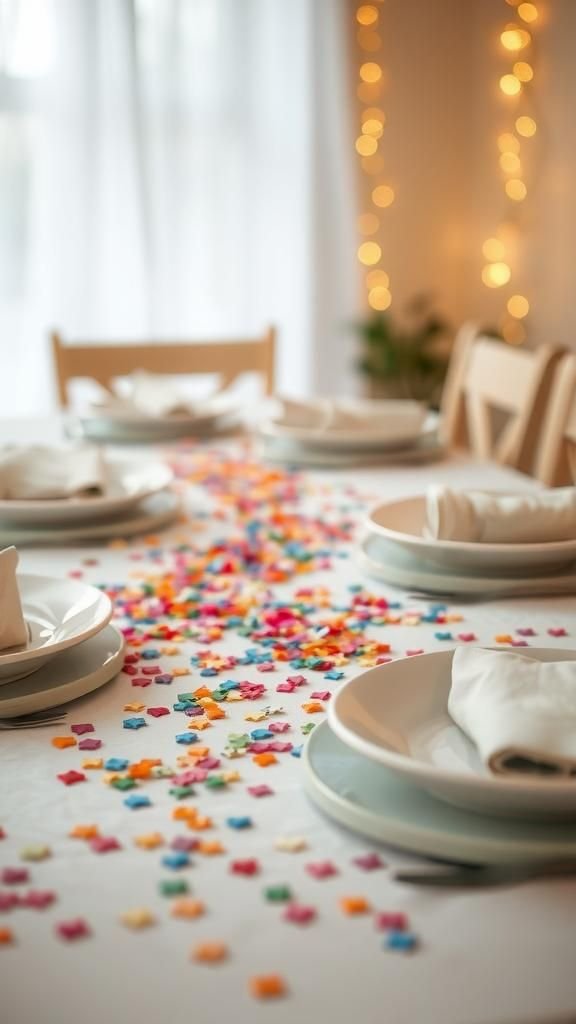
Sprinkled across a tablescape, tiny bead shapes turn a gathering into a joyful scene. Stars, hearts, leaves, or abstract dots scatter light and color among plates and glassware.
A limited palette keeps the look elegant, while rainbow sets spark a festive mood. Pearly and neon beads add shimmer and glow under candles or string lights.
Packaged in a little jar with a label, the confetti becomes a charming hostess gift. After dessert, the shapes store flat for the next celebration, ready to revive a brunch, tea party, or casual game night.
Steps
- Fuse many miniature shapes with clean edges.
- Let them cool flat for a smooth sprinkle effect.
- Scatter across a runner or tray, coordinating with napkins and florals.
Pixel Lattice Earring Display Board
![]()
A beaded lattice turns jewelry storage into decor, keeping pairs visible and tangle‑free. The grid offers tiny gaps for hooks, while a border pattern adds personality in colors that echo dresser accents.
Soft neutrals blend into minimalist bedrooms, and jewel tones feel luxe in vanity corners. Set into a simple wooden frame or perched on a stand, the piece becomes a little boutique moment at home.
Wrapped with a couple of earrings, it makes a thoughtful gift for accessory lovers who appreciate tidy solutions with playful flair.
Steps
- Design a rectangular lattice with repeating negative spaces.
- Fuse the panel flat and reinforce edges with an extra ring of beads.
- Mount in a frame or stand and hang earrings through the openings.
Custom Pixel Clock Face Overlay
![]()
A fused bead face gives a wall clock bold character without overwhelming the room. Graphic rings, sunburst rays, or color‑blocked wedges create motion even when time stands still.
Translucent beads allow a hint of the backing to show, while matte tones keep the look modern. A slim center opening hosts the hands, and dots or tiny icons mark hours with playful clarity.
Gifted with a fresh mechanism, the piece suits studios, kitchens, and dorms. The grid texture reads like textile weave when viewed from across the room, adding depth to a simple silhouette.
Steps
- Create a circular bead panel with a centered hole for the shaft.
- Fuse evenly and cool under weight for a flat face.
- Assemble hands and movement through the opening and hang on the wall.
Translucent Window Sun Catcher Charm
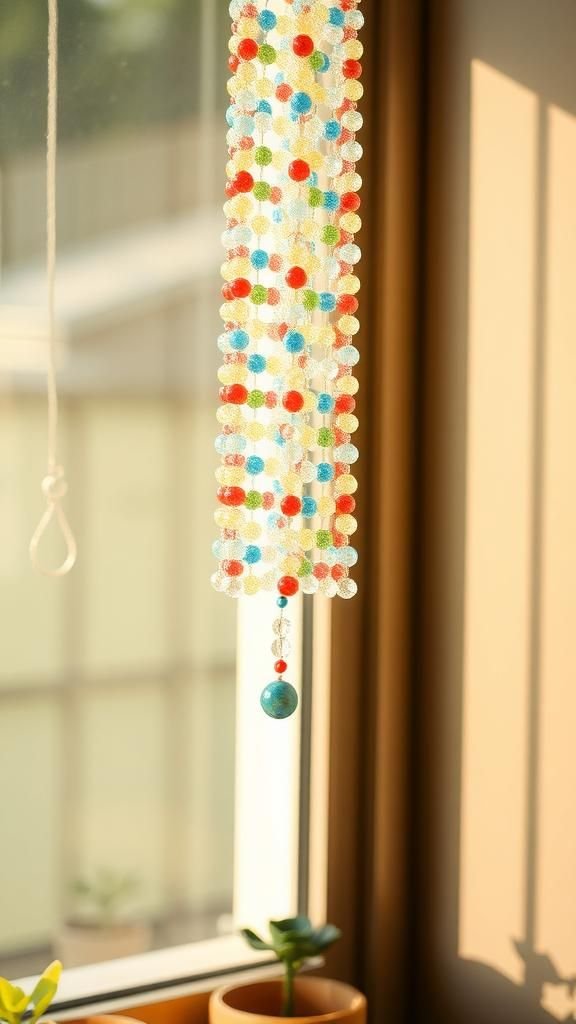
Transparent beads melt into a glassy panel that glows when sunlight hits, casting tiny colored reflections across the sill. Stained‑glass florals, geometric prisms, or ocean waves suit bright kitchens and breezy bedrooms.
A thin border adds structure while keeping the piece lightweight. Hung by a clear cord, the charm hovers like a small jewel against the window.
Wrapped with a card explaining the color story, it becomes a bright pick‑me‑up for a friend. The panel also looks lovely in front of a bookshelf where daylight filters through for a subtle halo.
Steps
- Arrange a design using predominantly transparent beads.
- Fuse lightly to keep gaps minimal and retain clarity.
- Punch a small hole, tie clear cord, and hang near a sunny pane.
Festive Holiday Ornaments And Gift Toppers

Beaded ornaments bring charm to trees and packages alike. Snowflakes with pearly shimmer, candy‑striped hearts, or tiny houses showcase favorite palettes across the season.
Matte tones feel calm, while metallic flecks sparkle under string lights. A collection strung on thin ribbon becomes an heirloom set to pull from storage when the season rolls around.
Tied onto wrapped gifts, the motifs double as keepsakes for guests. Displayed in a bowl on a console, they create a cheerful vignette even before the tree goes up.
Steps
- Fuse ornament shapes with a small hanging hole near the top.
- Thread ribbon or twine and knot securely.
- Hang on branches or tie onto gift bows.
Desk Pennant Name Banner On Mini Stands

Tiny pennants spell out a name across a desktop, bringing color to a workspace without clutter. Stripes, polka dots, or gradient letters keep the mood upbeat through long sessions.
Neutral bases in wood or acrylic pair nicely with bold beads, and tiny tassels add movement. The banner sits happily below a monitor or along a bookshelf, and it packs easily for a move.
Presented with a matching coaster, it suits new jobs, study nooks, or classroom desks. The pixel edges feel nostalgic while the silhouette stays clean and modern.
Steps
- Fuse small triangular pennants with letter forms centered on each.
- Punch or form tiny top holes and thread onto cord.
- Tie cord to two mini dowels and anchor in small stands for display.
Pixel Flower Bouquet In A Glass Vase
![]()
Flat beaded blooms rise on slender stems to form a lasting bouquet that brightens desks and bedside tables. Daisies, tulips, or wildflower mixes come alive with layered petals and sunny centers.
A handful of green shades creates leaf depth, while pearly whites add gentle highlights. Arranged in a clear vase with glass pebbles, the bouquet delivers cheerful color without watering needs.
Wrapped in kraft paper, it makes a sweet hospital visit or teacher thank‑you. The graphic petals read like modern illustration from across the room.
Steps
- Fuse flower heads and leaves in chosen palettes.
- Adhere pieces to floral wire stems and allow to set.
- Arrange in a vase with pebbles or marbles to anchor.
- Fluff leaves and adjust heights for balanced silhouette.
Do Not Disturb Door Hanger Tag

A hotel‑style hanger turns dorms and home offices into zones with clear boundaries while adding personality. Bold block text sits over stripes, checker squares, or starry skies, and a cutout fits over the knob.
Bright neon palettes deliver high visibility; muted tones feel calm in bedrooms. The piece also works as a welcome sign when flipped with a friendly message.
Bundled with a matching keychain, it becomes a playful gift for roommates or new parents. The sturdy fused body keeps edges smooth and durable through daily comings and goings.
Steps
- Create a long rectangular tag with a rounded knob opening.
- Fuse evenly and smooth while cooling under weight.
- Add beaded text tiles or vinyl lettering and hang on the door.
Geometric Mirror Frame With Pixel Tessellation
![]()
A ring of beaded diamonds or hexagons turns a simple mirror into a striking focal point. Monochrome frames feel sleek in entryways, while jewel tones bring life to vanity corners.
A slim profile preserves the mirror’s airy quality, and tiny gaps between tiles let the wall color peek through. Paired with brass trays and a small plant, the frame creates a curated vignette.
Boxed with tissue and a note, it makes a beautiful apartment‑warming gesture. The pixel tessellation plays with reflections, adding subtle rhythm around faces and daylight.
Steps
- Fuse repeating geometric tiles and a matching ring to fit the mirror.
- Adhere tiles around the mirror edge with strong, mirror‑safe adhesive.
- Weight gently while bonding and allow full cure before hanging.
LED Glow Panel For Soft Night Light
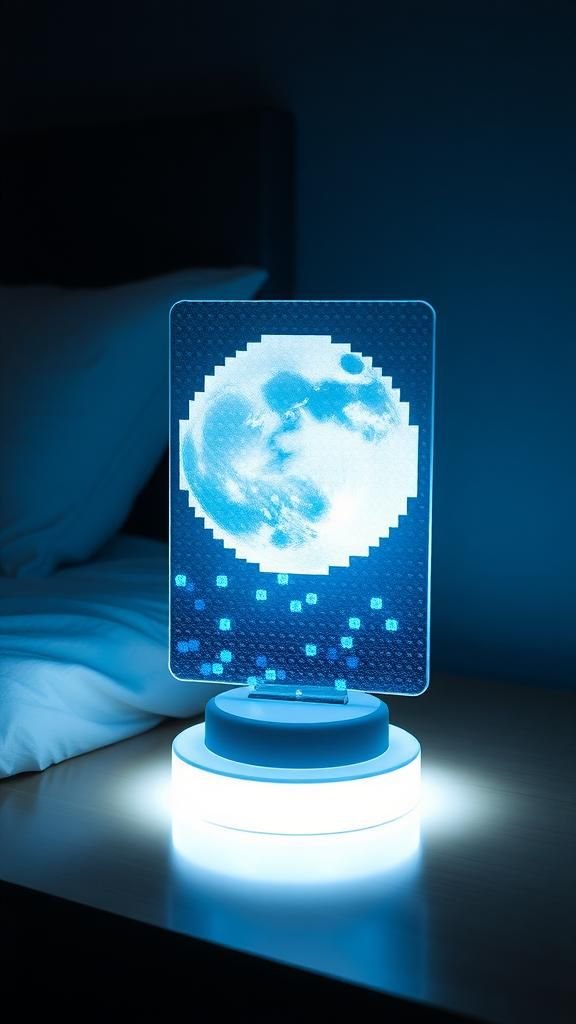
A translucent bead panel set before an LED base casts a gentle glow, perfect for bedtime stories or hallway ambiance. Gradients in ocean blues, dawn pinks, or galaxy purples create mood, while a simple icon like a moon or mountain adds focus.
The panel stands in a slot or on a small easel near the light source, keeping heat away from the plastic. Gifted with the base, it becomes a thoughtful nursery or studio accent.
The glow passes through the grid, forming tiny halos that feel calm and cozy.
Steps
- Arrange a translucent‑heavy design sized to the LED base.
- Fuse lightly to preserve clarity and let cool flat.
- Insert into the base slot or stand on a small easel before the light.